Project of the Week: Flat Frame Light
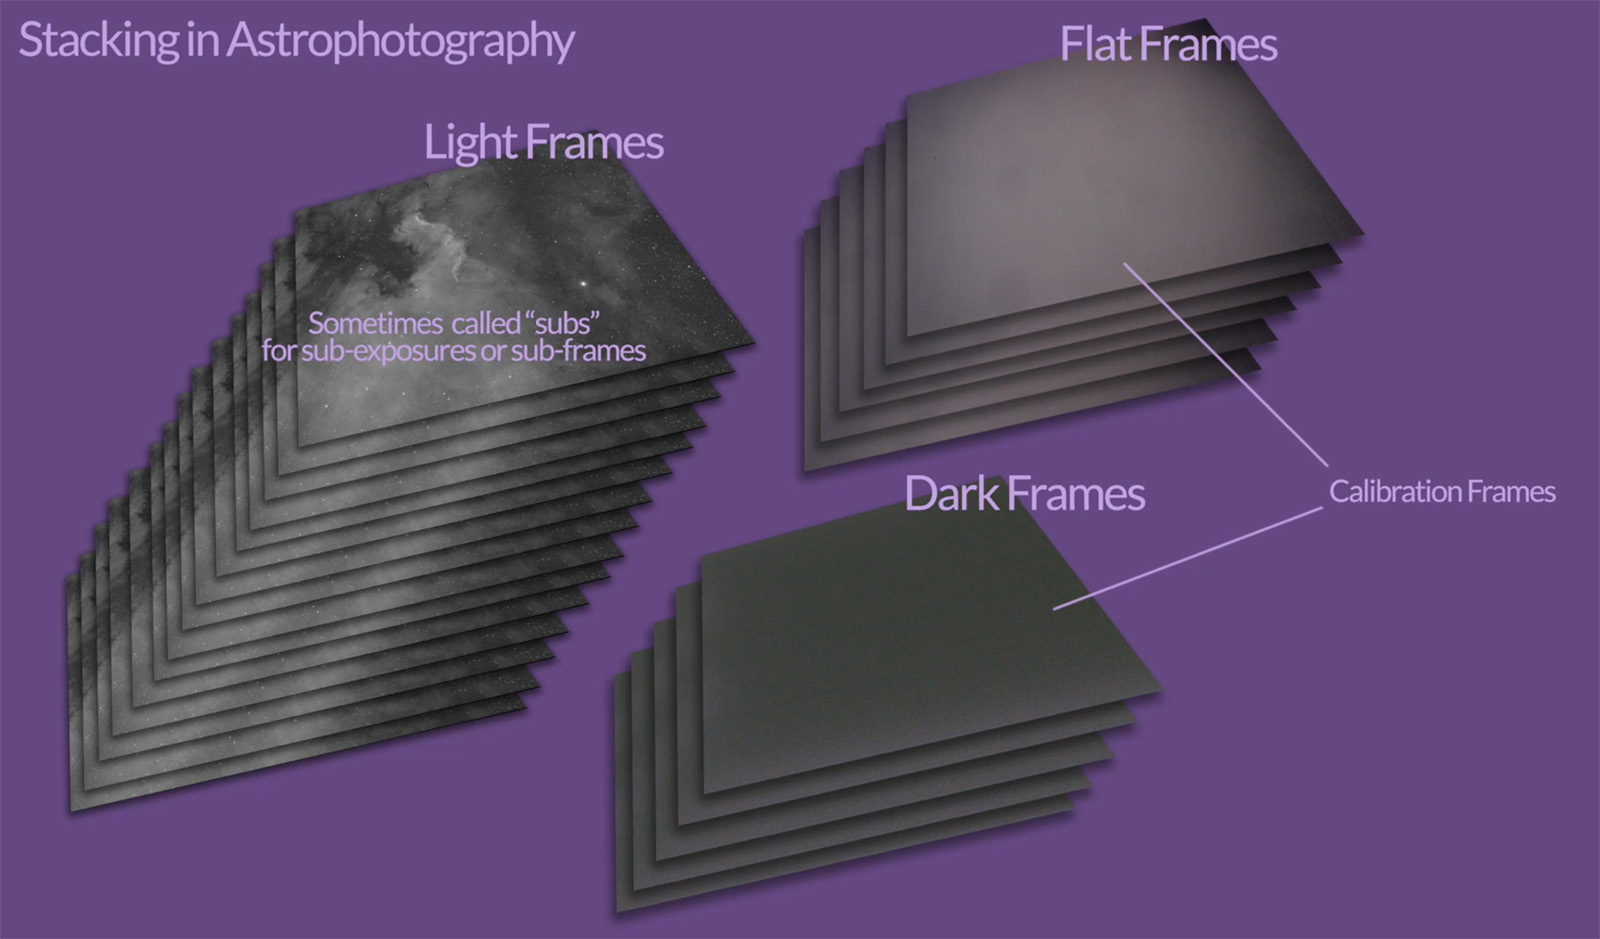 Astrophotography relies on many stacked images of the same target in the night sky, anywhere from 20 to over a hundred or more, all merged together with sophisticated algorithms to form one image. The purpose of stacking is to shift the SNR—Signal to Noise Ratio—to our advantage, so that there is more signal (nebula, galaxy) and less noise (light pollution, read noise, etc.)
Part of that stacking process involves calibration frames, which provide additional data in the stacking process for reducing noise, including read noise, thermal noise, removing dust on the sensor, vignetting, uneven field illumination, and other stuff we don't want in the final image.
One type of calibration frame is a Flat Frame, which involves shooting ~20 - 40 exposures of an even, luminous source, with the same camera used to shoot your deep sky objects set to the same temperature and somewhere near your normal focus position (there's some leeway with focus). Exposure times are based on filters and camera settings. One way to do this is to point at a blank wall or by covering the front of the scope with paper or a white t-shirt, and taking a batch of exposures—both during daylight hours. We usually take new Flat Frames every month or so, or whenever anything in the imaging train changes significantly.
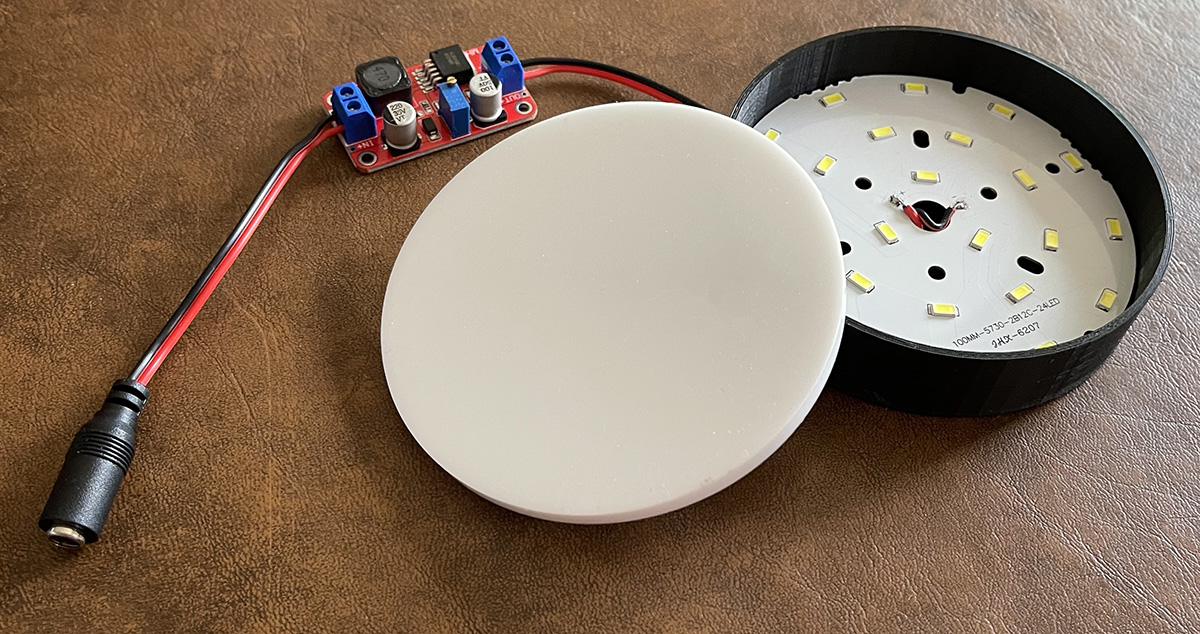
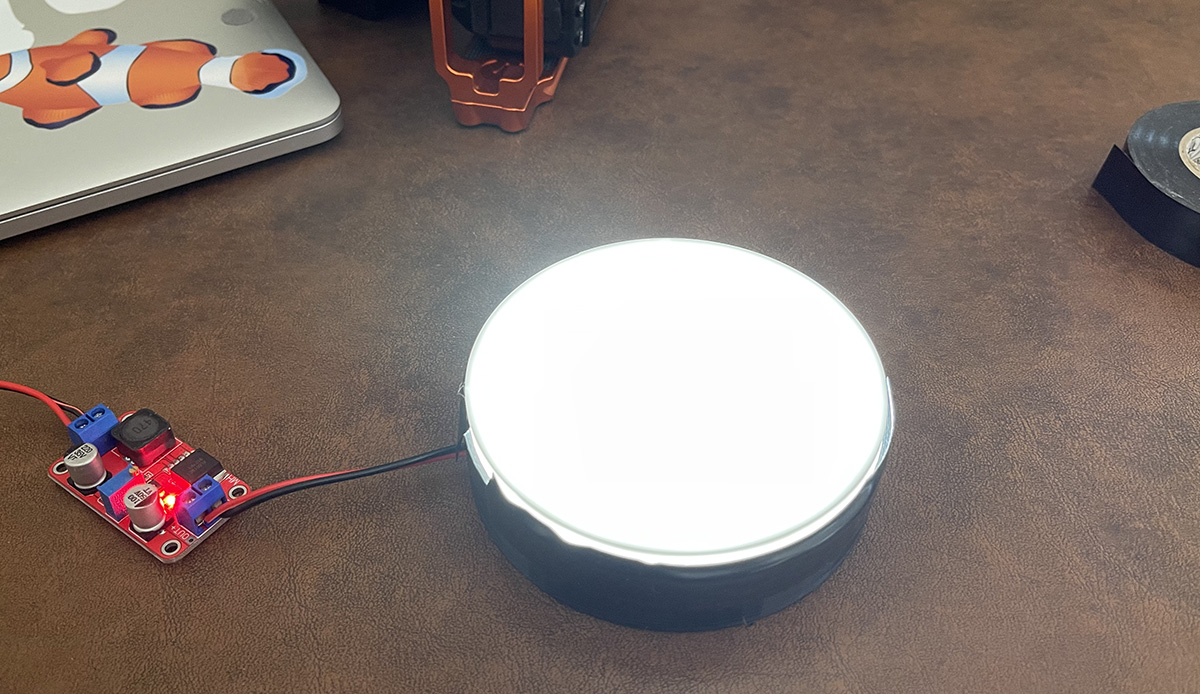
I made an LED Flat Frame Light for my SpaceCat 51 using some inexpensive hardware and a printed enclosure—links to everything below. There's not much to it, other than making sure you have the DC voltage connected the right way—positive to positive, ground to ground and all that. The step-up converter I'm using for this project has a potentiometer to change the output voltage. First thing I did was plug the input side into a 3amp 12v adapter, and then with the meter attached, used a screwdriver to adjust the output toward 40vdc—I think you'll get something out of the LEDs at anything over 30 volts, but keep going, make it bright! The specs on the LED board say anywhere from 36-42v DC is in range, and this particular XL6019 converter can output up to 40v.
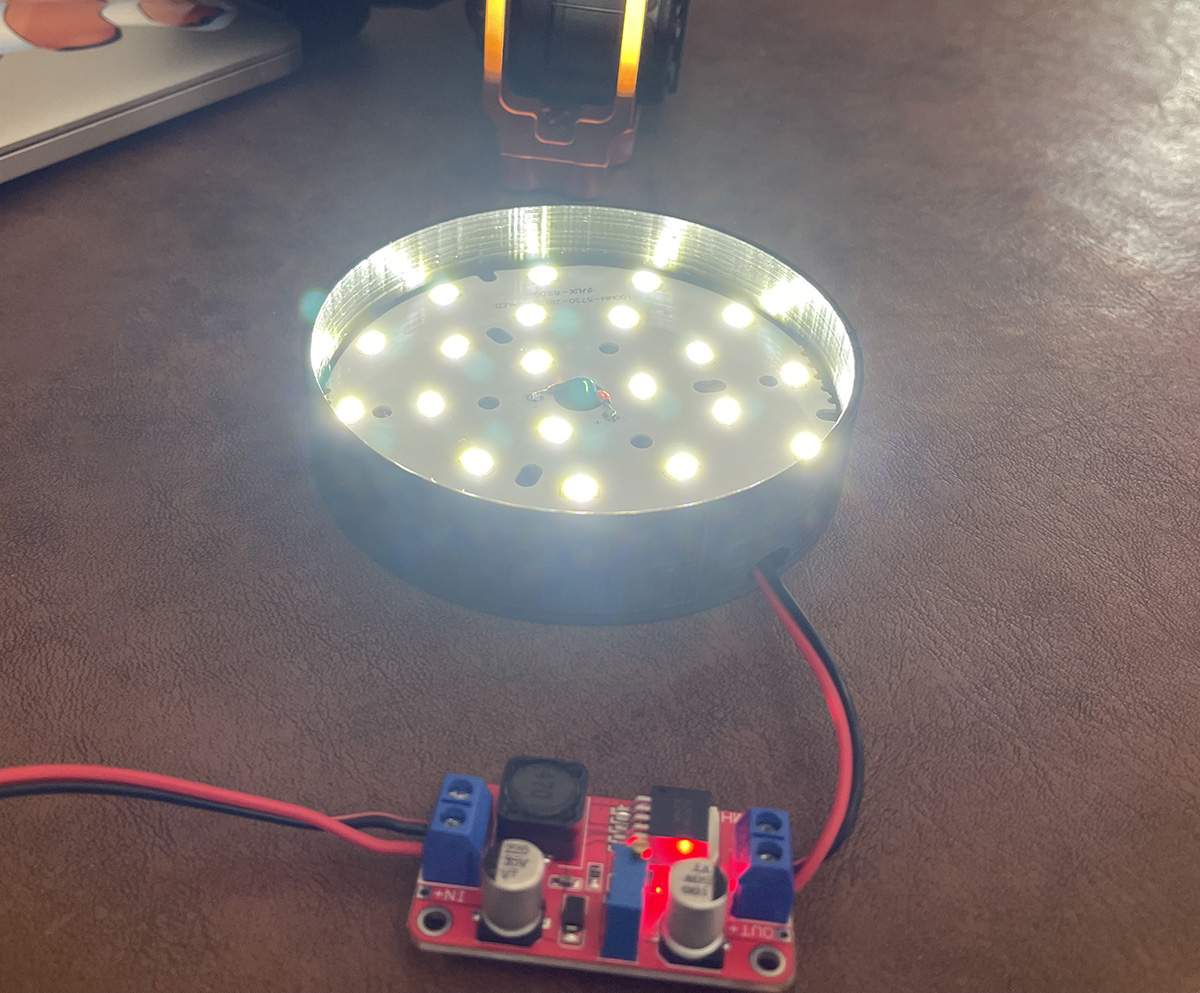
I'm still testing illumination across the acrylic face plate. The space between the LEDs and white acrylic is a little over a centimeter, and that seems to look evenly illuminated to my eyes. That's the one thing that remains to be tested and potentially adjusted—most likely away from the LEDs by small amounts until it works. I'm also going to add a strip of aluminum foil around the inside to make the most of the reflected light.
I used E6000 glue (link below) to hold the LED board to the stand-offs on the printed enclosure. The board is aluminum and acts as a heatsink. E6000 is supposed to work at high or low temperatures, but we'll see how that works out after some serious testing.
Where to go from here? A larger diameter light is probably where I'm going next, to support the the William Optics GT81. I might try different LED boards, some with more LEDs. Also, this is a pretty cheap step-up converter, and I have a couple different kinds I can try out. Making some 3D printed fittings for specific scopes is another thing to try.
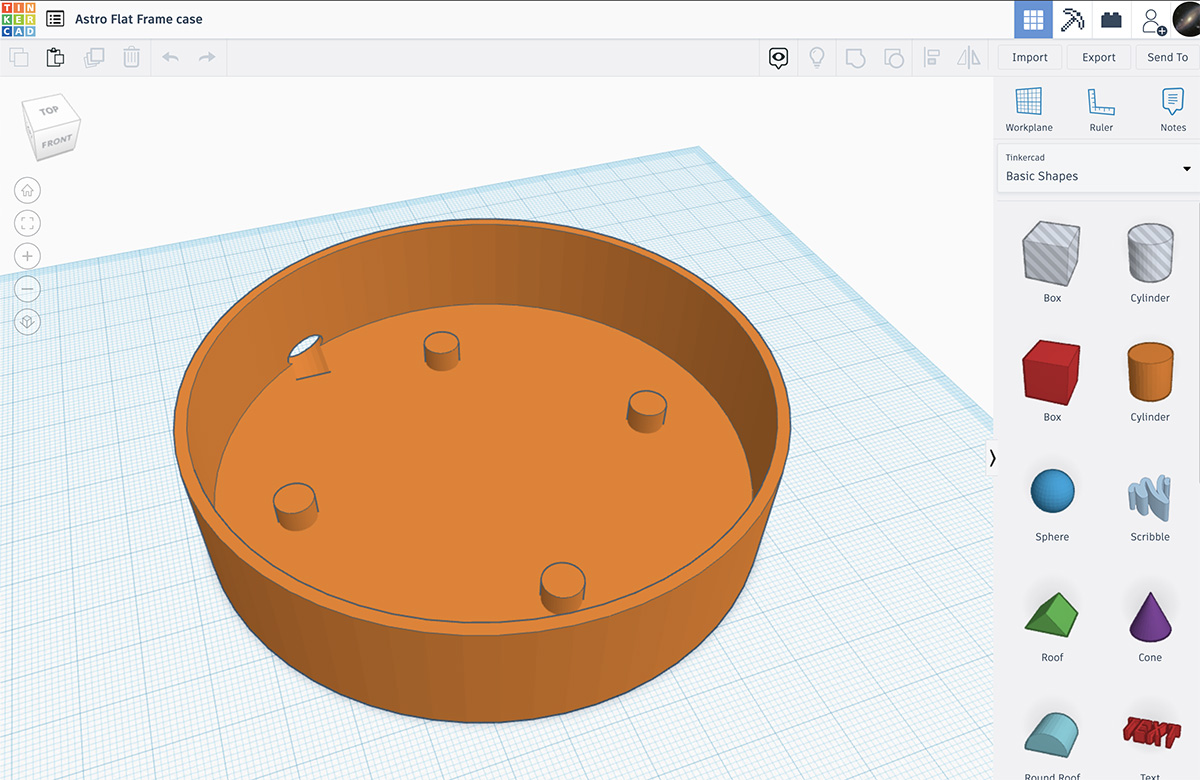
Here's a screenshot of the enclosure I made in Tinkercad:
And with the lights on!
Using electrical tape to hold the acrylic disc in place, and a strip of aluminum foil around the inside to reflect the light:
I made a 3D Printable Flat Frame Light enclosure:
https://www.tinkercad.com/things/5ThpmrMrqdR-astro-flat-frame-case
STL File I used for printing:
https://saltwaterwitch.com/files/AstroFlatFrameCase.stl
Amazon Shopping List:
5A High Power DC to DC Step-up 5V 6V 12V 24V 3-35V to 5-40V XL6019 Converter
https://www.amazon.com/dp/B07Z5M89N1
LED: Aluminum Circuit Board 5730 SMD LED Chip Module 12W 300mA 6500K Diameter 100mm
https://www.amazon.com/dp/B07VFHP5P5
Acrylic blank Opaque White Round 2 Pieces (4" Diameter, 1/4" Thick Opaque White)
https://www.amazon.com/dp/B07BPVL622
DC Power Cable 12V 5A Plugs Male Female Connectors (5.5mm x 2.1mm, 10 Pairs)
https://www.amazon.com/dp/B07C7VSRBG
E6000 High Viscosity Adhesive, 3.7 Fluid Ounces, 1 Pack, Clear, 3 Fl OZ
This: "temperature resistant – unaffected by extreme heat or cold once cured"
https://www.amazon.com/dp/B0044SB3M8
Posted May 17, 2021
AstroTrackerHD Prototype 4
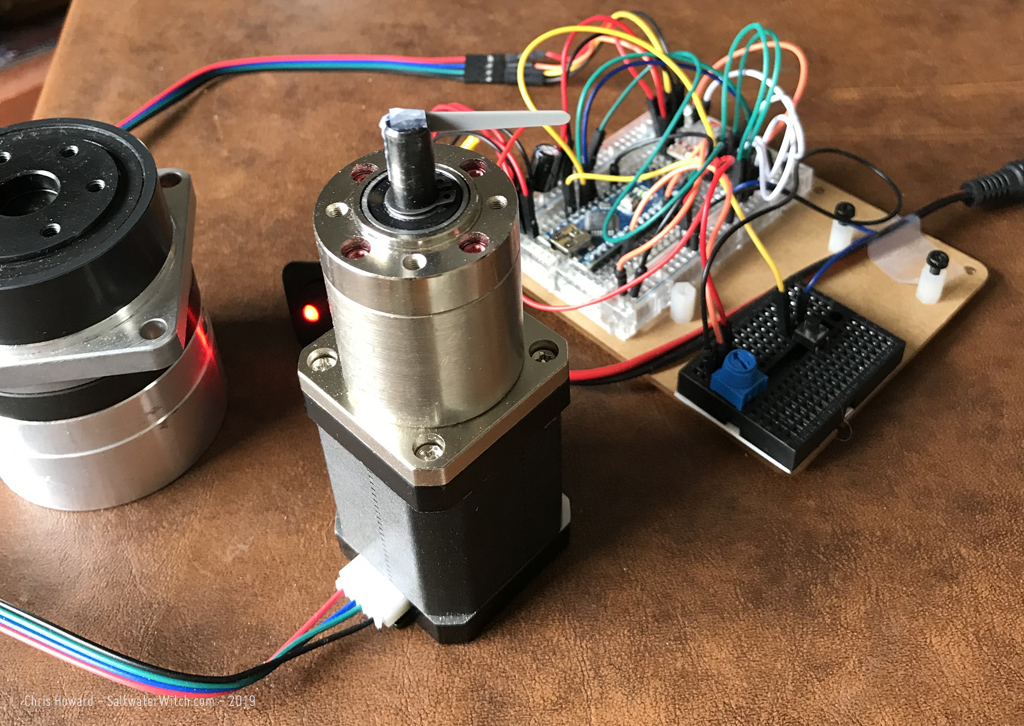
AstroTrackerHD Prototype 4 in testing, with pics. (HD = harmonic drive, which is a high-precision, high-torque, zero backlash gear set. See: https://youtu.be/3mWemlMEzFk). I did some code cleanup and refactoring for version 4.0.7, and added the ability to adjust the speed in small increments and save the speed values to eeprom. I have a couple posts on this earlier in the year, but if you haven't seen them: AstroTrackerHD is my project to build a very accurate star tracker using a NEMA 17 stepper, 139:1 ratio planetary gear feeding a 100:1 ratio harmonic drive. I'm running updated software in this one, and I'm in the process of 3D printing some brackets for the stepper.
![]()
![]()
![]()
Posted May 4, 2019
Harmonic Drive testing
Star Tracker Build: the 100:1 reduction Harmonic Drive gearhead arrived today, and I'm planning out the mechanics for the direct drive train and structure for a case (3D printing a prototype case that will hold everything together tonight). Harmonic drives are the way to go if you're looking for extreme precision, zero backlash, and just plain cool technology: https://www.youtube.com/watch?v=3mWemlMEzFk I will be using the original iOptron CEM25P saddle for testing, and the threaded holes in the harmonic drive line up neatly. Gearhead specs here: http://www.harmonicdrive.net/products/servo-mount-gearheads/harmonic-drive/csf-gh/14/csf-14-100-gh


Posted January 21, 2019
Direct-drive Star Tracker Prototyping
Electronics project for the day: prototyping the drive system for a direct-drive star tracker. This will be driving a 100:1 ratio Harmonic Drive gearhead. For this test I'm using a NEMA 11 stepper motor, also geared down, and a cheap A4988 stepper driver, but I will be experimenting with others.
![]()
