iOptron SkyGuider Pro Test 2
Cygnus region of the Milky Way, with NGC 7000 North America nebula at the bottom left, the Sadr Region in the center, and it's crazy how much of the Veil Nebula showed up--that's the ring of wispy, mostly white nebulosity on the right toward the bottom. The reddish/pinkish areas are mostly clouds of hydrogen gas, while the pale cloudy areas are mostly stars--so many stars. Our galaxy contains somewhere between 150 and 250 BILLION stars. 3 x 120 sec exposures, Nikon D750 85mm f/5.6, on an iOptron SkyGuider Pro tracker.
The SkyGuider Pro has iOptron's standard polar scope and reticle, and by "standard" I mean so much easier to use than just about any other polar scope on the market--that I've used anyway. With just a simple alignment, using the SkyGuider's polar scope, I was shooting 2 and 3 minute exposures. This little tracker is amazingly simple and powerful. At some point I will start testing my color wide-field rig with the William Optics ZS61 and ZWO ASI071MC camera, but for now I want to get used to the SkyGuider, and I'm using my good old Nikon D750 full frame DSLR (unmodified). And you can see this setup produced some decent images to stack.

Posted August 25, 2019
Ultra-portable astro rig
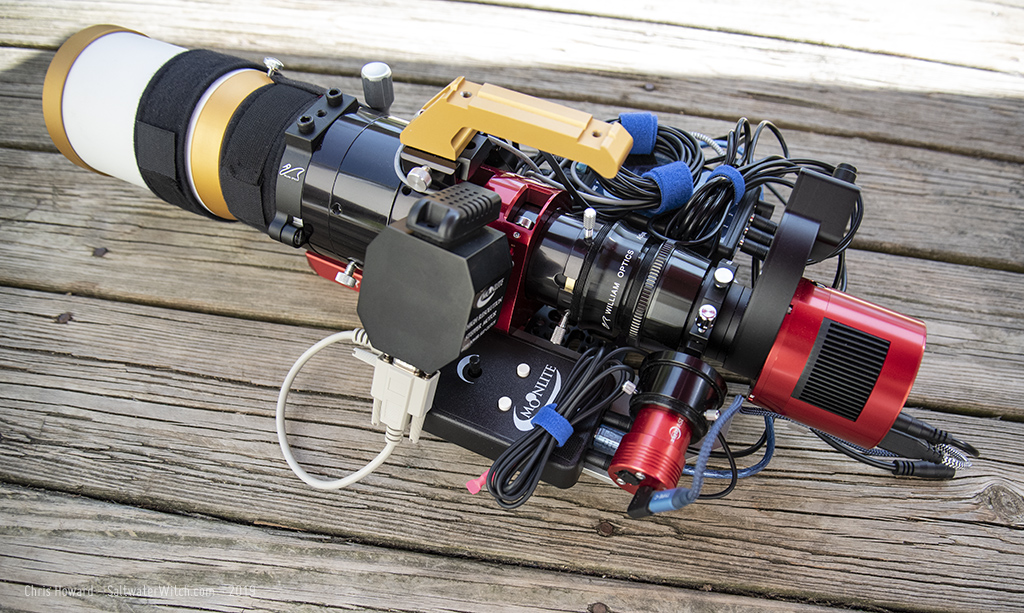
Last month I picked up an iOptron SkyGuider Pro, because, well who doesn't have one of these best-in-class star trackers? I felt left out. It also gave me an excuse to get the Stronghold Tangent Alt-Az base from AstroShop on AliExpress (https://www.aliexpress.com/item/32822479423.html). I've been looking at images of this one for a while, and in reality it doesn't disappoint. It's a nicely machined piece of equipment, very sturdy, with a 10kg/22lb carrying capacity! I'm using this instead of the very compact light-weight version that comes with the SkyGuider Pro.
Here's my ultra-portable astro setup, with the William Optics ZS61 APO, ZWO ASI071MC cooled color, ZWO ASI120MM-S guide cam, DeepSkyDad AF1 focuser, homemade powerbox (2 x 12v out, 1 x 5v 4 amp out, 1 x dew control out), controlled by a Raspberry Pi 4 4GB running Stellarmate 1.4.2 beta. The SkyGuider Pro has it's own battery for power, and the scope, cameras, focuser only require a single 12v 7-10 amp input. All other cabling and control functions are mounted on the ZS61. I'm using an old Celestron tripod--I tightened the bolts on the legs, and it's definitely sturdy and stable enough for any payload the iOptron can handle.

Posted August 24, 2019
Color Wide-field test with the new Raspberry Pi 4 4GB and Stellarmate
I'm testing out my color widefield setup with the William Optics ZS61 APO, ZWO ASI071MC cooled color, ZWO ASI120MM-S guide cam, DeepSkyDad AF1 focuser, homemade powerbox (2 x 12v out, 1 x 5v 4 amp out, 1 x dew control out), controlled by a Raspberry Pi 4 4GB running Stellarmate 1.4.2 beta. I ran some test sequences in Ekos and everything appeared to function normally. I am getting an error for the focuser ("...temperature value (!100)"), but the AF1 doesn't support temperature controlled focus adjustment, so not sure if this affects anything. It focuses properly, so I'm choosing to ignore the error for now. And I'm not absolutely sure this is a Raspberry Pi 4 thing, instead of an INDI/Ekos thing on any hardware. And you may have noticed that I'm testing this out (remotely, using Jump Desktop) from my brand new Apple iMac 5k 27" i9/8core with... yes, I ordered it with 8 GB RAM, but I have 64GB on order, and I'll add that myself. (No sense paying $1000 to have someone at Apple do that for me).
What's funny is Dylan O'Donnell on his Star Stuff channel posted about upgrading his iMac and the giant performance improvement with PixInsight--same iMac I just bought, but I haven't used PixInsight processing software. I'm a Photoshop guy from way back in the 90s and version 4. https://youtu.be/J_EsH54XqjE


Posted August 24, 2019
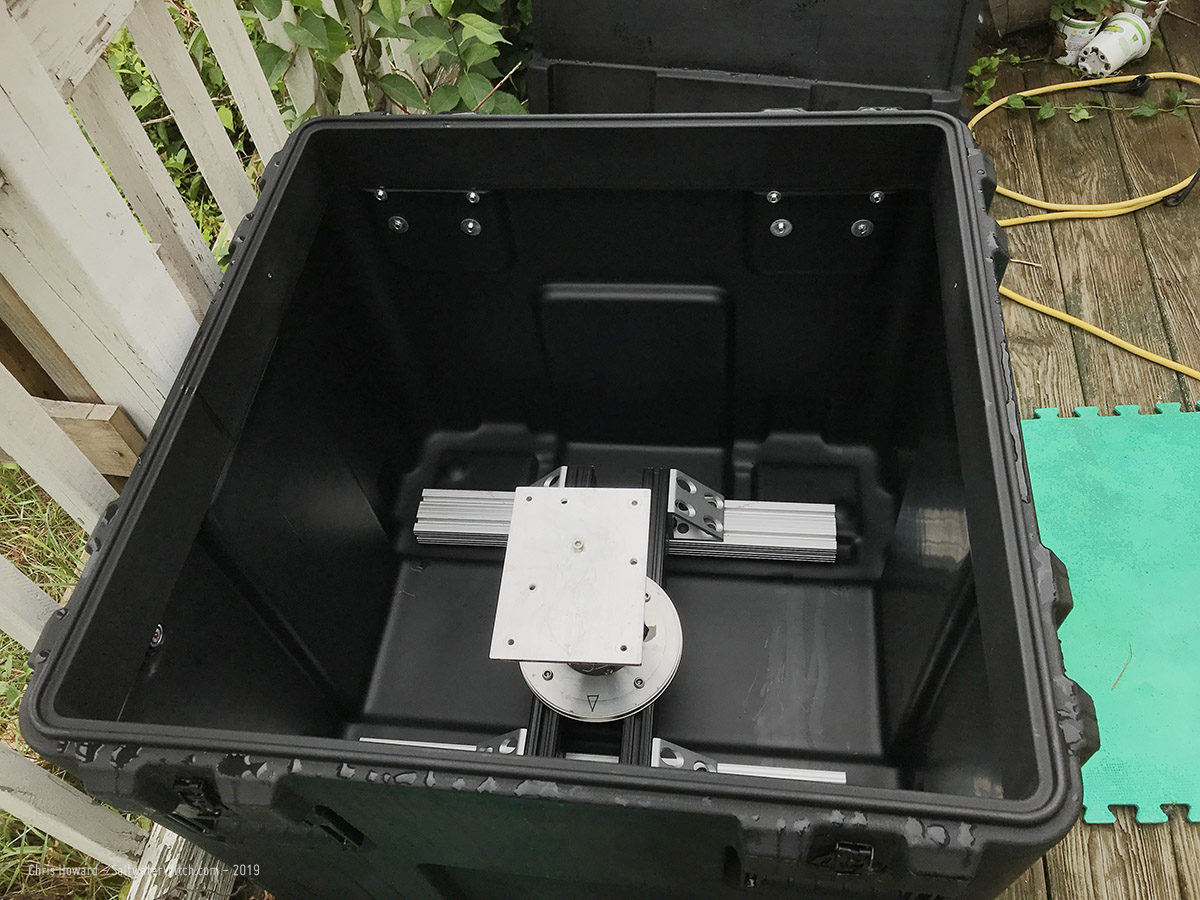
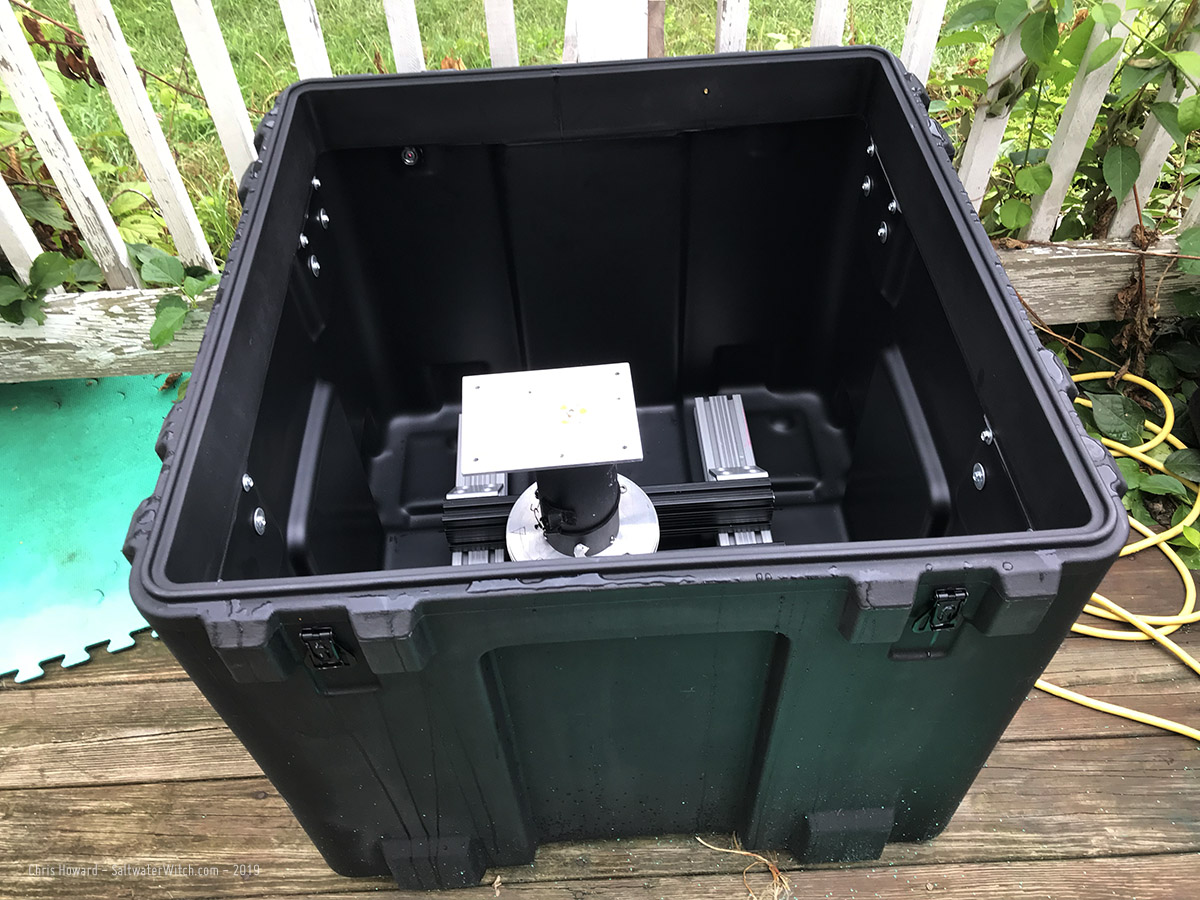
Micro-Observatory Project #1
My goal with my “micro-observatory” project is to be able to set up a self-powered astrophotography system that can remain in place through any weather while protecting the equipment, be operational and ready to image within a couple minutes, and be moveable--if necessary. I don’t need it to be fully automated for now. This is a fairly complicated setup, and so I’m going to take this in steps. The main missing piece of automation is raising and lowering the lid. Of course, all the astro gear is automated, except for a motorized cap, which won’t be necessary without the ability to remotely open and close the lid.
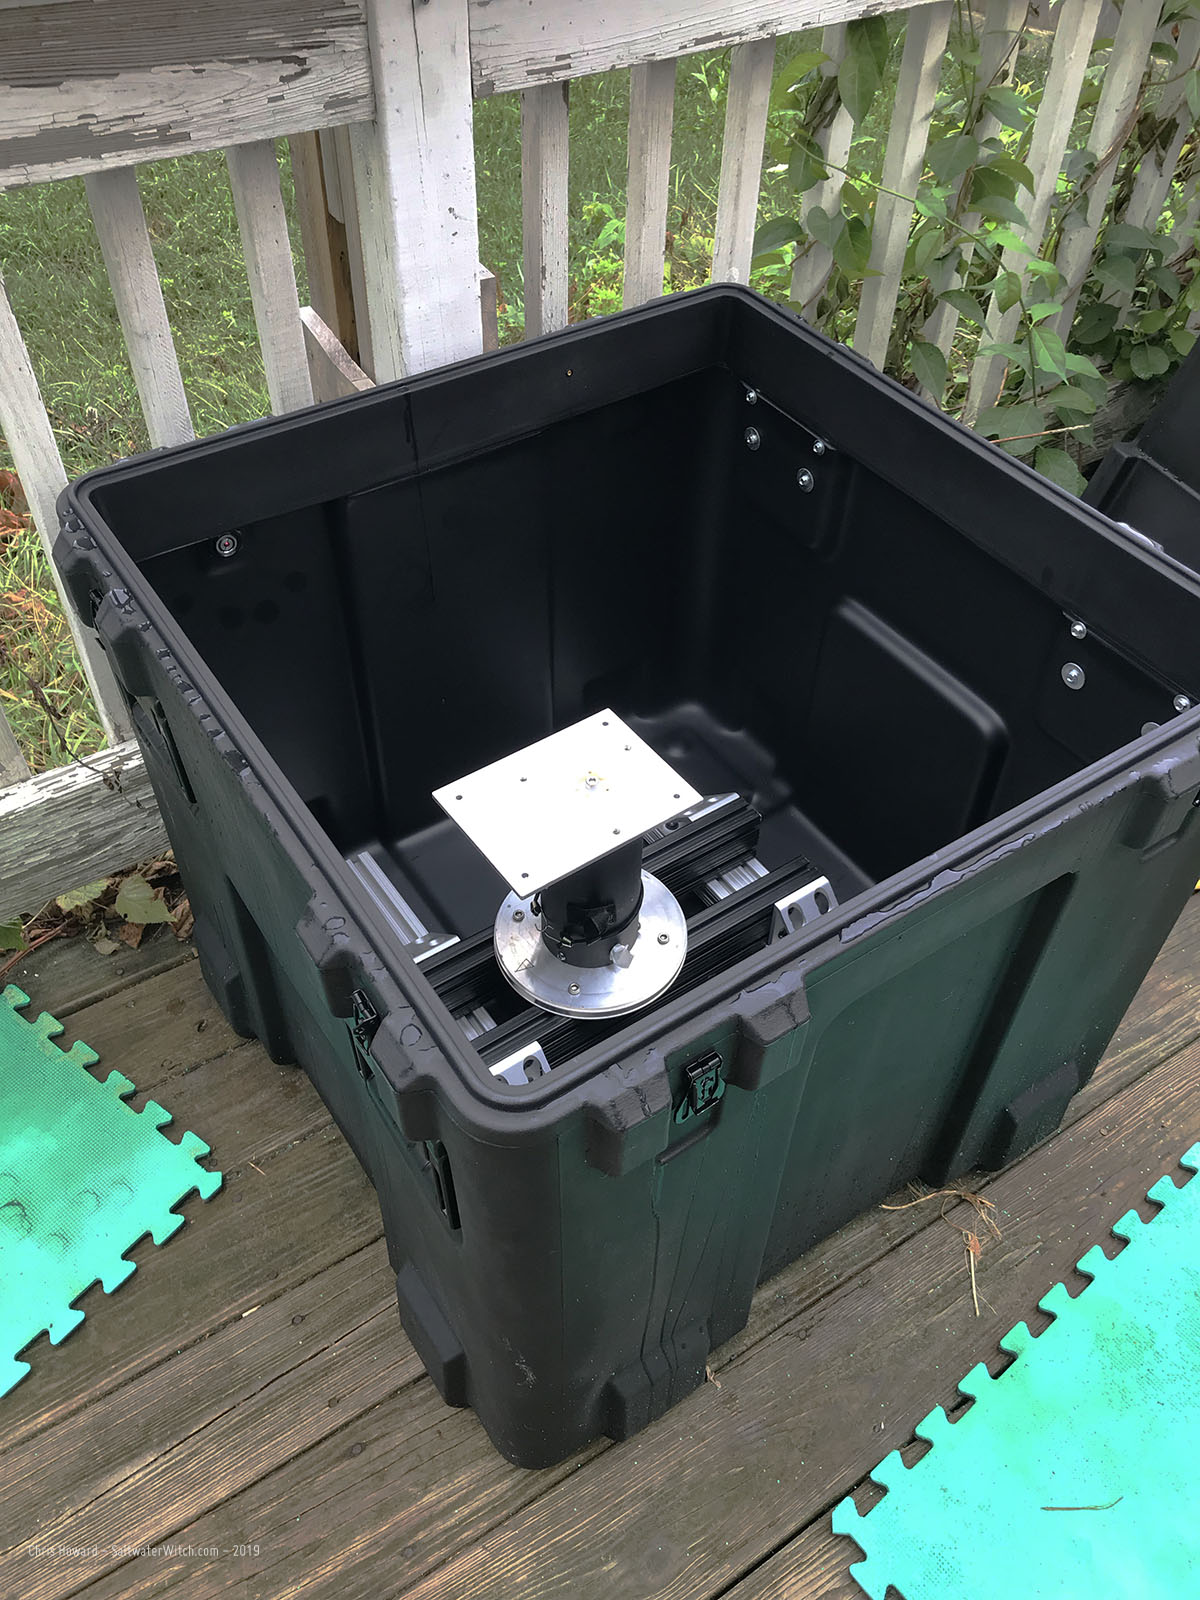
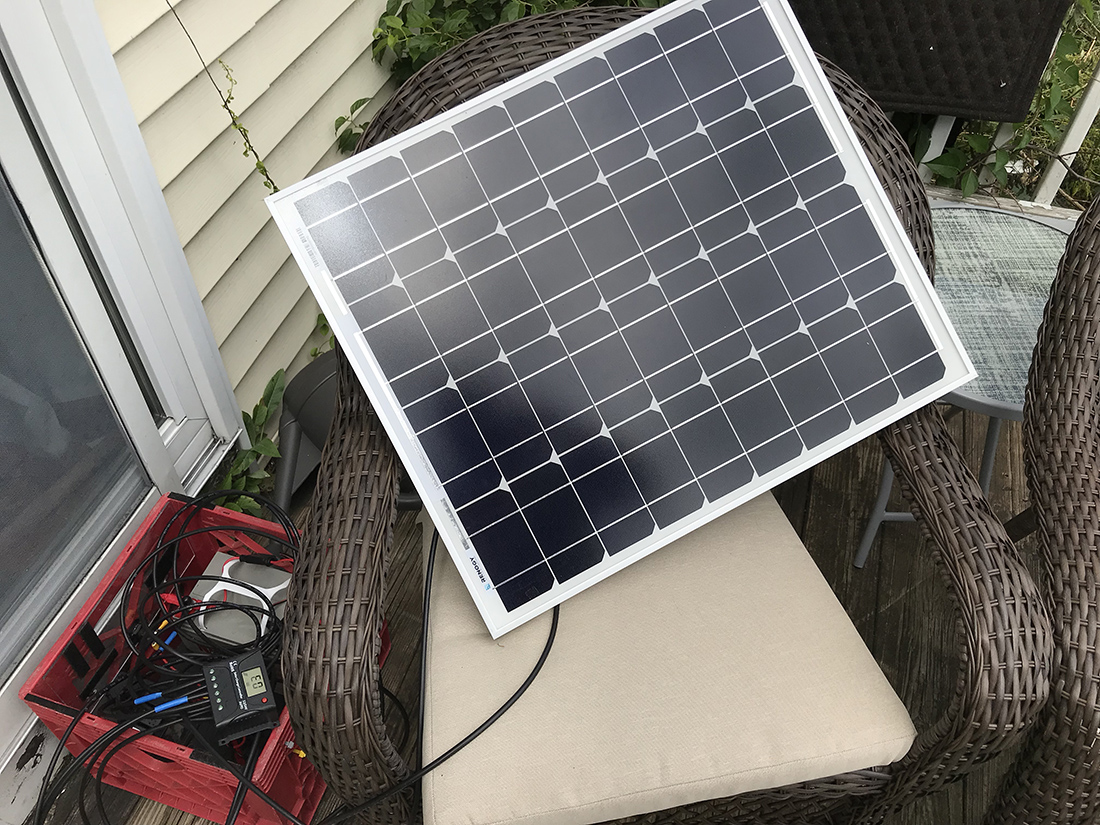
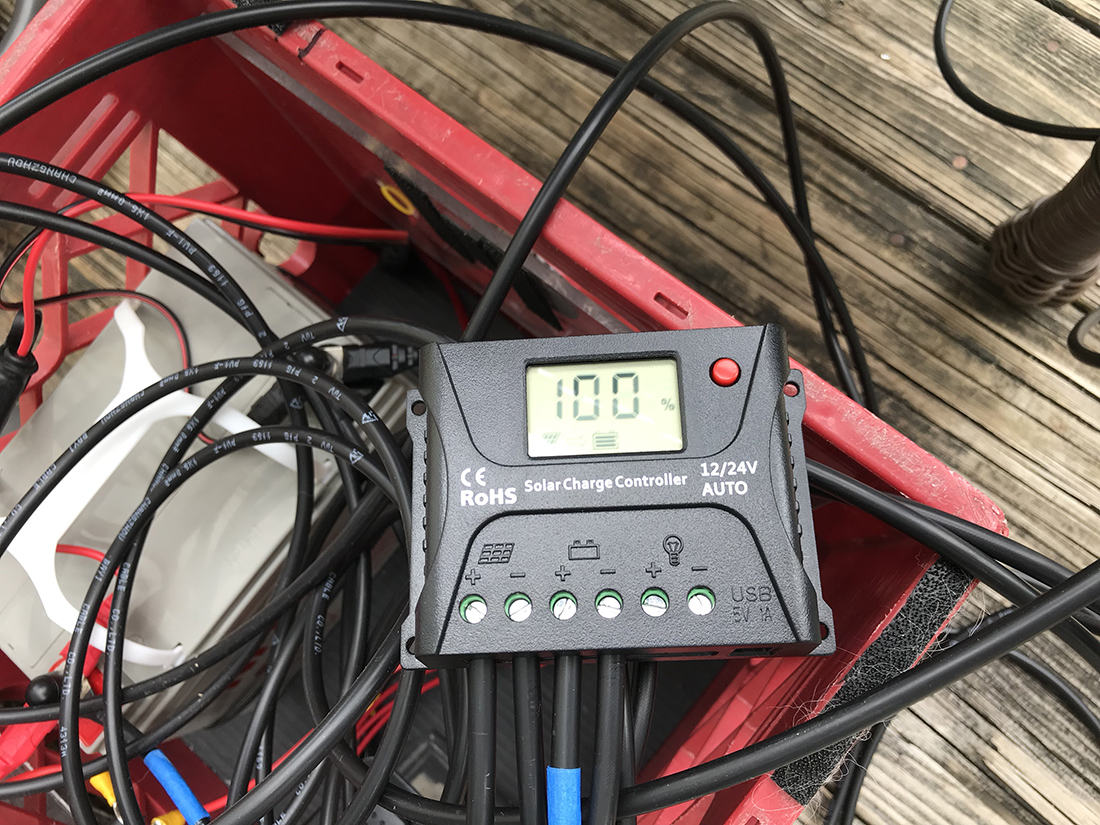
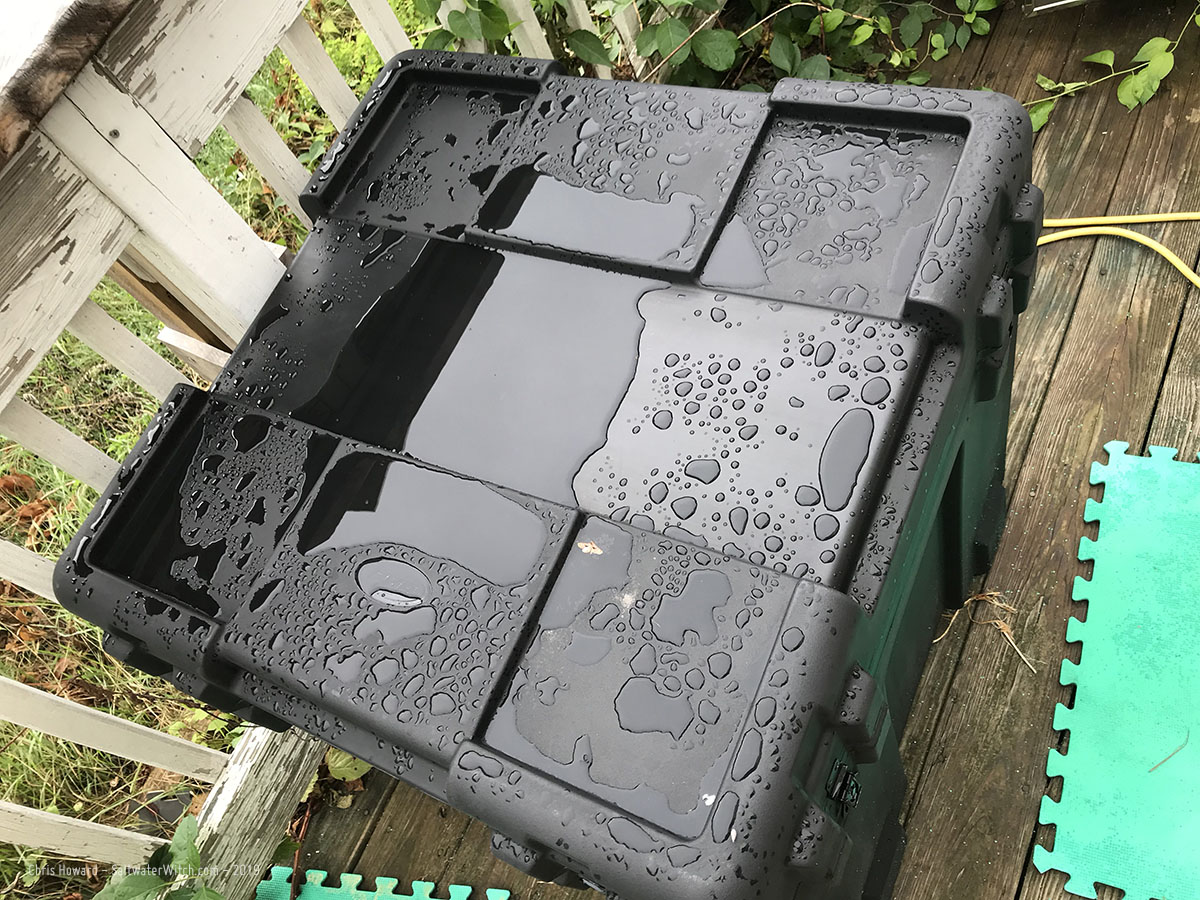
I started testing this idea a couple years ago with wood frames, and even did some research on wood shipping crates. I settled on this plastic molded shipping container with 27”/68.5cm interior dimensions--it’s a cube. So far, this looks like it might work. The stock hardware is crap--I already drilled off the hinges, and I’m looking at 180 degree hinge mechanisms and other options for lifting the lid away with minimal obstruction of the sky (https://youtu.be/6bMMZq0X29E). Whatever I end up with will have to be pretty sturdy because I’ll be mounting a 50 watt solar panel on the lid to keep the batteries charged.
As far as project progress, I’m still at the beginning. I’m testing out different mount/scope configurations for fit--with the scope and counterweights horizontal. I was surprised to find the Orion Atlas EQ-G fit with a small refractor--just barely, and only with west-side travel and no meridian flips. (I had to move the mount and aluminum mounting frame all the way to one side to make this configuration fit). Today I’m trying out the iOptron CEM25P, with the hope that this will fit entirely in the box, centered, and be able to do flips and reach most of the sky.
I’m going to spend a while doing weather and motion testing, anchoring to the ground and monitoring temperature and humidity. It’s water-tight, so I’m not worried about leaks. I just don’t want internal temps or condensation to build up this time of year, or in the winter, to drop below the equipment specs. I haven’t decided what I’ll do for warmth when it’s cold outside. It’s not unusual for the temperature to remain well below freezing for extended periods of time (-6F / -20C is not unusual).
Much to do. I’ll keep you posted!
Posted August 18, 2019
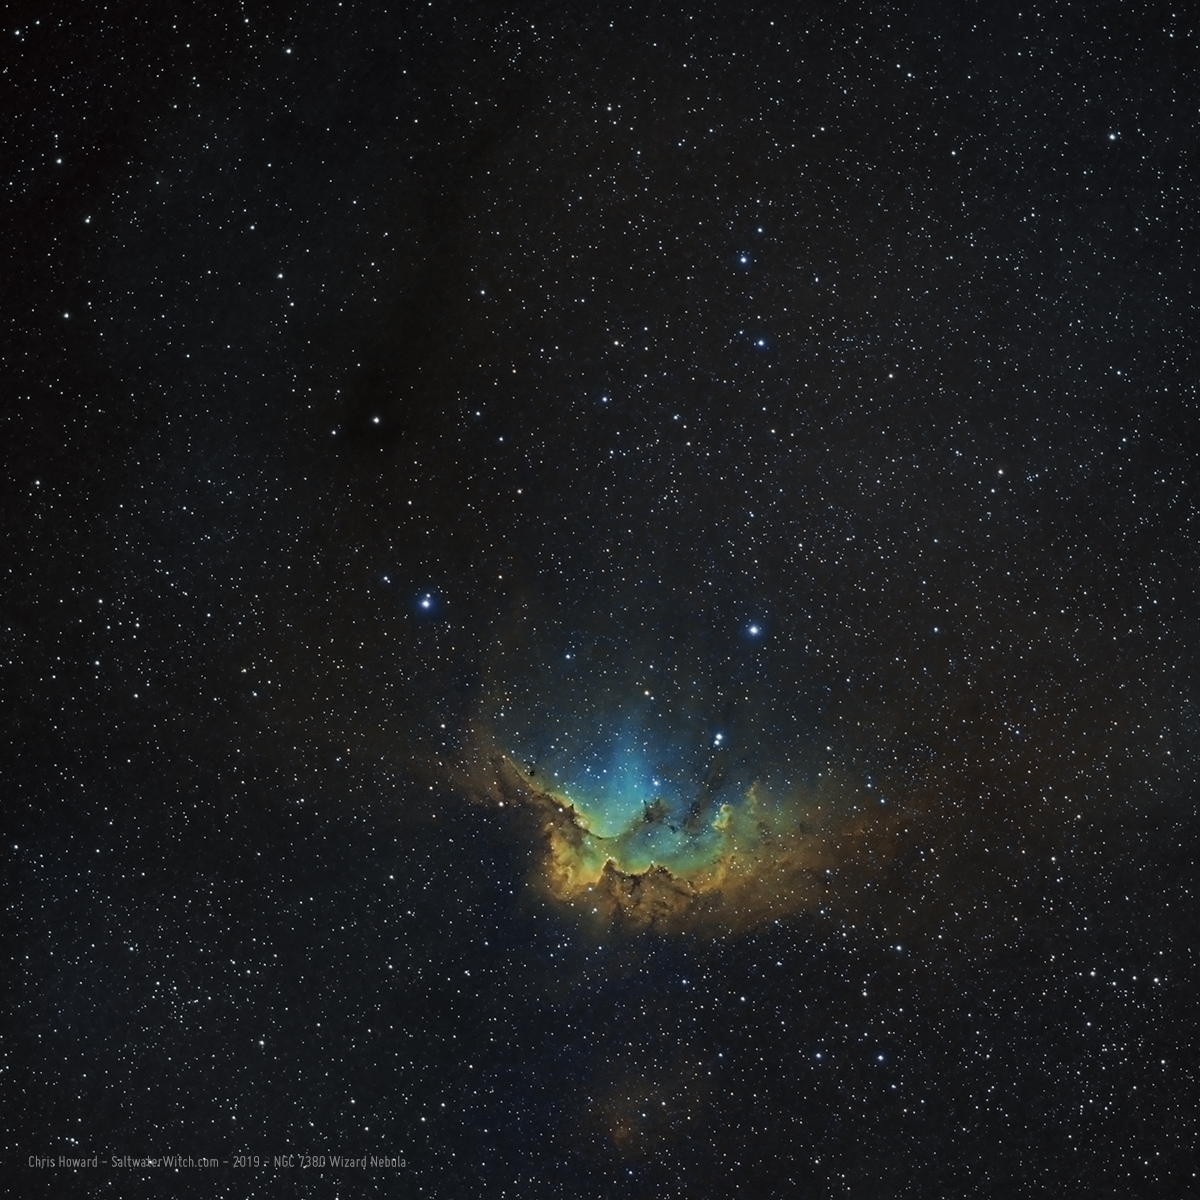
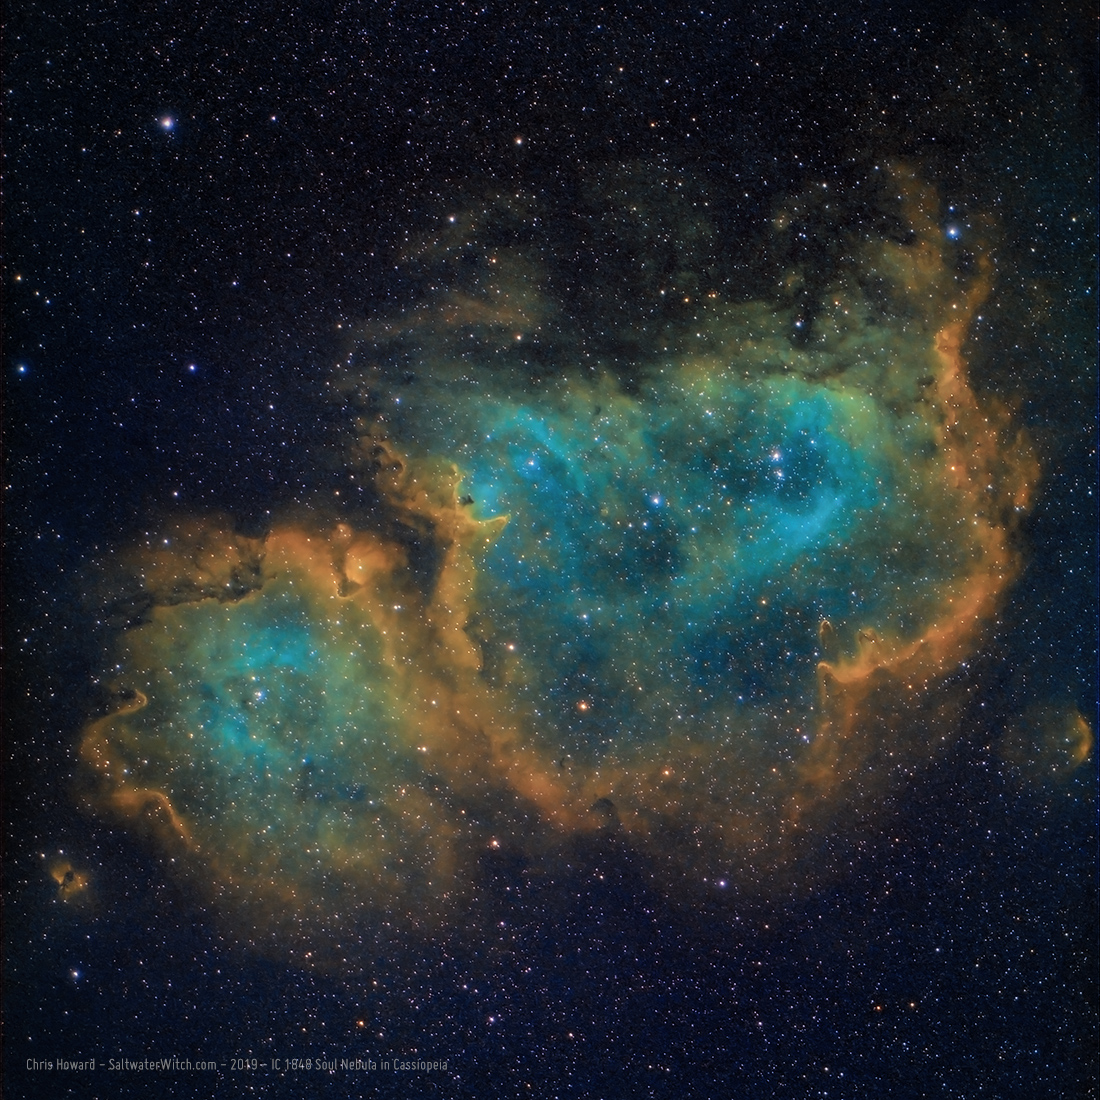
The Wizard and the Soul
I captured almost 5.5 hours of OIII and SII data on NGC 7380 (Sh2-142) the Wizard Nebula and star cluster in Cepheus, along with a full set of narrowband frames for IC 1848 the Soul Nebula in Cassiopeia. I timed things well enough that I captured 20 subs each of Ha, OIII, and SII for the Soul before the earth rotated into early morning. Not a ton of data, but enough to process and see how it looks--not bad, in my opinion. My camera rotation is almost 90º off, almost vertical against the long side of the sensor, but I cropped the nebula to a square so you don't have to see how silly that looks.
I captured the Ha data for the Wizard Nebula early in July, and now I have enough to process in SHO (Hubble Palette) that's where we map the three bandpasses, sulfur (SII), hydrogen (Ha), and oxygen (OIII) to RGB, Red, Green, Blue to make up a color image.
Here's NGC 7380, Sharpless 2-142, Wizard Nebula:
IC 1848, the Soul Nebula:
I don't know if I succeeded but I was trying to get more hydrogen green back into the arrangement. Most of the nebula is hydrogen--just going off the signal in the Ha frames compared with the OIII and SII data. The rims of both regions of IC 1848 are thick with sulfur--red and green gets us that golden brown, but I think the processes, filters, actions typical for astro imaging go too far in reducing green in the images, bending it more toward blue. This does have the benefit of bringing out oxygen, which is nowhere near as plentiful as the blues I see in most SHO/Hubble Palette images. That's just what everyone's come to expect from a "Hubble" image. On the other hand this is one of the coolest aspects of the hobby, the ability to go back and re-processes your data, because you have new or improved processing tools or skills, a new set of data, or simply because you want to experiment with color allocation.
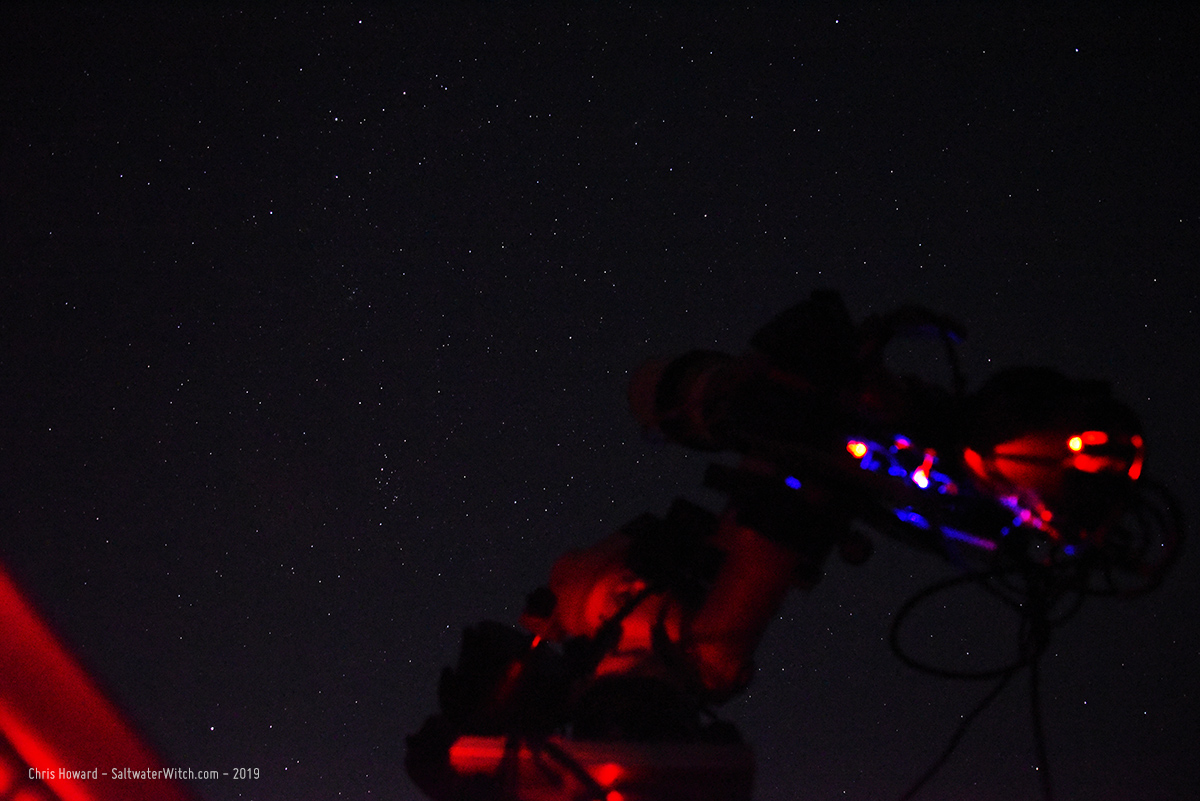
I woke up around 3:30 am and went out to check on the night's imaging run. I was in the middle of the sulfur2 frames when I took this shot with the Nikon: the William Optics GT81 APO refractor pointed at Cassiopeia (top left), actually just below it, which is where you will find IC 1848, the Soul Nebula. Just so you are aware, this is all automated--slewing, plate solving, focusing, filter rotation, and image capture. Once I plot and schedule an imaging run, the last place I want to be is near the telescope where the slightest motion in the ground can ruin a good 5-minute exposure. I was just out there to look at the beautiful sky, and take some crappy blurry photos of my astro gear against the starry background.
Posted August 2, 2019
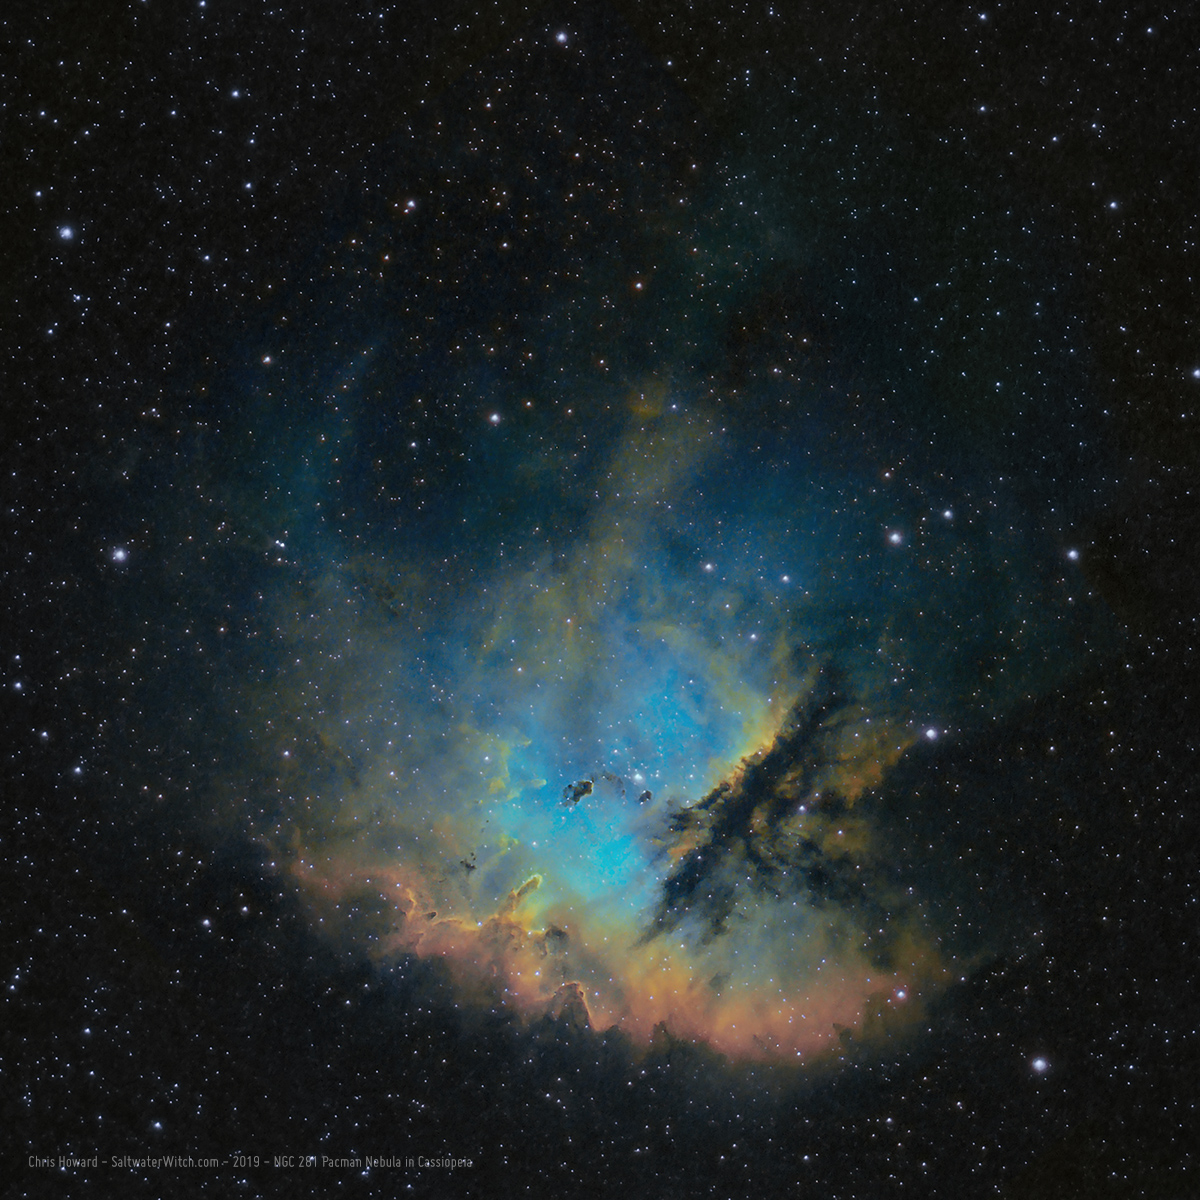
NGC 281 Pacman Nebula
NGC 281 Pacman Nebula - I'm finally getting around to processing a bunch of data I gathered over the last month and a half. Pacman is one my favorite nebulae in Cassiopeia. I love that it's out on its own, surrounded by cold dark space and a field of stars. NGC 281 also has an impressive set of Bok Globules, those dark gaseous knots drifting in front of the bright blue and gold (oxygen and hydrogen). And that's Achird (eta Cassiopeia) at the bottom left, a variable double star a little under 20 lightyears away. Damn, that's nearly close enough to visit--with the right technology.
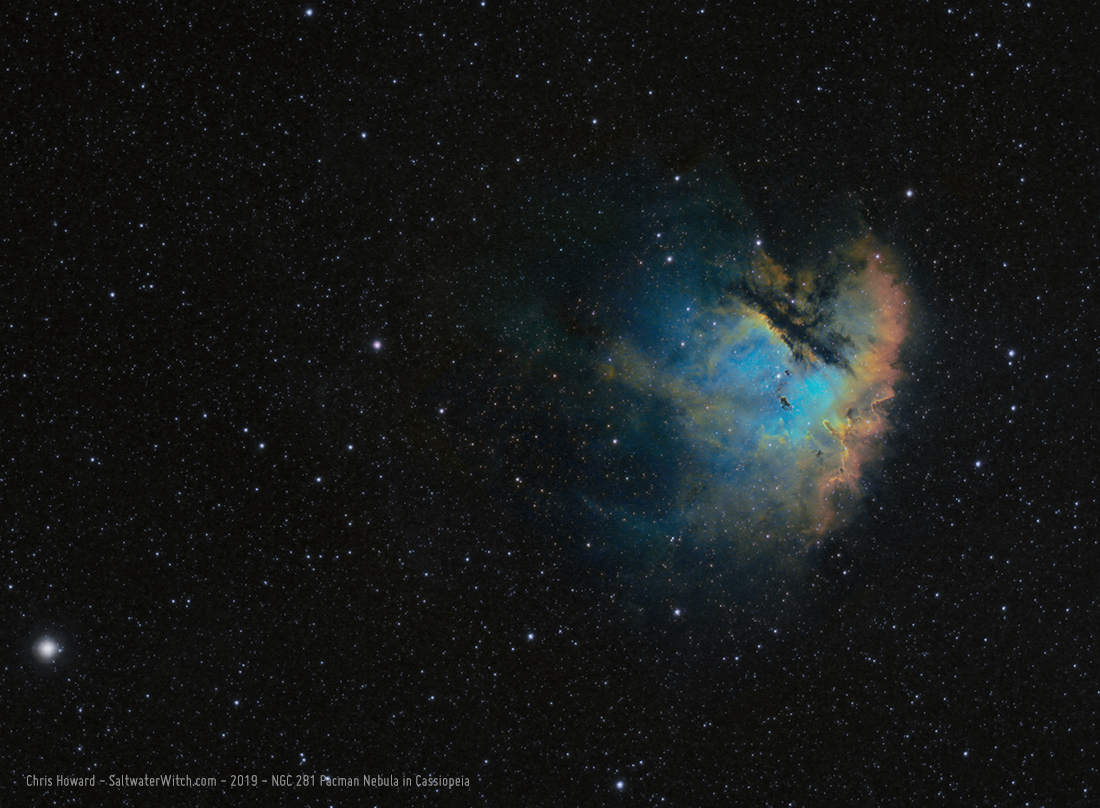
Another one of the Pacman Nebula NGC 281, with narrowband data I started taking in early June. You can really see the Bok globules, those little lumps of dark dust and gas standing out near the center and backlit by the bright emission of the Pacman. https://en.wikipedia.org/wiki/Bok_globule
Imaging notes: William Optics GT81 at f/4.7 with WO 0.8x Flat6A II, Astronomik Ha, OIII, and SII filters, Moonlite focuser, ZWO ASI120MM OAG, Imaging camera: ZWO ASI1600MM Pro cooled mono on an iOptron CEM25P mount. Stacked in DSS, processed in PS CC 2019.
Posted July 29, 2019
Pelican Nebula ( IC 5070 and IC 5067)
Another one from my June 8th narrowband imaging run through the constellation Cygnus. The Pelican Nebula ( IC 5070 and IC 5067) in sulfur 2, hydrogen-alpha, oxygen 3, mapped to RGB.

My narrowband imaging rig: William Optics GT81 (81mm aperture, focal length 392mm, f/4.7), Moonlite Focuser, Pegasus Astro Power, and ZWO monochrome cameras and EFW.
Posted July 25, 2019
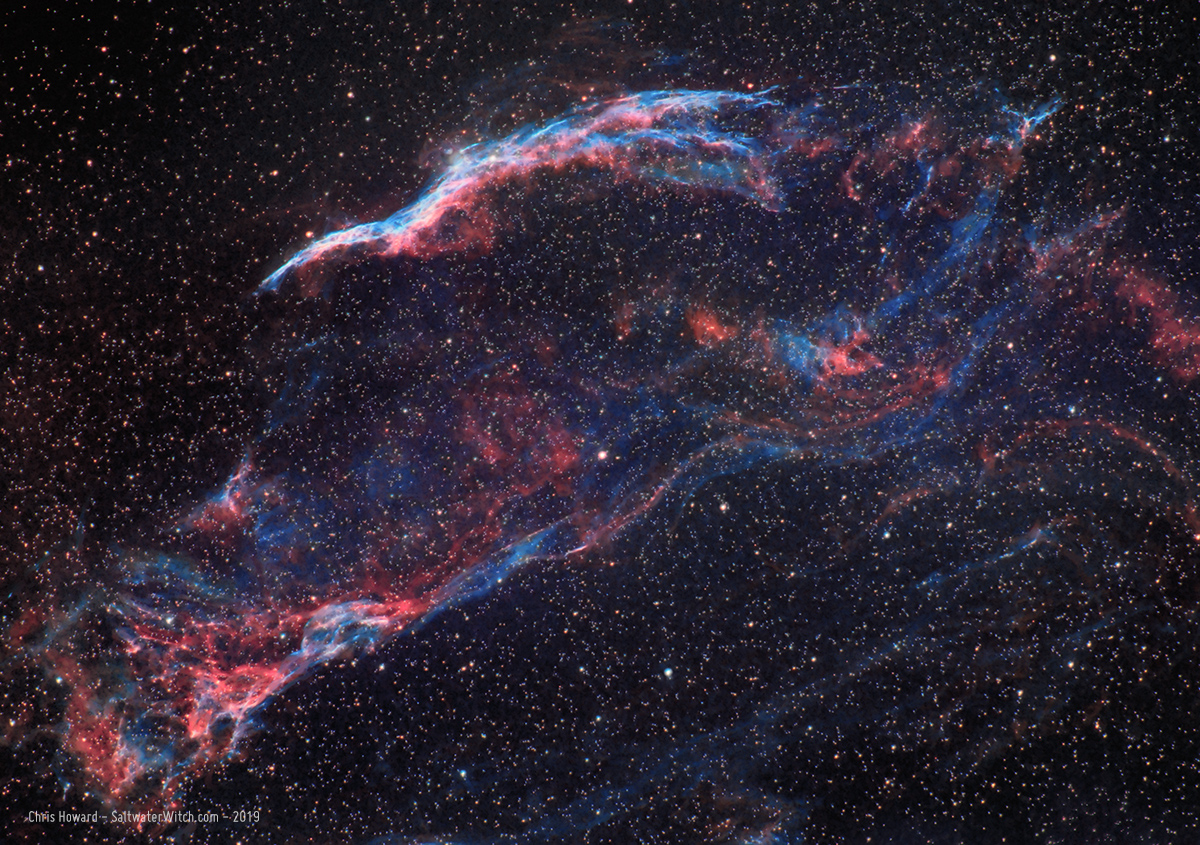
Western Veil Nebula in Cygnus
The Western Veil Nebula in Cygnus with the "Witch's Broom" (NGC 6960) toward the top. WilliamOptics GT81 APO Refractor and ZWO ASI1600MM-Pro mono camera: 14 x 300 second exp in Ha, 15 x 300 second exposures in OIII.