Astro Tracker Build - Prototype and Rotation Speed Testing
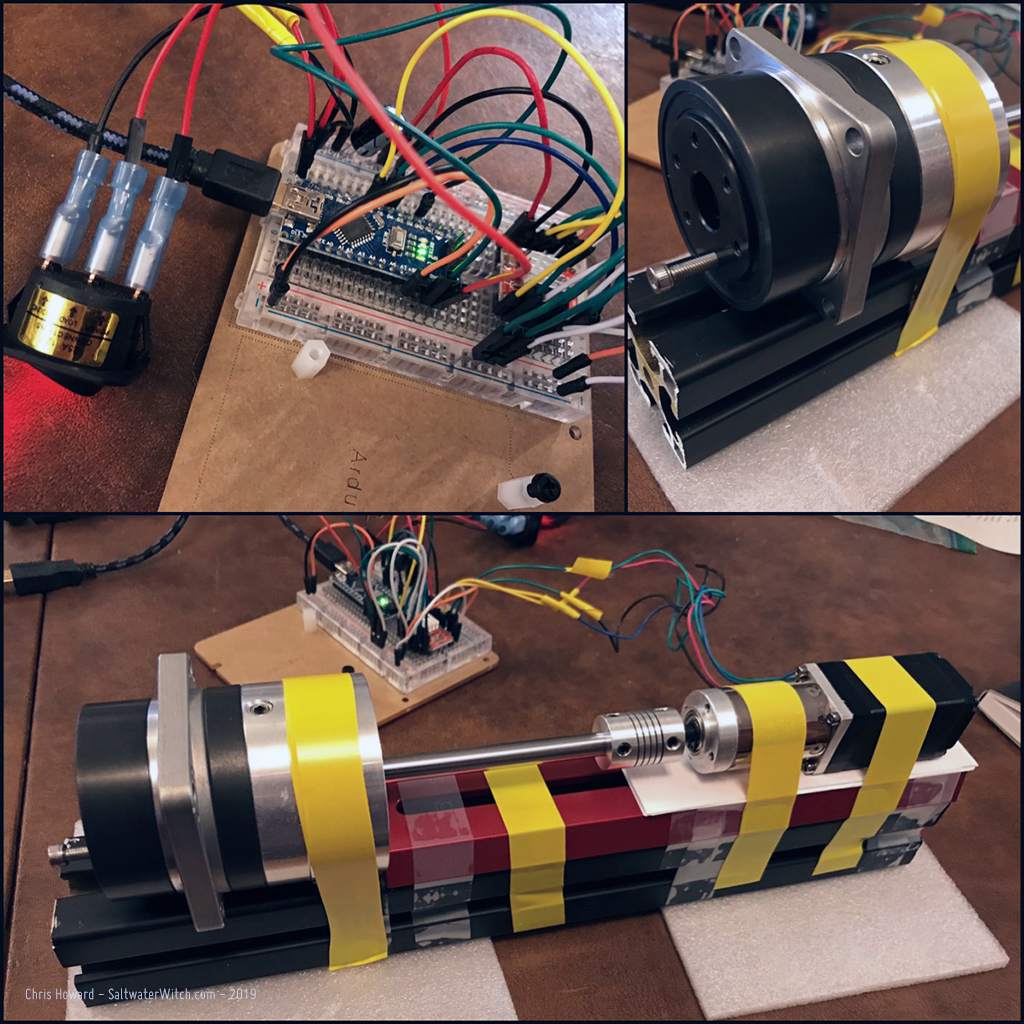
Our beautiful planet rotates on its axis once every 23.93447 hours (23 hours, 56 minutes, 4.091 seconds). This is one sidereal day--sidereal time is based on the earth's rate of rotation measured relative to the stars that are--for the most part--fixed in position. Here we go: 23.93447 hours = 86164.091 seconds. So, we need to do a 360 degree rotation of the right ascension motor shaft in 86164.091 seconds to match the earth's rotation speed. Sounds simple enough. Backing into the time/revolution (360 deg) before the 100:1 gearhead ratio, we have: 86164.091 / 100 = 861.64091 seconds, or 14.3606 minutes / 360 degrees, which is close to what I'm getting for a full rotation with my current test system: NEMA 11 stepper + 100:1 planetary gearhead and A4988 stepper driver running with 1/16 microstepping. I'm probably going to build the second prototype with a NEMA 17 + 139:1 planetary gearhead, but still waiting on that to arrive. And I will most likely continue to run with 1/16 microsteps. The downside is microstepping significantly reduces torque--I'm sacrificing torque for slower, smoother steps, but I'm thinking I will make up some of this with the 100:1 harmonic drive gearhead (CSF-14-100-GH-F0ACB). The idea is to get the motor with the planetary gearbox to do one rotation in a little over 14 minutes, and then by adding the harmonic drive I'll multiply the rotation time by 100, and we should end up around 86164.091 seconds, or one sidereal day. I think that sounds right? (Also, don't forget the direction is reversed with the harmonic drive--clockwise rotation of the wave generator results in the flexspline moving counterclockwise).
The shot below has my attached 3D printed adapter for a camera mount. Once I test the rotation speed adequately, I will try out some long exposures with the Nikon.
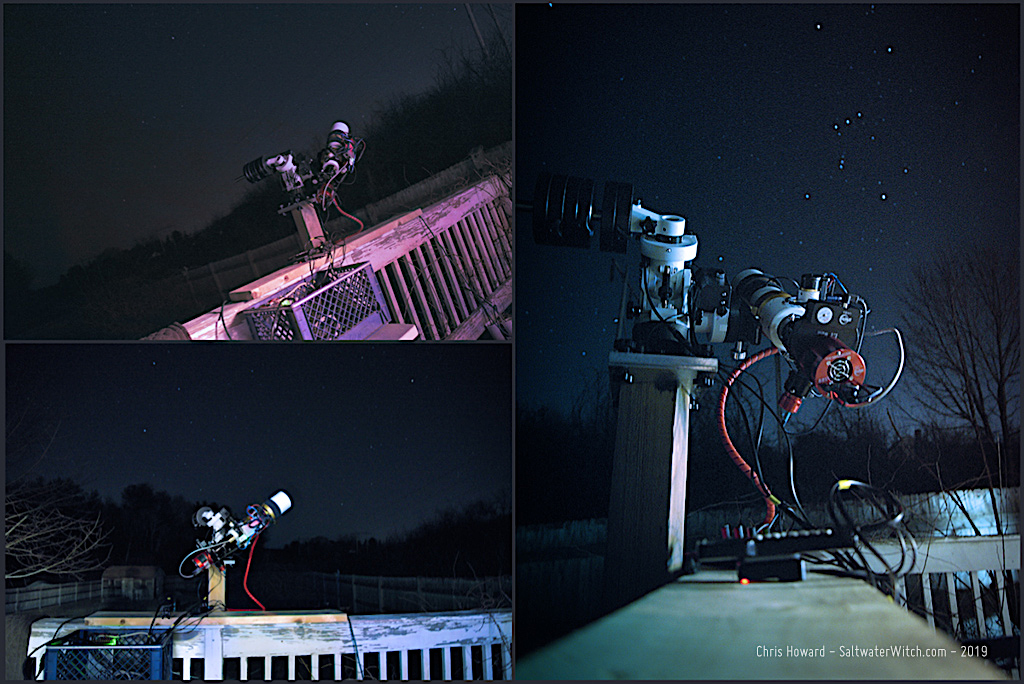
Here's the latest component and wiring setup, driven by an Arduino Nano and A4988 Stepper Driver, with the whole thing running off a single 12vdc power supply. The bottom frame is the entire rotation test taped together and functional.
Posted January 23, 2019
Harmonic Drive testing
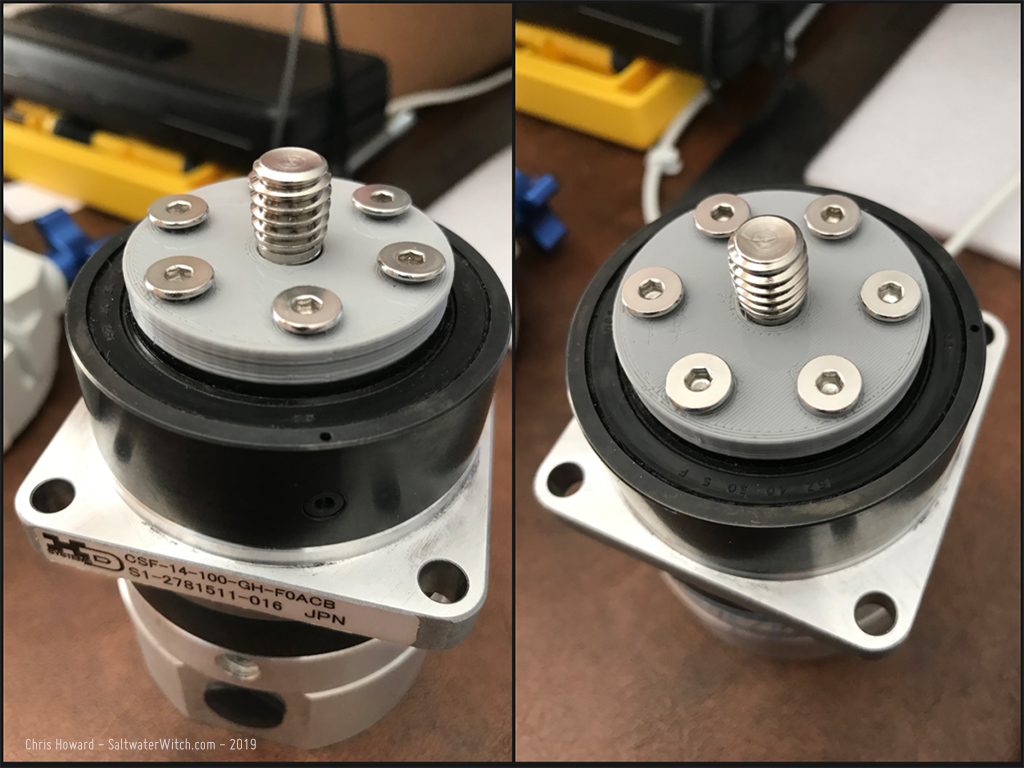
Star Tracker Build: the 100:1 reduction Harmonic Drive gearhead arrived today, and I'm planning out the mechanics for the direct drive train and structure for a case (3D printing a prototype case that will hold everything together tonight). Harmonic drives are the way to go if you're looking for extreme precision, zero backlash, and just plain cool technology: https://www.youtube.com/watch?v=3mWemlMEzFk I will be using the original iOptron CEM25P saddle for testing, and the threaded holes in the harmonic drive line up neatly. Gearhead specs here: http://www.harmonicdrive.net/products/servo-mount-gearheads/harmonic-drive/csf-gh/14/csf-14-100-gh


Posted January 21, 2019
Total Lunar Eclipse 2019
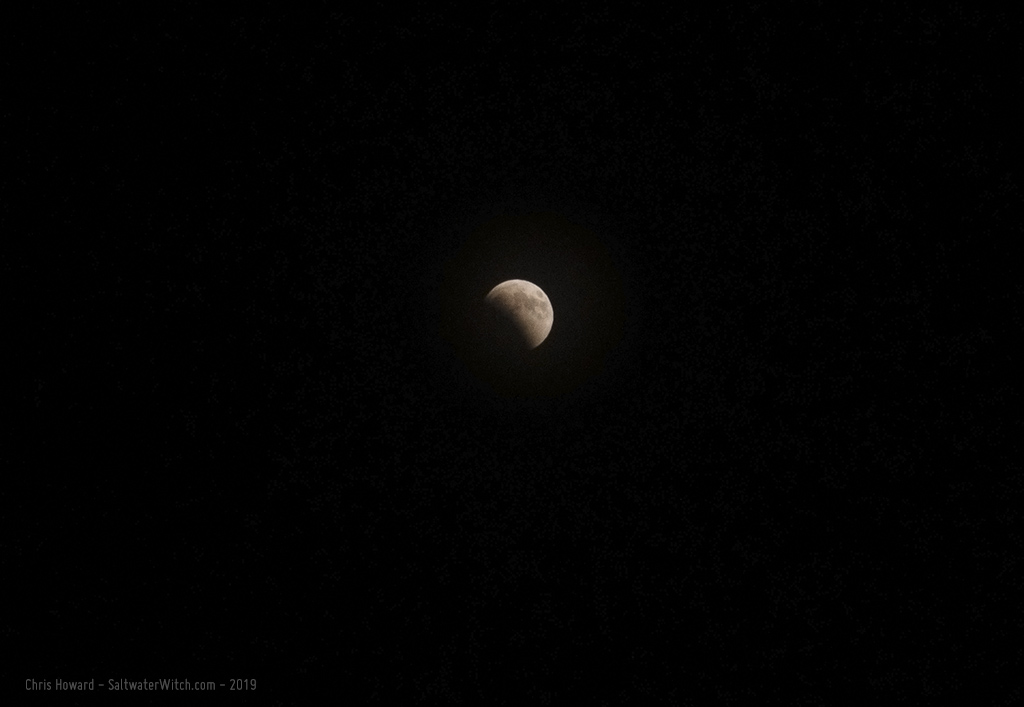
A terrible night for a total lunar eclipse--it's freakin' cold (5°F / -15C) and cloudy, but here's a sequence going into the total.

It's very cloudy out there tonight, but I did manage to capture the lunar eclipse in progress. Not a great shot, but was through the cloud layer.
Posted January 21, 2019
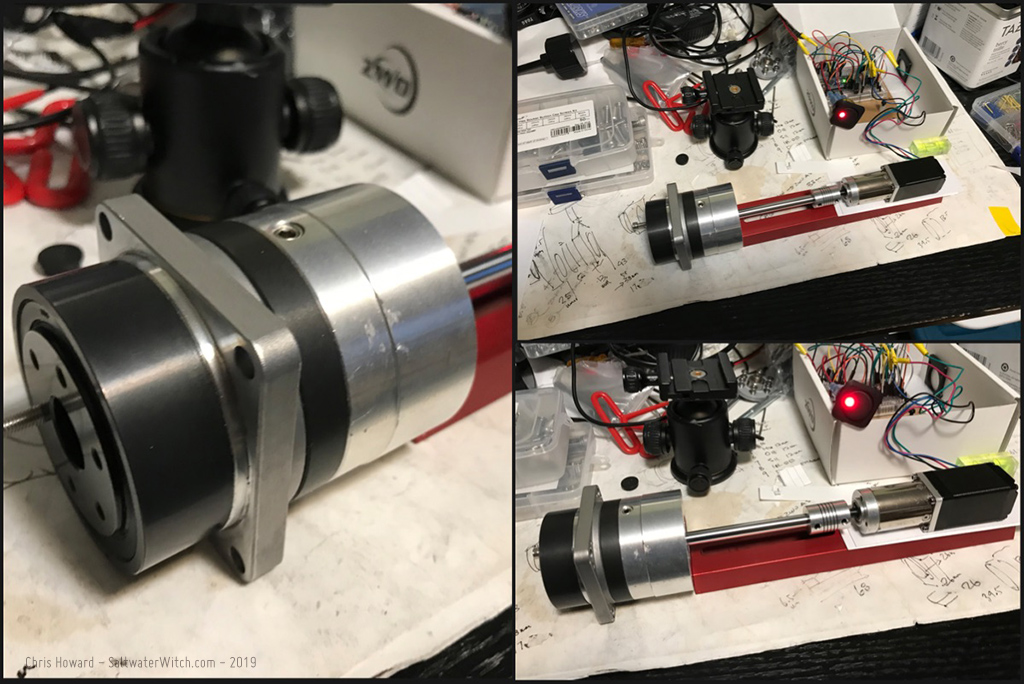
Direct-drive Star Tracker Prototyping
Electronics project for the day: prototyping the drive system for a direct-drive star tracker. This will be driving a 100:1 ratio Harmonic Drive gearhead. For this test I'm using a NEMA 11 stepper motor, also geared down, and a cheap A4988 stepper driver, but I will be experimenting with others.
![]()
Posted January 14, 2019
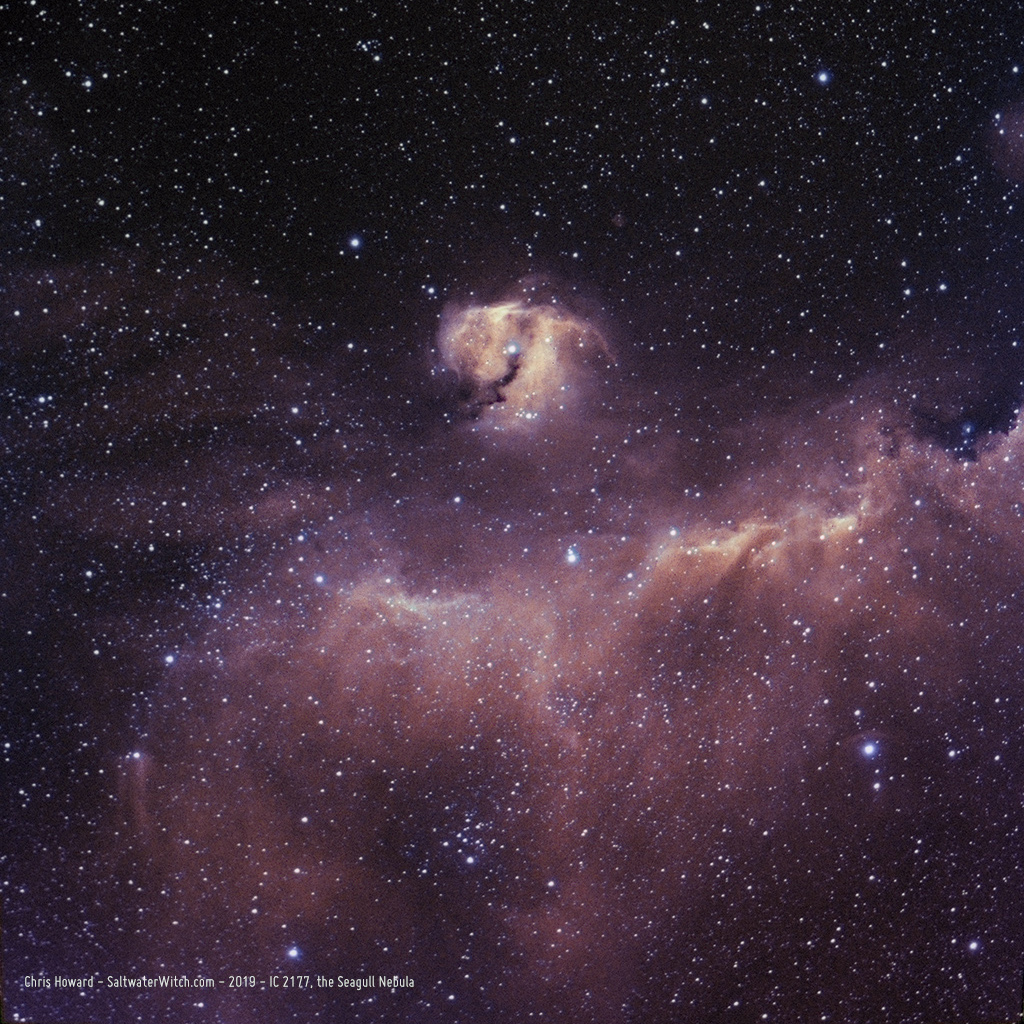
NGC 2327 "Parrot Nebula" and IC 2177 "Seagull Nebula"
The dust and hydrogen gas of NGC 2327 "Parrot Nebula" and IC 2177 "Seagull Nebula" span 100 lightyears between the constellations Monoceros and Canis Majoris. This is another one from last night (New Years Day). After shooting the Flaming Star Nebula for several hours, I dropped down to IC 2177 for the remaining clear skies (up to around 1am). Neither of these targets are strong--or have anything showing up--in the oxygen bandpass. I ended up cutting the OIII frames and going with bi-color Ha and SII. Exposures: 28 x 300 seconds of Ha, 26 x 360 seconds of SII. Equipment: William Optics GT81 APO refractor, ZWO ASI1600MM-Pro monochrome 16MP camera (unity gain 139/21), Astronomik filters, iOptron CEM25P mount, INDI/Ekos/KStars running in Stellarmate/Raspberry Pi 3b+
Posted January 2, 2019
First astro session of the year!
The star at the core of this nebula is the "Flaming Star", AE Aurigae, in the constellation Auriga (The Charioteer), and all the surrounding dust and clouds of hydrogen is called the Flaming Star Nebula (IC 405). This emission nebula is around 1500 lightyears away and it's fairly large, about 5 lightyears across (roughly 47 trillion kilometers or 30 trillion miles across).
What's interesting is that even though AE Auriga is lighting up the nebula, it was not formed there, but rather is a "runaway star" that was probably ejected several million years ago from the star formation furnace in the core of the Orion Nebula. The star is moving quickly through the nebula, producing a violent bow shock with a wave of high energy electromagnetic radiation.
Frames: 23 x 300 seconds of Ha, 5 x 300 seconds of OIII (I was not picking up oxygen at all!), and 20 x 360 seconds of SII. Equipment: William Optics GT81 APO refractor, ZWO ASI1600MM-Pro monochrome camera (unity gain 139/21), Astronomik filters, iOptron CEM25P mount, INDI/Ekos/KStars running in Stellarmate/Raspberry Pi 3b+.

Posted January 2, 2019
Astro-imaging Highlights 2018
I put together a batch of images from my astrophotography sessions over the last year. This isn't in order, because a wanted a nice mix of color, narrowband, hydrogen-alpha only, wide-field, moon shots, along with some of my astro gear setups for some of these sessions.
Posted December 30, 2018
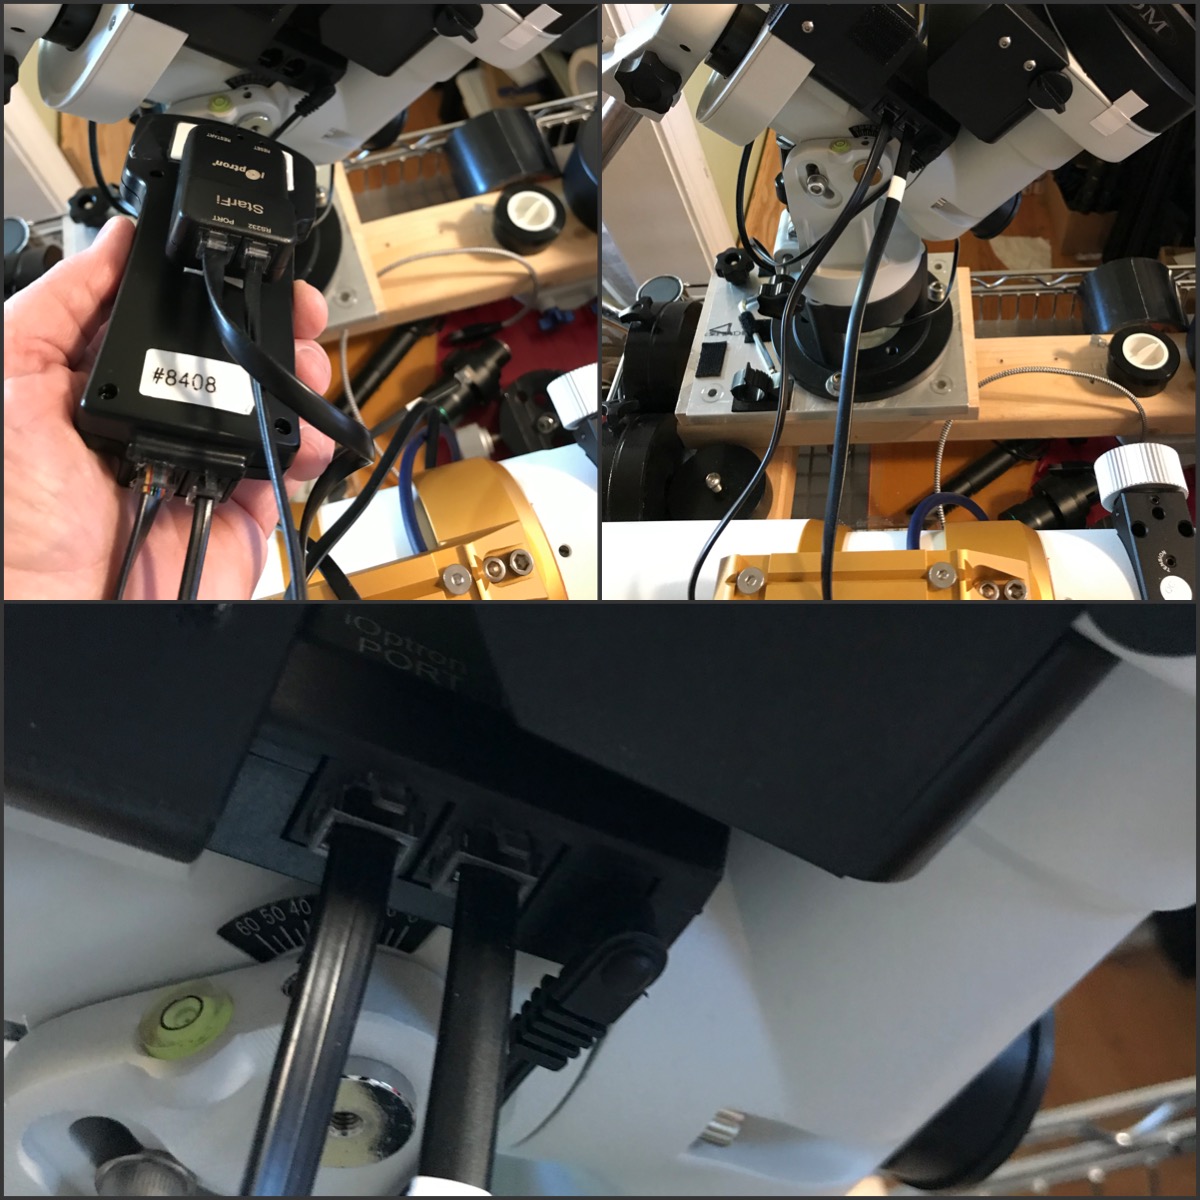
Connecting the iOptron StarFi adapter
My purpose was to avoid running another USB cable from the iOptron hand controller to the Raspberry Pi3B+, using iOptron's Wifi-to-serial adapter, "StarFi". Here's the basic setup: you plug in the hand controller normally. The adapter comes with two short cables with RJ jacks. The four lead RJ11 cable goes from the RS232 port on the StarFi to the serial port on the hand controller, and the 6 lead RJ-12 runs from the StarFi "Port" to the "iOptron Port" on the CEM25P mount. The instructions guide your through adding the device to your network and using it with ASCOM. I had no problem setting it up with Ekos/INDI, using an IP address instead of a serial port.