Testing my portable narrowband astro setup
In the field--well, not really, but I was a little under a 100 miles away in western Massachusetts testing out the portable narrowband setup with my William Optics GT81 APO refractor, Moonlite automated focuser, ZWO ASI1600MM-Pro Mono camera, iOptron CEM25P mount. It snowed and was cloudy the rest of the time, but I did have a chance to really test out the setup away from the house, and it all worked beautifully. Unfortunately I also forgot to take my Macbook Pro, but ended up running everything from my iPhone using Jump Desktop to remote into the astro system. The weather didn't cooperate, but so what? We had such a fun time down at Lisa and Neil's place this weekend, and just to prove there was at least a little astronomy stuff going on, here's a pic of my setup running in the library.
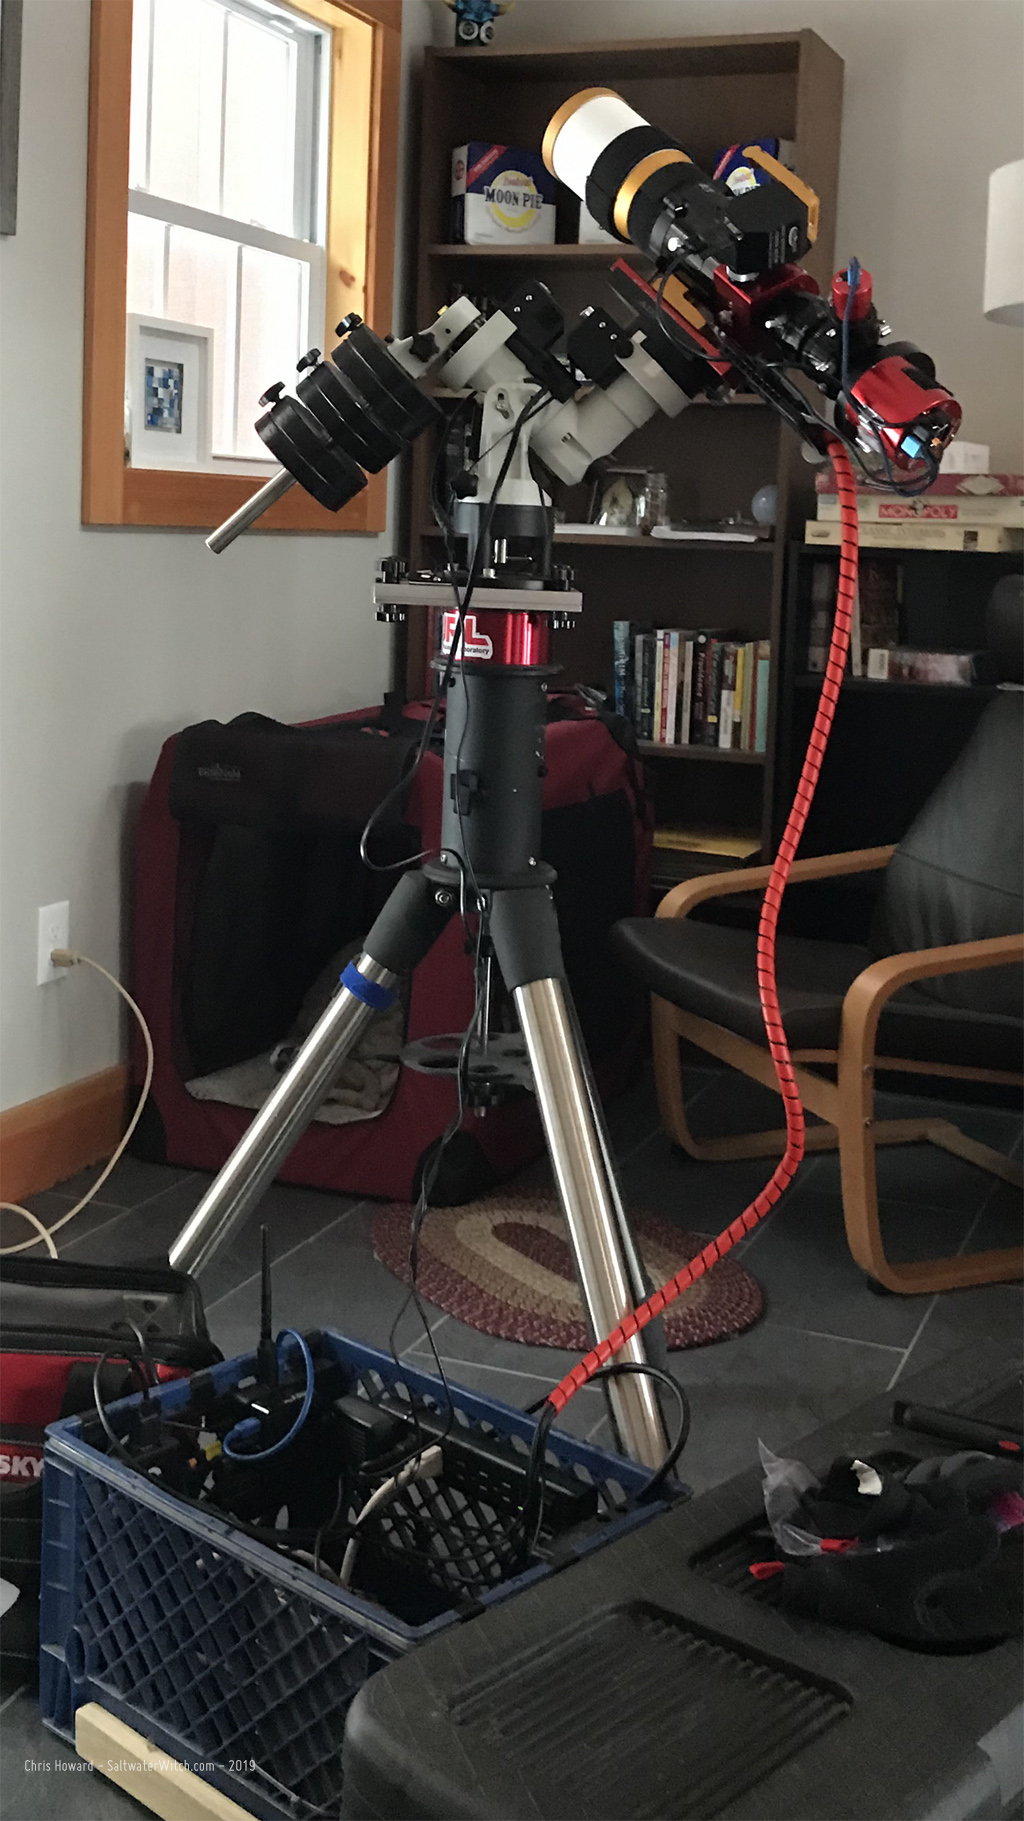
Posted March 3, 2019
Astro Setup - Feb 19, 2019
Tonight's setup: William Optics GT81, Moonlite Focuser, ZWO ASI1600MM-Pro, ASI 120MM. This is my narrowband setup, and tonight it's all about the focuser.

Posted February 19, 2019
Astro Tracker Build - Prototype and Rotation Speed Testing
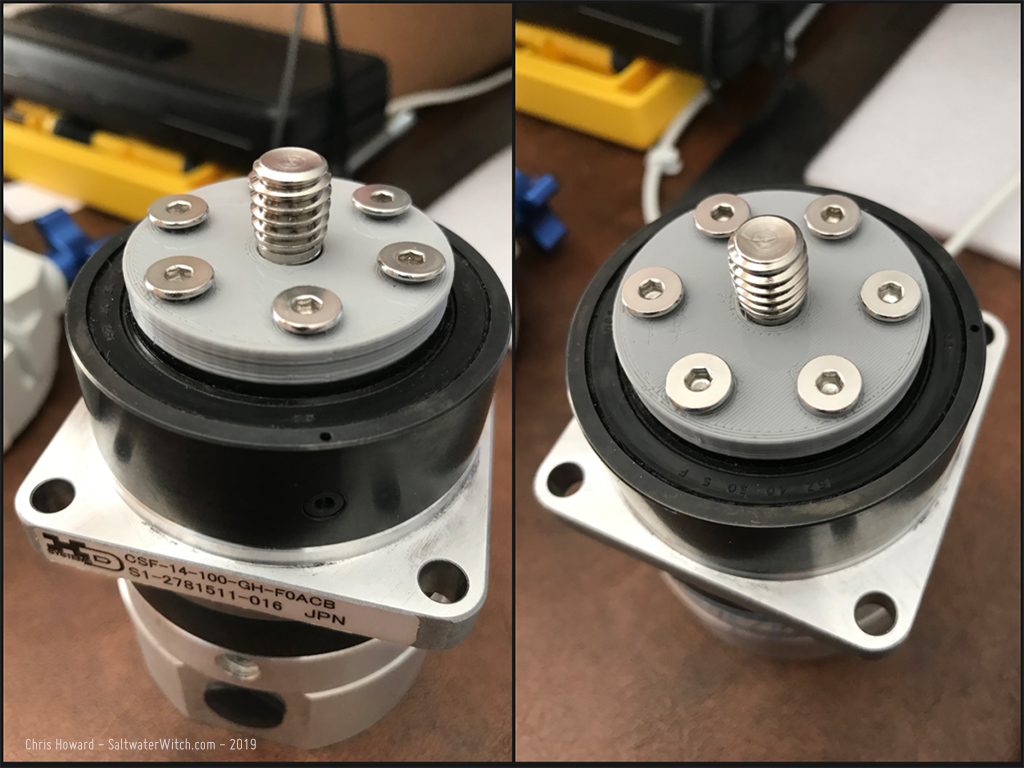
Our beautiful planet rotates on its axis once every 23.93447 hours (23 hours, 56 minutes, 4.091 seconds). This is one sidereal day--sidereal time is based on the earth's rate of rotation measured relative to the stars that are--for the most part--fixed in position. Here we go: 23.93447 hours = 86164.091 seconds. So, we need to do a 360 degree rotation of the right ascension motor shaft in 86164.091 seconds to match the earth's rotation speed. Sounds simple enough. Backing into the time/revolution (360 deg) before the 100:1 gearhead ratio, we have: 86164.091 / 100 = 861.64091 seconds, or 14.3606 minutes / 360 degrees, which is close to what I'm getting for a full rotation with my current test system: NEMA 11 stepper + 100:1 planetary gearhead and A4988 stepper driver running with 1/16 microstepping. I'm probably going to build the second prototype with a NEMA 17 + 139:1 planetary gearhead, but still waiting on that to arrive. And I will most likely continue to run with 1/16 microsteps. The downside is microstepping significantly reduces torque--I'm sacrificing torque for slower, smoother steps, but I'm thinking I will make up some of this with the 100:1 harmonic drive gearhead (CSF-14-100-GH-F0ACB). The idea is to get the motor with the planetary gearbox to do one rotation in a little over 14 minutes, and then by adding the harmonic drive I'll multiply the rotation time by 100, and we should end up around 86164.091 seconds, or one sidereal day. I think that sounds right? (Also, don't forget the direction is reversed with the harmonic drive--clockwise rotation of the wave generator results in the flexspline moving counterclockwise).
The shot below has my attached 3D printed adapter for a camera mount. Once I test the rotation speed adequately, I will try out some long exposures with the Nikon.
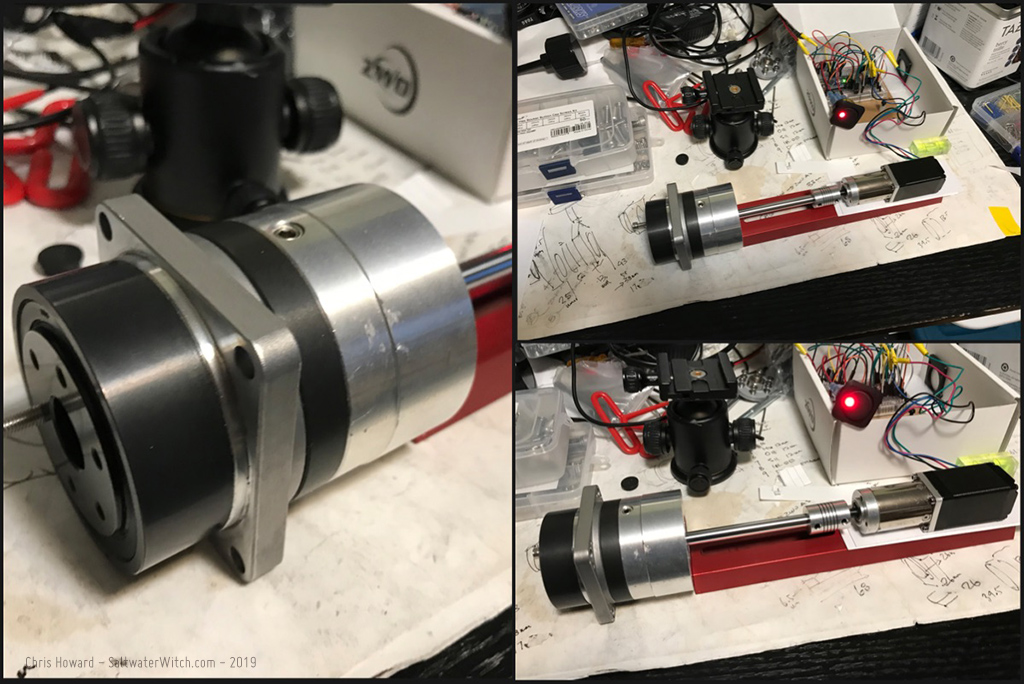
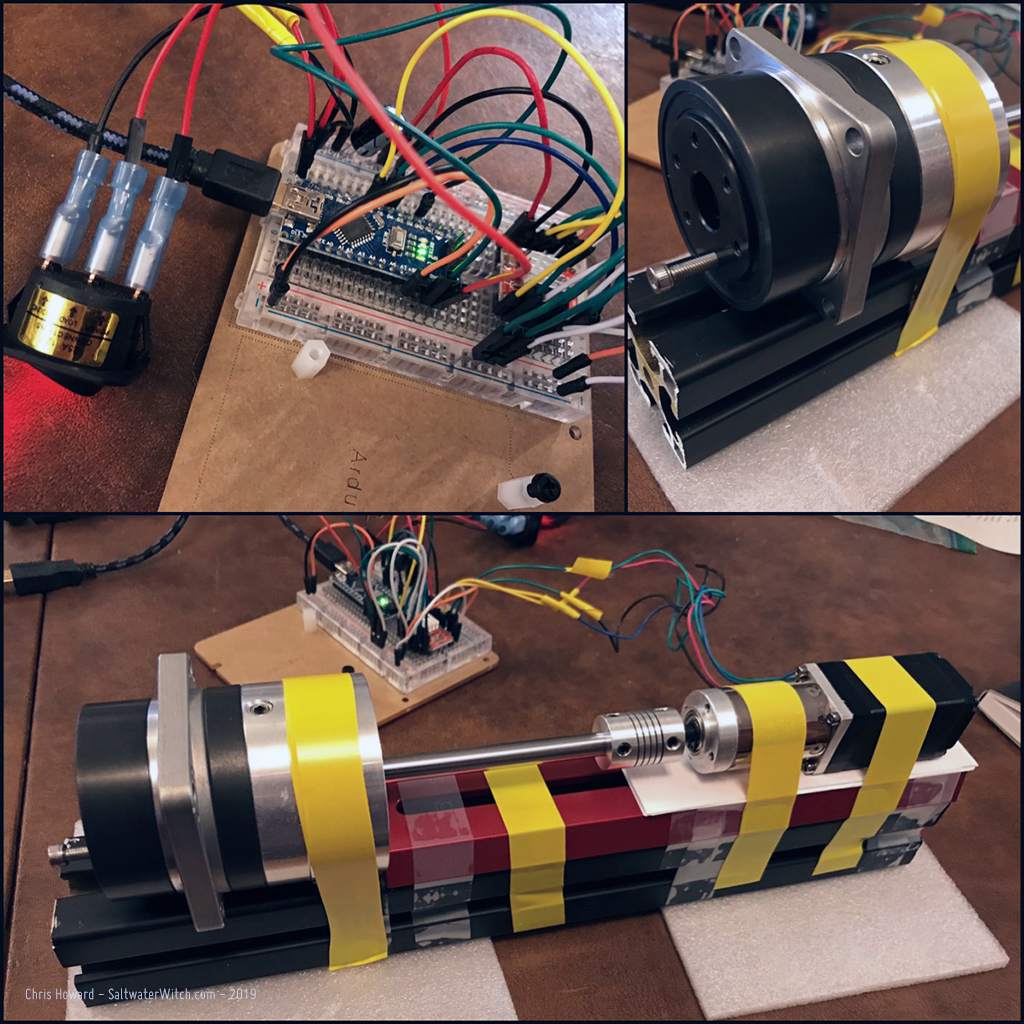
Here's the latest component and wiring setup, driven by an Arduino Nano and A4988 Stepper Driver, with the whole thing running off a single 12vdc power supply. The bottom frame is the entire rotation test taped together and functional.
Posted January 23, 2019
Direct-drive Star Tracker Prototyping
Electronics project for the day: prototyping the drive system for a direct-drive star tracker. This will be driving a 100:1 ratio Harmonic Drive gearhead. For this test I'm using a NEMA 11 stepper motor, also geared down, and a cheap A4988 stepper driver, but I will be experimenting with others.
![]()
Posted January 14, 2019
Astro Setup
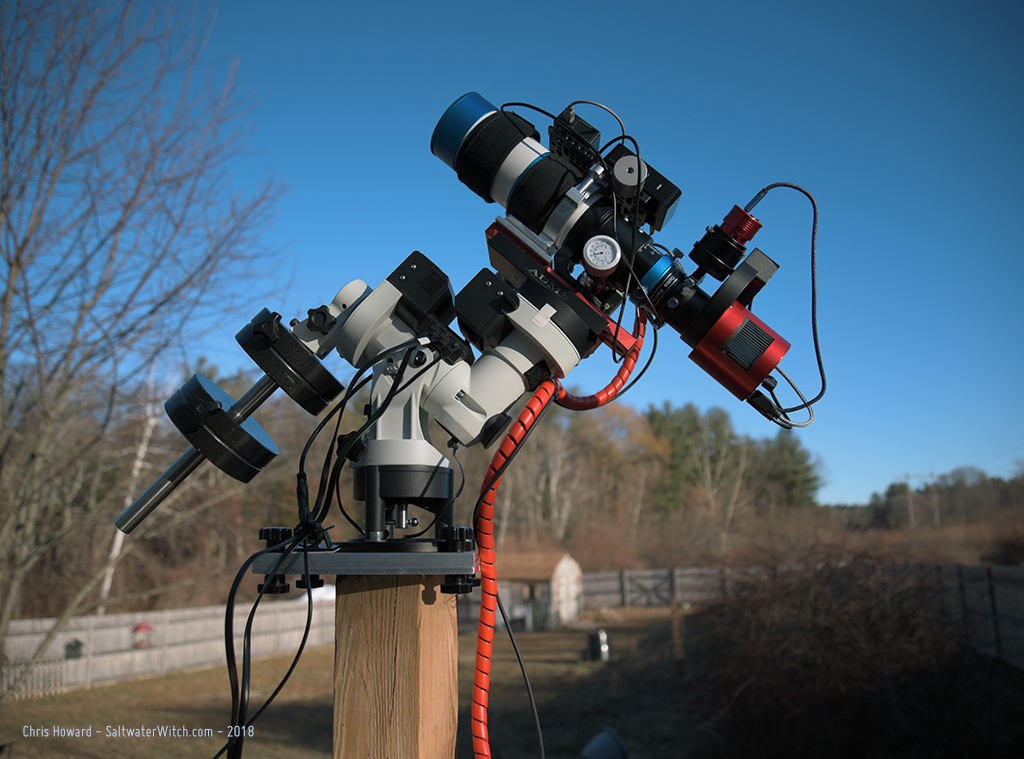
Tonight's setup with the new ZWO ASI1600MM-Pro monochrome camera. Going to test it out with some narrowband targets later.
Posted December 25, 2018
Rainy Weekend Project - December 1, 2018
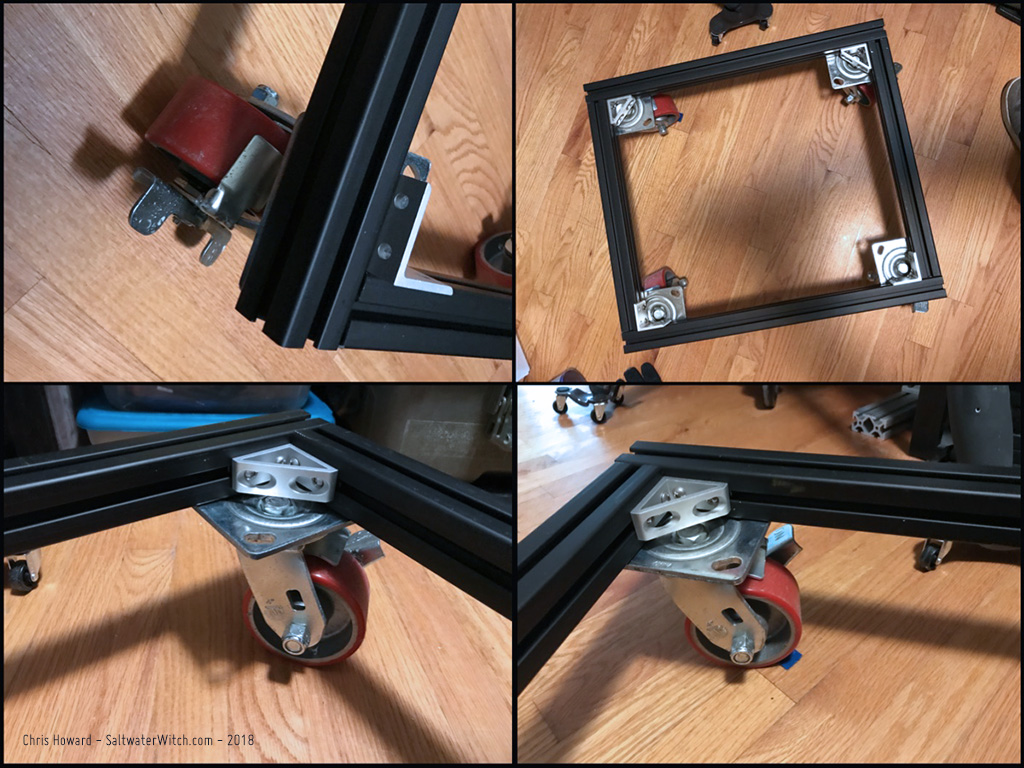
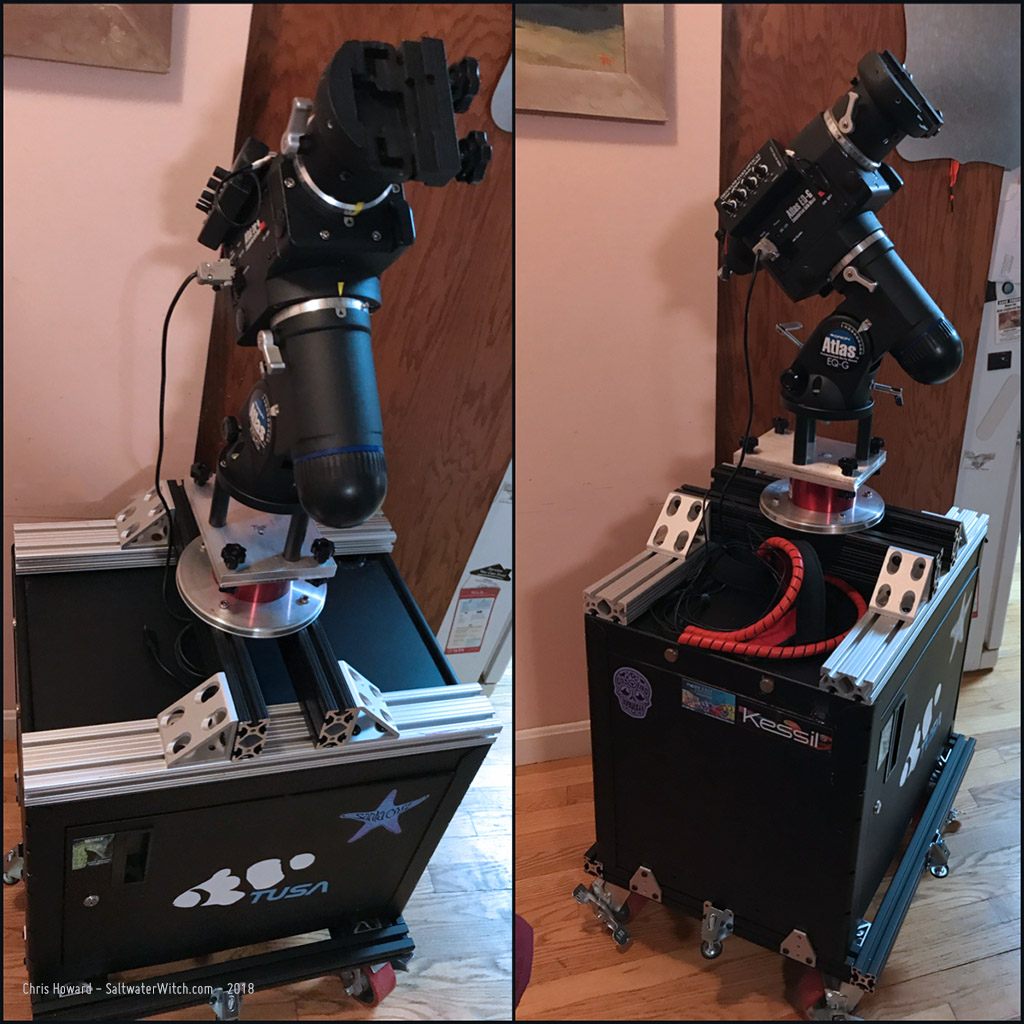
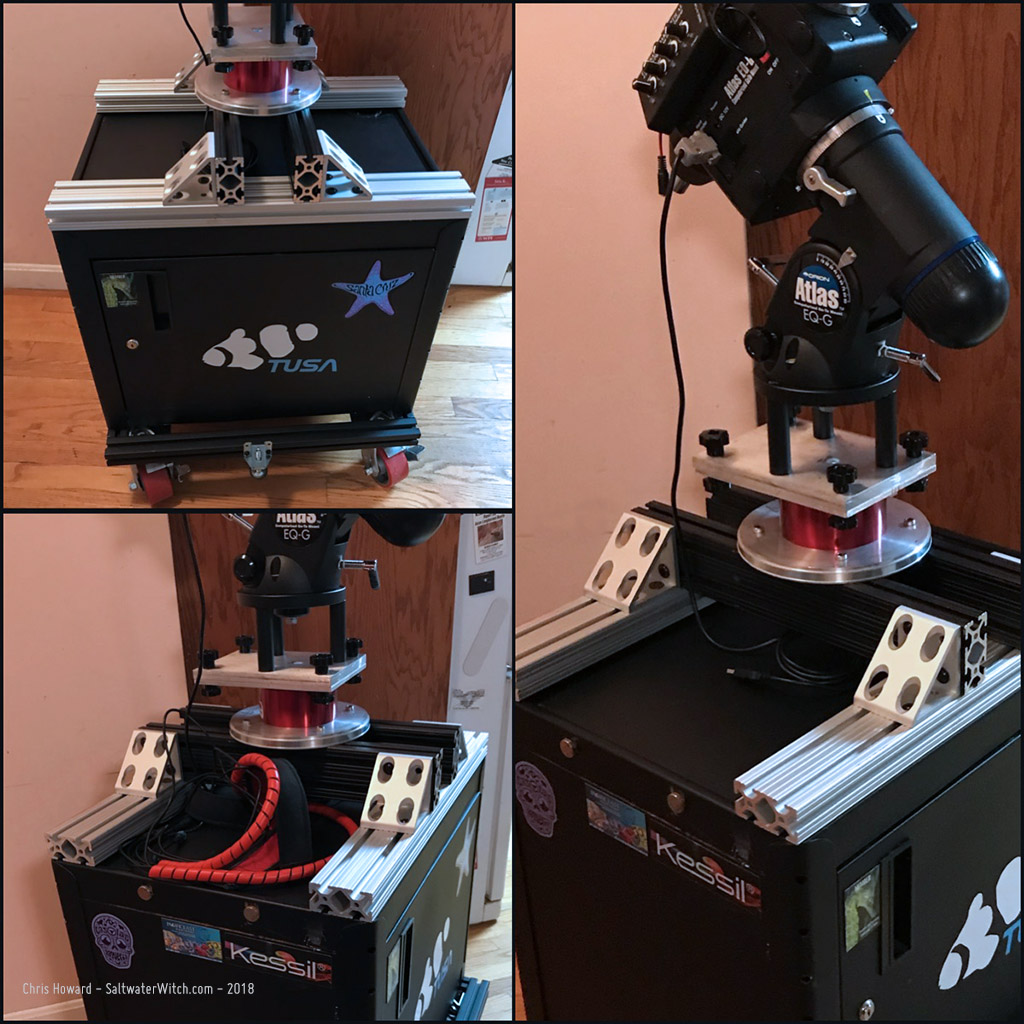
I started this--the top part with the pier made of 80/20 Series 15 T-Slot Aluminum beams and angles--about a year ago, or maybe longer. I never really used it though, because I needed some place level to anchor it. Taking some more t-slot beams I made a base for some super-duty castors and bolted an old steel AV Cart cabinet to it. This has become the base for my next set of astro sessions, where I will be wheeling this out to the driveway, leveling it (threaded leveling adjustments on each side), polar aligning, and then we'll see how the astro imaging goes. I'm looking forward to getting more of the western sky, most of which is blocked by the house when I'm shooting from the backyard.
Posted December 2, 2018
Pier upgrade for my Orion Atlas EQ-G - November 28, 2018
I worked on this over the weekend, but I have been planning it for a while. I now have both my mounts--Orion Atlas EQ-G and iOptron CEM25P on identical aluminum mounting plates, drilled to match the base plates on my backyard pier and my tripod. I'm using the iOptron Tri-Pier Adapter (8036-TK) for this. It comes with the heavy duty aluminum upper plate (connected to the mount), three posts, and stainless steel hex cap bolts. I drilled the aluminum plate with the same four hole pattern I use on the pier and tripod. I drilled and tapped three holes for the adapter. This thing is solid!
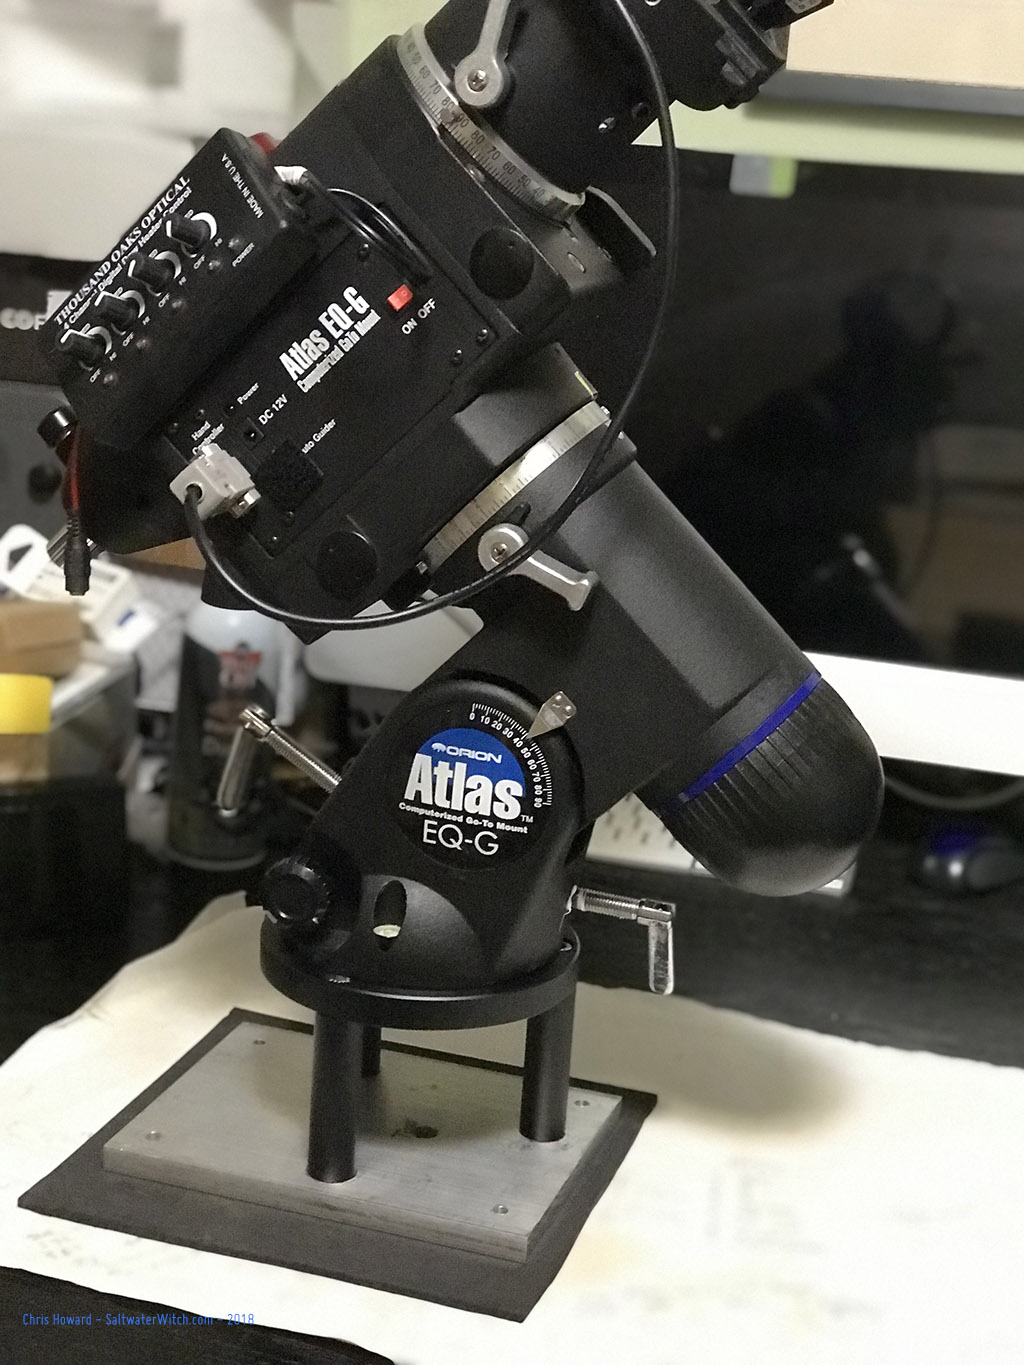
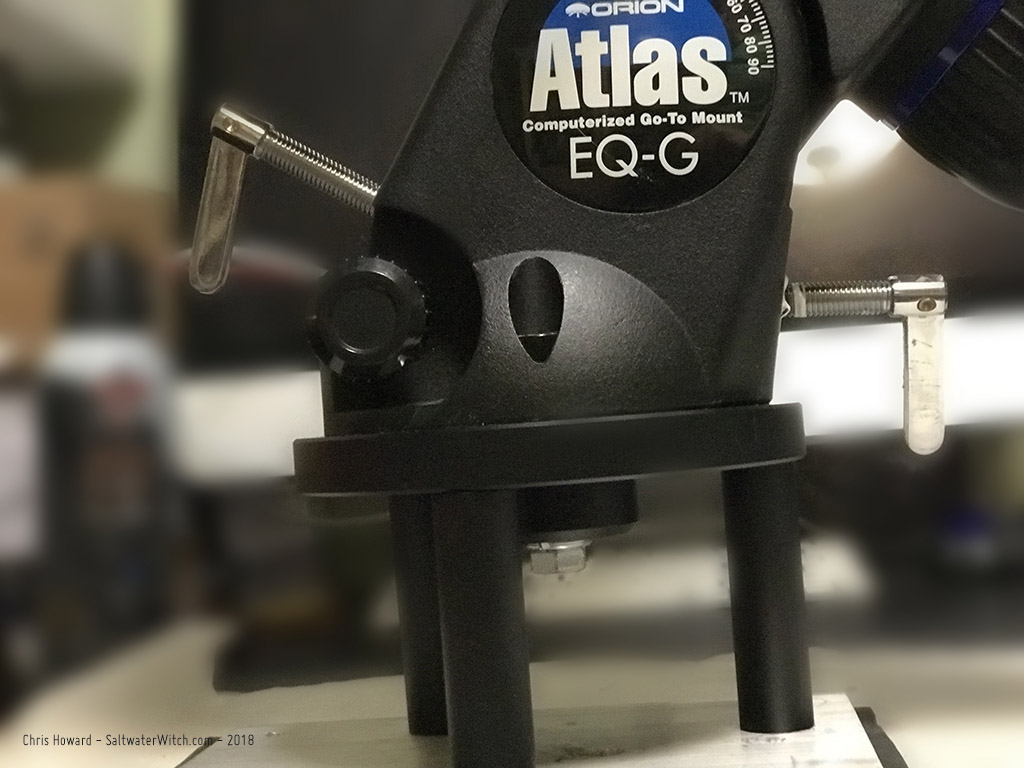
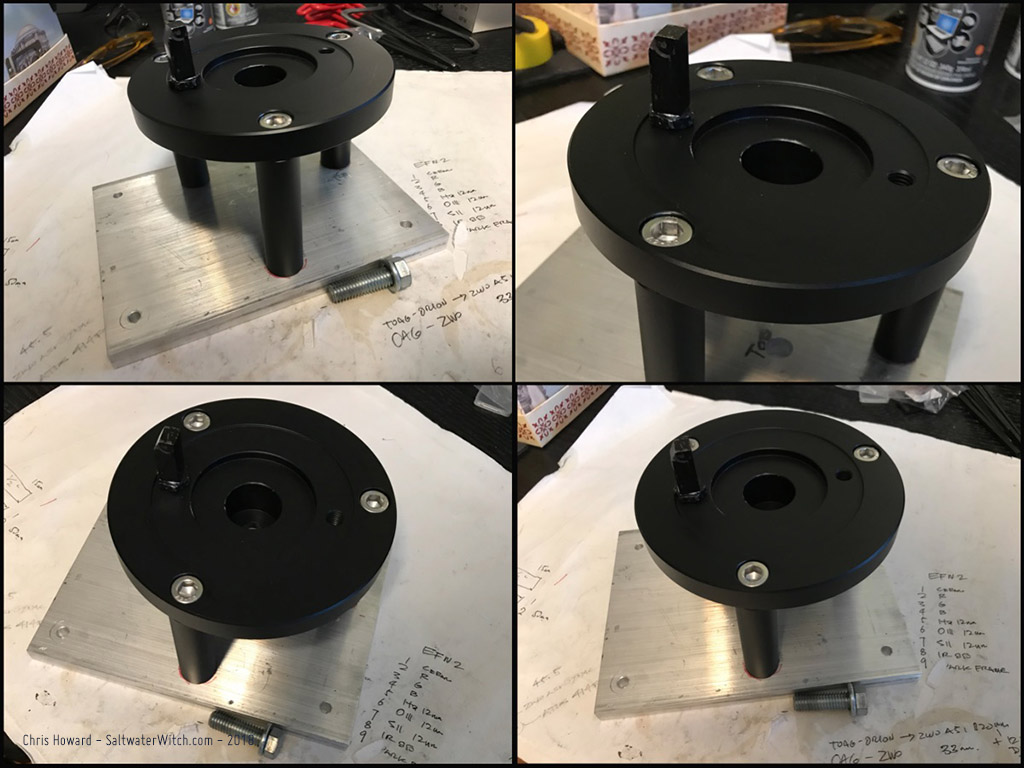
Posted November 28, 2018
iOptron Mods: October 26, 2018
According to several weather sources it's not going to be clear after 8pm tonight, but I set up the William Optics GT81 anyway. Two reasons: I need to test out an adjustment I made in the spacing from the WO FLAT 6AII, to see if it corrects some star elongation at the corners--I added a 3mm M48 spacer just between the flattener/reducer and the off-axis guider. Second, I'm testing out some plans I have with Stellarmate (INDI, Ekos, KStars) on a Rasp Pi 3B+ (faster, with AC wifi). This one will be dedicated to this color imaging rig, with an auto-starting Ekos equipment profile.
I put together a list of modifications and upgrades I have added or built for my IOptron CEM25P mount, and included them in one handy image--with arrows and descriptions (see below). Over the last year this has become my primary telescope mount (over my Orion Atlas EQ-G), partly because I've been doing most of my astro-imaging work with 81 and 61mm aperture refractors (that's a William Optics GT81 in the upper right). The other advantage of the CEM25P is quick setup time. I can have this bolted to the pier plate, polar aligned, and ready to image in about five minutes.


