NINA/ASCOM: Connect your ZWO AM5 Wirelessly
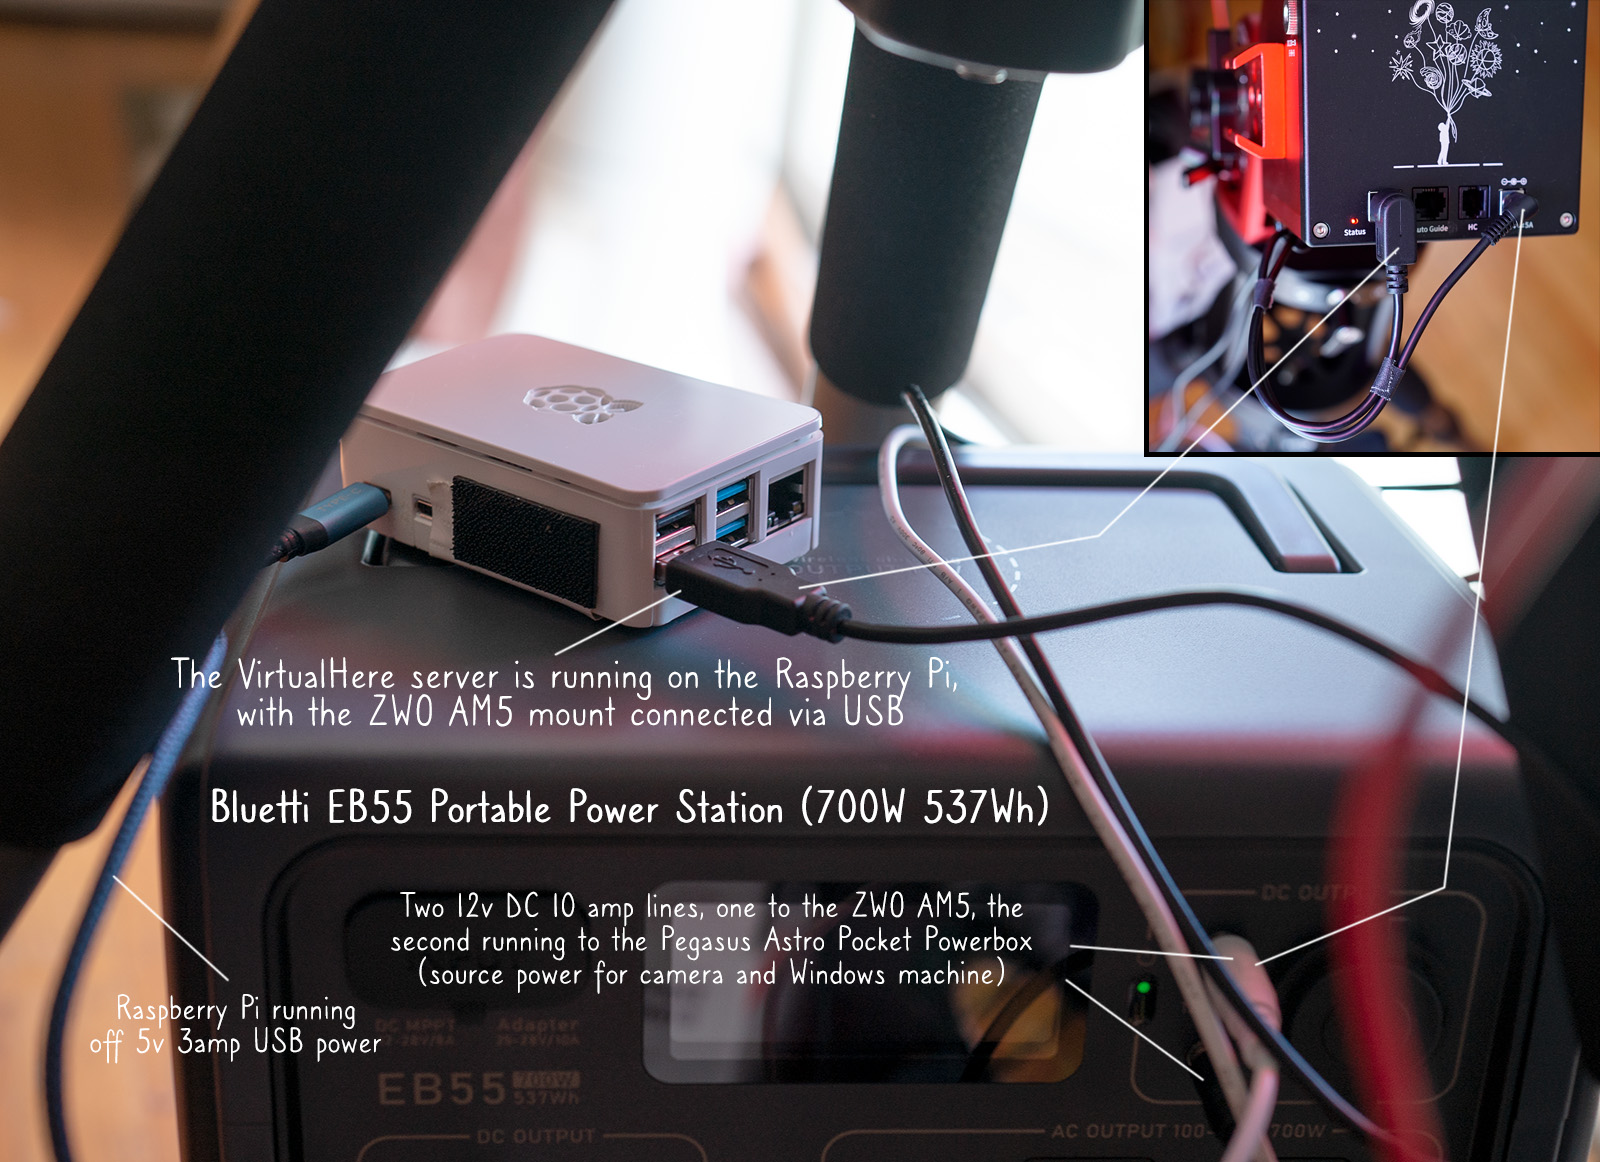
Tonight's test with the ZWO AM5 mount: run a virtual USB server from a Raspberry Pi and connect wirelessly to the AM5 from my Windows machine running NINA/ASCOM. The VirtualHere server is running on the Raspberry Pi, with the ZWO AM5 mount connected via USB The VirtualHere Client, running on my Windows astro controller, creates a standard COM port for the connected device (AM5). The ZWO AM5 ASCOM driver connects normally, and everything functions as if the AM5 is plugged directly into the Windows computer.
See my older post on this--connecting the Sky-Watcher EQ6R-Pro: Connecting your astro devices without cables
I'm using a VirtualHere server (https://www.virtualhere.com)
Don at Novaspirit Tech has a great video, walking through the complete setup on the Pi, using Linux on both ends, but it works basically the same with Windows on the client side. (https://youtu.be/I5zA1lU5Tw0). VirtualHere has servers for just about every OS and hardware combination imaginable, and clients for MacOS, Linux, and Windows. Whatever you're running, it's probably supported.
UPDATE: I ran an entire night with this setup and ran into an issue about midway through. The virtual USB port inexplicably closed at about the five-hour mark. I have a licensed version installed, so I don't think this is a trial version limitation. I haven't updated the client or server side since I used this setup with the EQ6R-Pro. I reconnected, and everything ran fine after that, but the last thing any of us wants to introduce into the system is unpredictability, so I will have to dig into the cause before trying again.

Posted August 31, 2022
Bad-weather Build: thin film dew heating strips
I have been thinking about a low-profile method for warming up the main scope and guide scope, and Polyimide film heaters seem like the perfect candidate. They're very thin, adhesive backed, and come in voltages (12v dc) and max output wattage that seem perfect for dew control. These aren't new in astrophotography. I know ZWO uses a Polyimide heating ring dew heater for the front of their cooled cameras, and I am pretty sure Deep Sky Dad uses similar film heating for the built in dew control on the motorized telescope cover and controllable flat panel available for some William Optics, Takahashi, and Askar scopes.
The build for this is relatively simple. I cut up an old stereo + video RCA cord, using the red and white male end audio jacks. I soldered the two leads from the jacks to the two leads from the heater film, covered the splice with shrink tubing, and that's it. I plugged both into the Pegasus Astro Pocket Powerbox to get a sense of where to set the PWM dial for best dew control results. It turned out to be quite a bit lower than expected.
CAUTION: The dew heating range in the Pocket Powerbox is 0 to 255, and I normally run my dew strips somewhere near maximum. You have to be careful with the Polyimide film though, because these generate a lot more heat, maybe enough to damage some scopes. After a couple tests, it seems like a range of 30 to 75 works. The next step is more testing--soon as the night skies clear up!
- RCA Male Jack, two leads stripped and ready to solder https://amzn.com/dp/B081TYCKC6
- Polyimide Film 12V 12W with adhesive back https://amzn.com/dp/B076PD7TXW
- Deep Sky Dad: Automated, flap panel https://shop.deepskydad.com/product/wo-redcat-flap-panel-fp1
- ZWO Anti-dew heater https://astronomy-imaging-camera.com/product/anti-dew-heater

Posted August 21, 2022
Saltwater Witch Micro-Observatory Project

Here’s my situation--and I think this a common one: there is a limited amount of clear night sky--and that’s with or without the moon. I have a limited amount of time to set up all the gear necessary for a night’s imaging run. I don’t have an observatory in my backyard with everything ready to go, mount polar aligned, cameras cooling down, roof or dome rolling back.
But what if I had something like a self-contained, weather-proof box with just enough room to fit an equatorial mount and a scope? Even if it’s not my main mount and scope, wouldn’t it be nice to have an astro setup ready to go at any time--ready for the next break in the clouds?
That’s where I started with this micro observatory project. My goal is to be able to set up a self-powered astrophotography system that can remain in place through any weather while protecting the equipment, and be operational and ready to image within a few minutes. I don’t need it to be fully automated for now. This is a fairly complicated setup, and so I’m going to take this in steps. The main missing piece of automation is raising and lowering the lid. Of course, all the astro gear is automated, except for a motorized cap, which won’t be necessary without the ability to remotely open and close the lid.
This is what I’m shooting for:
- Weather looks clear enough to imaging.
- Select a target or two for the night.
- Walk out to the micro observatory and unlatch the lid, set it aside, take off the telescope cap, power up everything, move mount from parked position (horizontal) to a home position, weights down and pointed at the NCP. Walk back the house.
- Remote into the astro controller (i5 Windows 10 machine) and load an existing sequence or create a new one for the selected targets.
- Ready to run!
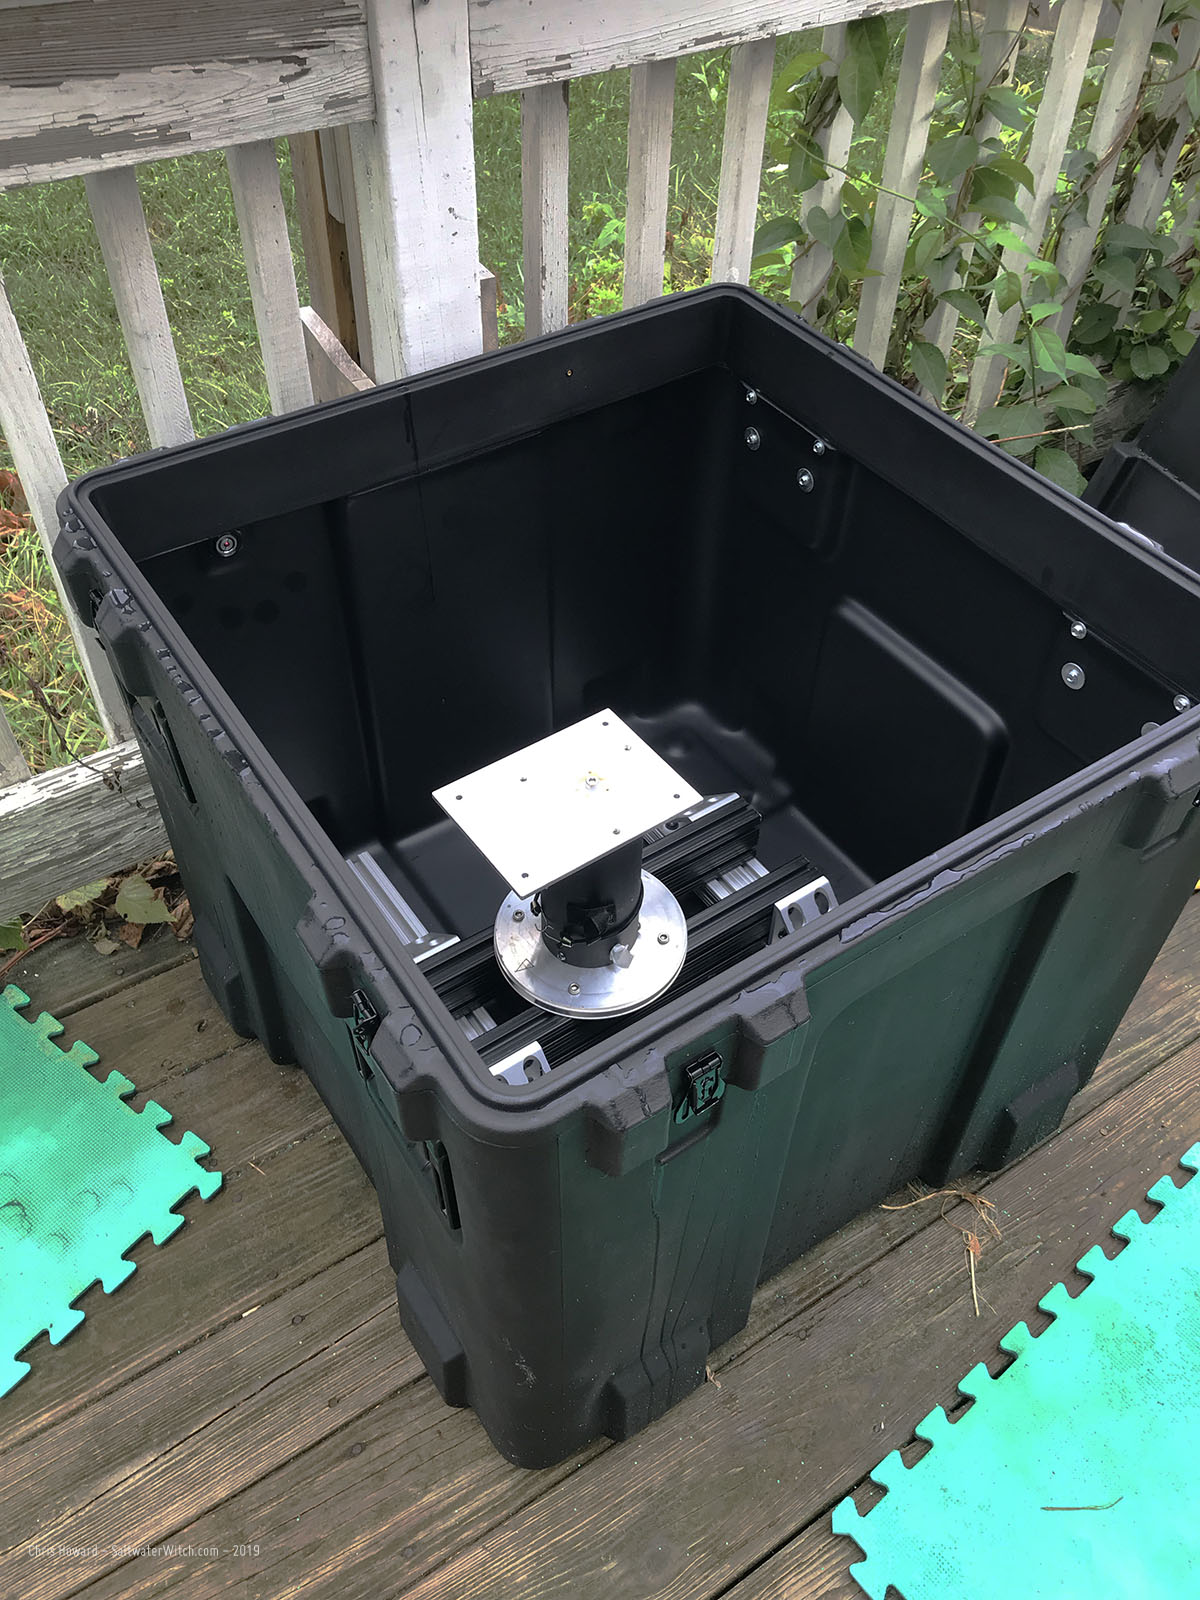
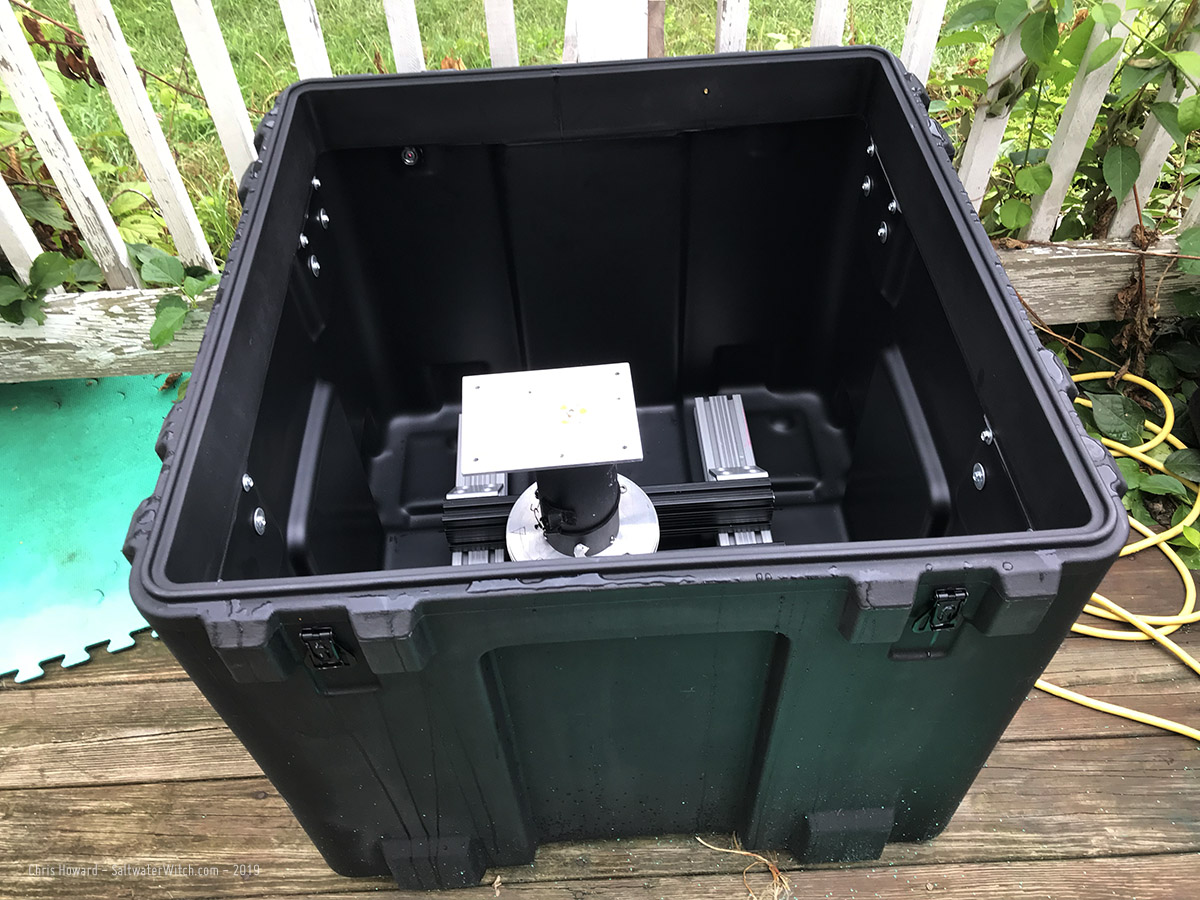
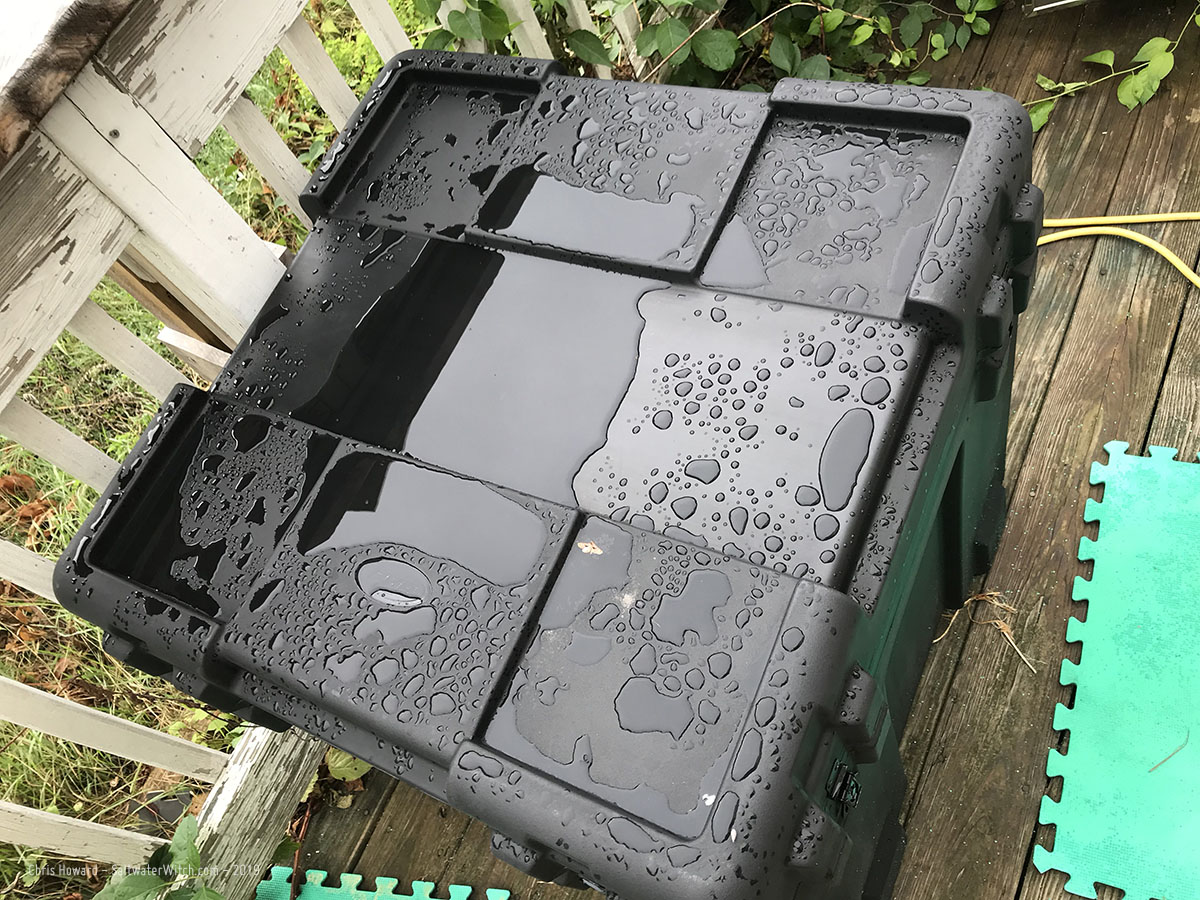
I started testing this idea a couple years ago with wood frames, and even did some research on wood shipping crates. I settled on this giant water-tight SKB plastic molded shipping container with 27”/68.5cm interior dimensions--it’s a cube. It's made from really sturdy impact resistant and UV stabilized polyethylene (LLDPE), with stainless steel latching hardware. The stock hinges and straps didn’t work for my purpose--I’ve drilled off the hinges.
 Here’s the SKB shipping case I’m using:
SKB R Series 2727-27 Waterproof Utility Case
https://www.skbcases.com/industrial/products/prod-detail.php?d=s18&id=333
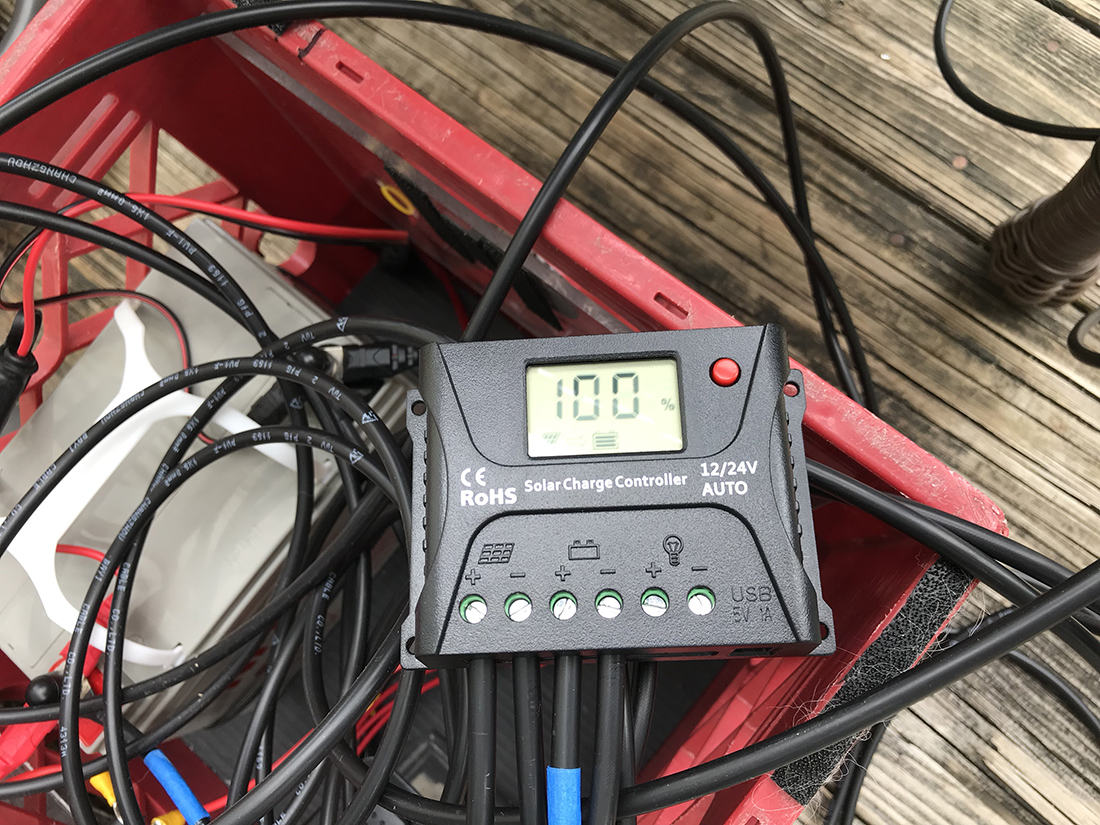
I running some temperature and humidity tests right now--it’s very humid and around 86F/30C --so pretty warm. I also had this box out in the yard, closed up and latched all winter long, and temperatures regularly get down (and sometimes stay down) to well below zero F, around -20C.
So far so good on the temperature--as long as I cover with a reflective cover. My box temp sensor in the box has the humidity well below outside ambient, and the temps are maxing out around 82F/27-28C. That’s warm but destructive, and I wouldn’t be operating the mount at those temps.
Roll the video...
Posted May 29, 2020
William Optics SpaceCat 51 Focuser Experiment 3
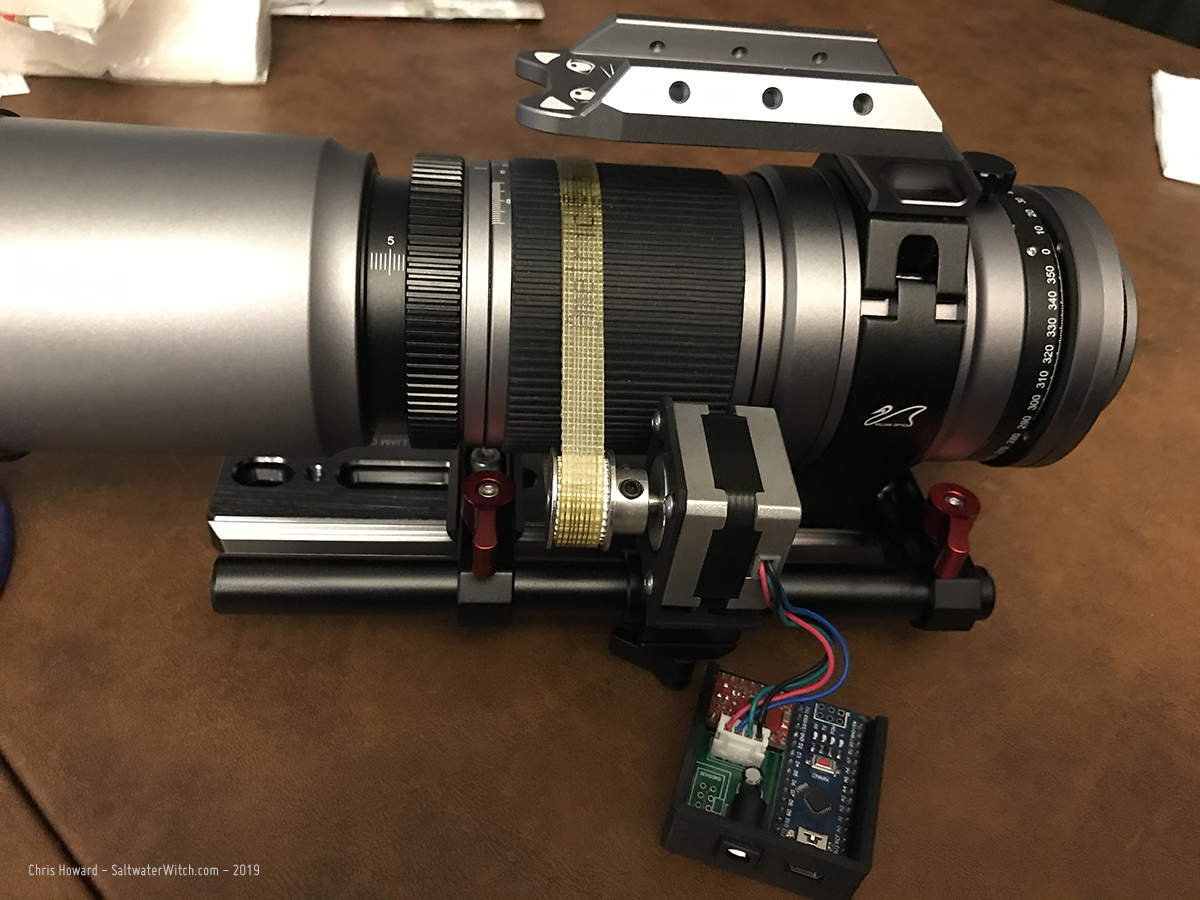
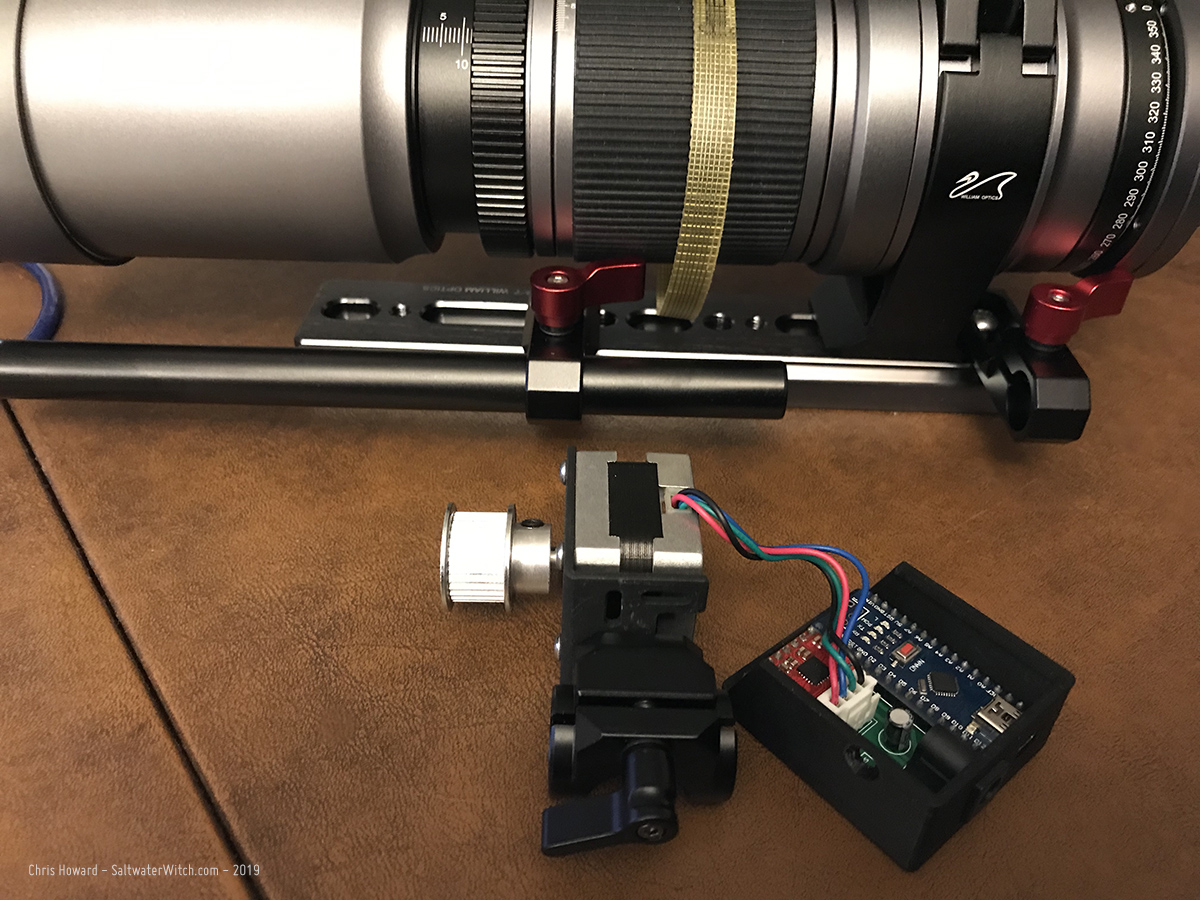
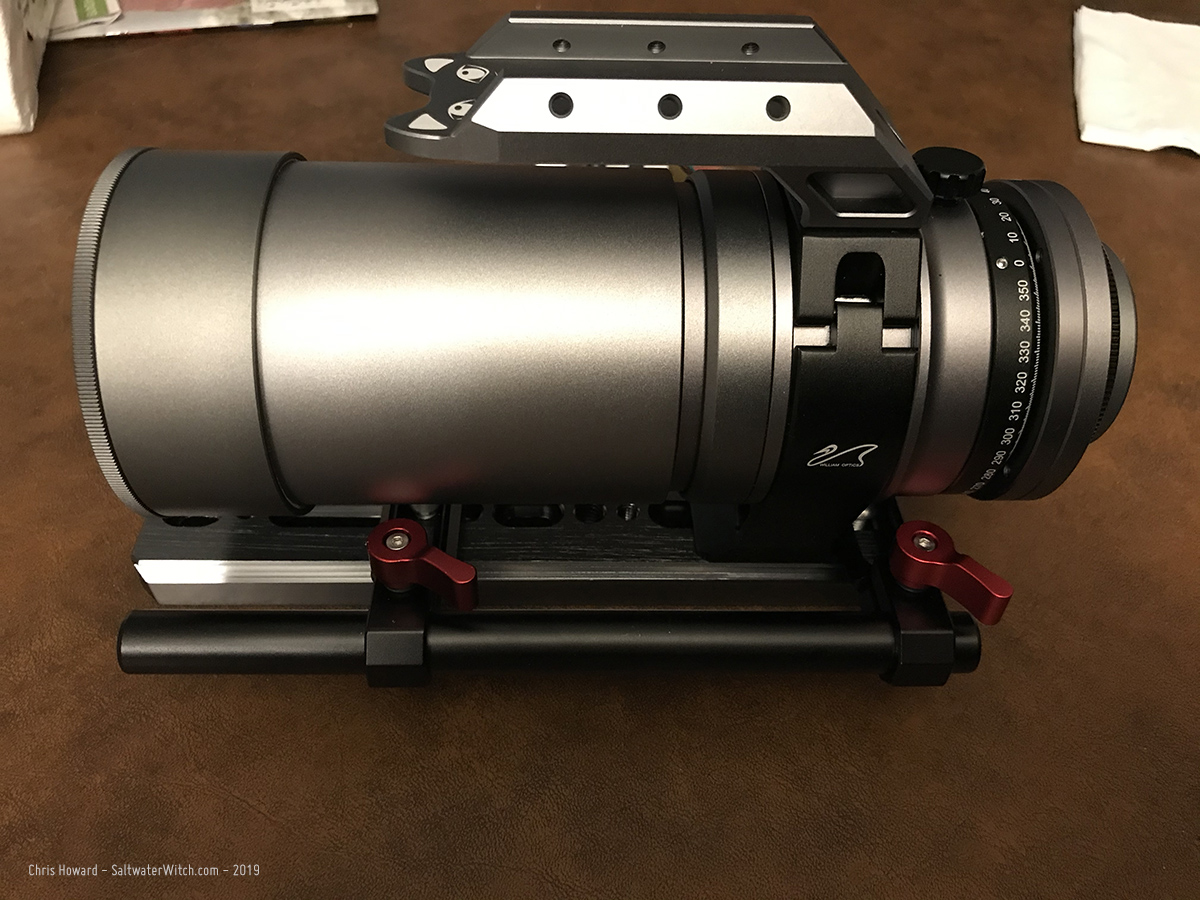
I'm working on a motorized focuser for the SpaceCat / RedCat. I saw that K-Astec is using a timing belt flipped inside out--brilliant. I've also seen DeepSkyDad's version, with the 3D-printed gear ring--very cool. I just ordered a couple test belts with a 2.5 mm pitch to see if that will work with the Cat's focus ring.
Right now I'm using my AF1--dismantled a bit--to test the belt tension and torque.
UPDATE: I was just emailing with Pavle at DeepSkyDad.com, and I ordered their latest AF3s motor/controller combination with the Cat timing belt ring, belt, custom pulley and L bracket. After a few days trying to get the 2.5mm pitch timing belt to work with the Cat's focus ring--with a lot of slipping and different configurations, different step sizes, speeds, etc., I went ahead and got the DSD working set. I'm pretty sure part of the problem is the softness of the Cat's focus ring, so that even with a timing belt with matching pitch it wasn't going to behave like a pulley, just not rigid enough--made for human hands to grip and adjust. I was going to have to go with supplemental gearing, either a reversed timing belt glued-down like K-Astec, or with the 3D printed rigid ring developed by Pavle. https://deepskydad.com/autofocuser/redcat. I went with the standard enclosure instead of the RedCat mount so this should work well with the camera rail.
Posted October 29, 2019
Micro-Observatory Project #1
My goal with my “micro-observatory” project is to be able to set up a self-powered astrophotography system that can remain in place through any weather while protecting the equipment, be operational and ready to image within a couple minutes, and be moveable--if necessary. I don’t need it to be fully automated for now. This is a fairly complicated setup, and so I’m going to take this in steps. The main missing piece of automation is raising and lowering the lid. Of course, all the astro gear is automated, except for a motorized cap, which won’t be necessary without the ability to remotely open and close the lid.
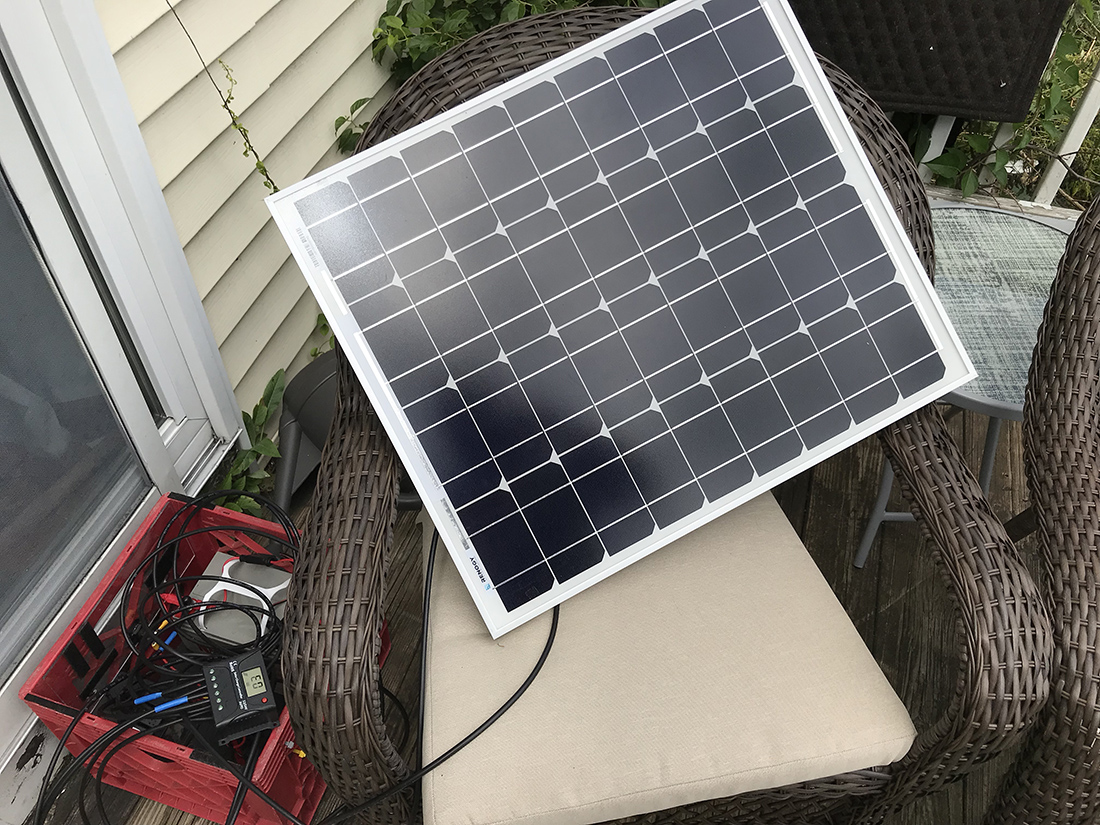
I started testing this idea a couple years ago with wood frames, and even did some research on wood shipping crates. I settled on this plastic molded shipping container with 27”/68.5cm interior dimensions--it’s a cube. So far, this looks like it might work. The stock hardware is crap--I already drilled off the hinges, and I’m looking at 180 degree hinge mechanisms and other options for lifting the lid away with minimal obstruction of the sky (https://youtu.be/6bMMZq0X29E). Whatever I end up with will have to be pretty sturdy because I’ll be mounting a 50 watt solar panel on the lid to keep the batteries charged.
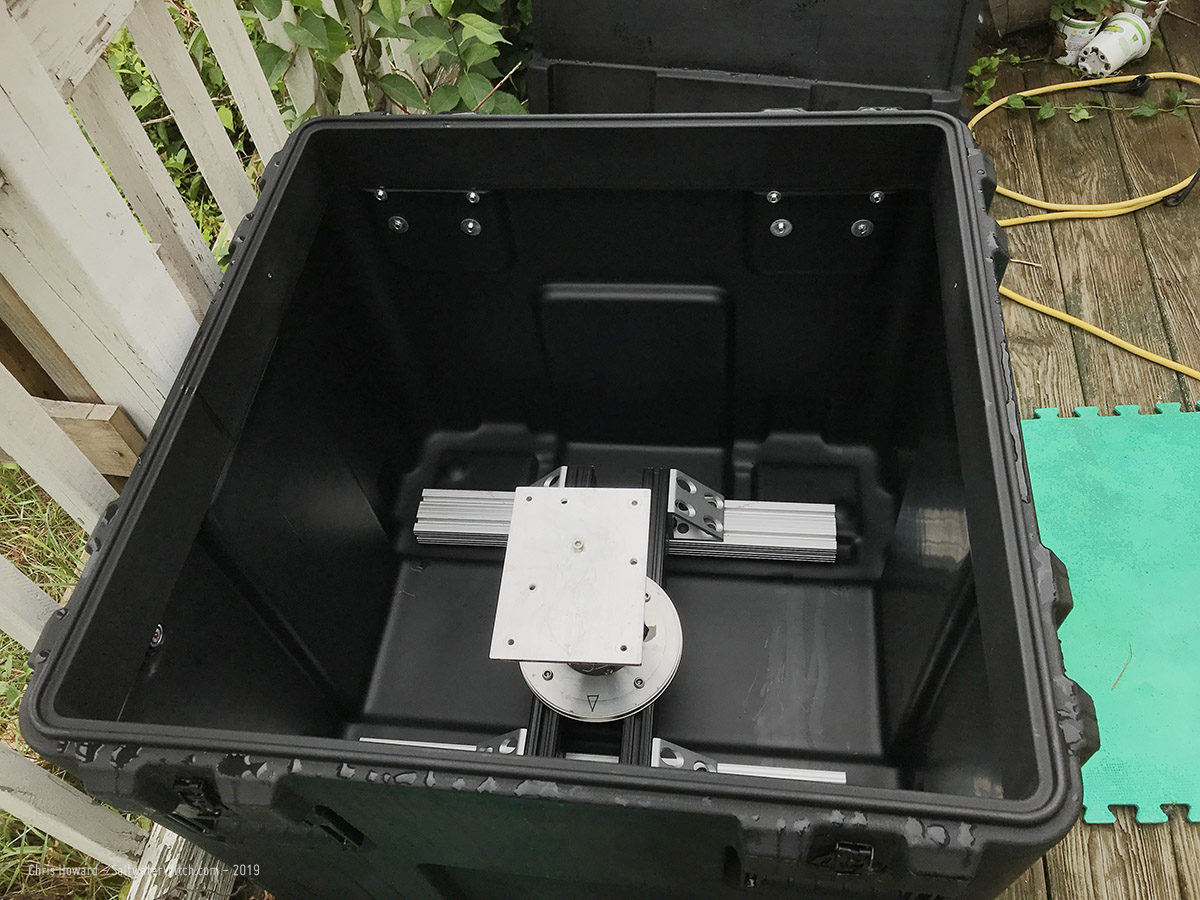
As far as project progress, I’m still at the beginning. I’m testing out different mount/scope configurations for fit--with the scope and counterweights horizontal. I was surprised to find the Orion Atlas EQ-G fit with a small refractor--just barely, and only with west-side travel and no meridian flips. (I had to move the mount and aluminum mounting frame all the way to one side to make this configuration fit). Today I’m trying out the iOptron CEM25P, with the hope that this will fit entirely in the box, centered, and be able to do flips and reach most of the sky.
I’m going to spend a while doing weather and motion testing, anchoring to the ground and monitoring temperature and humidity. It’s water-tight, so I’m not worried about leaks. I just don’t want internal temps or condensation to build up this time of year, or in the winter, to drop below the equipment specs. I haven’t decided what I’ll do for warmth when it’s cold outside. It’s not unusual for the temperature to remain well below freezing for extended periods of time (-6F / -20C is not unusual).
Much to do. I’ll keep you posted!
Posted August 18, 2019
DIY Pegasus Astro Pocket Powerbox (almost)
Tonight I'll be testing out the prototype for my DIY version of the Pegasus Astro Pocket Powerbox--well, a manual operation version. There's no ASCOM or INDI support, but with what I've put together here--12vdc line in, 3 x regulated 12v dc 4 amp out, 2 x PWM-controlled dew control RCA jacks (potentiometer with the silver knob controls output temp). Add an Arduino, a few relays, and a temp sensor and I can build all the powerbox features I use. One reason I'm going down this path (I have a pocket powerbox on my GT81 narrowband setup and I love it) is that the Pegasus Astro version doesn't provide 5v dc output, and I want 5v with up to 4 amps out to power the Raspberry Pi 4 + 4GB RAM I'll be building out later this year, running INDI/Ekos/Kstars or Stellarmate. There's also a big price difference. I threw this together for about 15 USD, and I think I paid $180 for the PPB. I'll let you know how it goes!

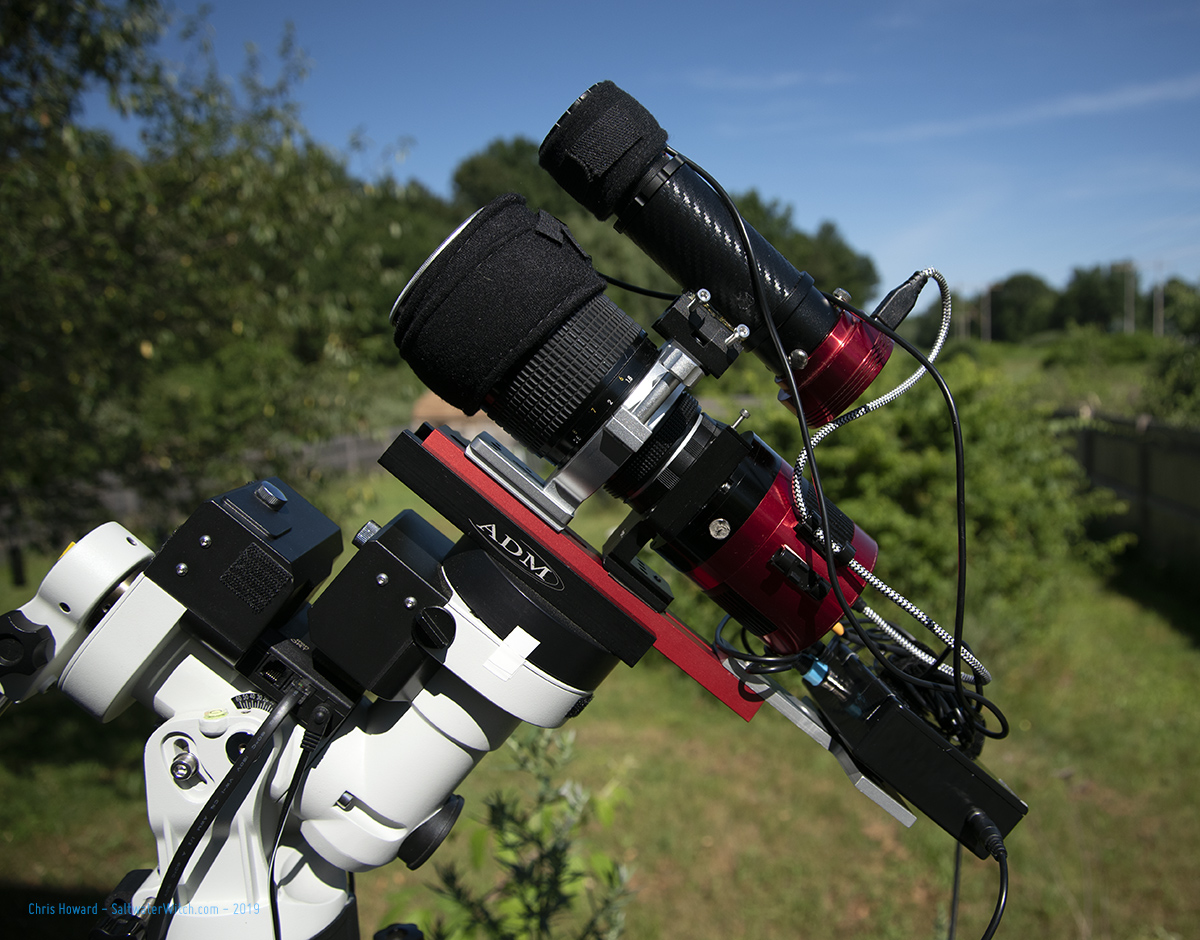
Here's my test setup for tonight--testing the DIY Pocket Powerbox. This is my ZWO ASI071MC with a Nikon 180mm f/2.8 lens, ZWO ASI120MM-S + 130mm guiding, on my trusty old iOptron CEM25P mount. That's my prototype pocket powerbox on the back, behind the main imaging camera. I'm going to be doing some long exposure color shots in Vulpecula--Sh 2-92, NGC 6820.
Posted July 7, 2019
DIY Power for Astrophotography
 The problem I want to solve is supplying 12v dc power to my astro setups away from mains/grid power, for example, a 110v ac line running from the house. I want enough storage to last a full night with everything--even the big power drains like thermo-electric cooling and dew control covered by the system. Of course there are off-the-shelf solutions for this, but I wanted a little more versatility, a system that I can upgrade, add more batteries if needed, and this is much cheaper than the portable power options out there. It's also specific to my needs: a handful of 12vdc devices, with varying current requirements. (I don't need a built-in flash light or an inverter to power AC devices--things that plug into a wall socket).
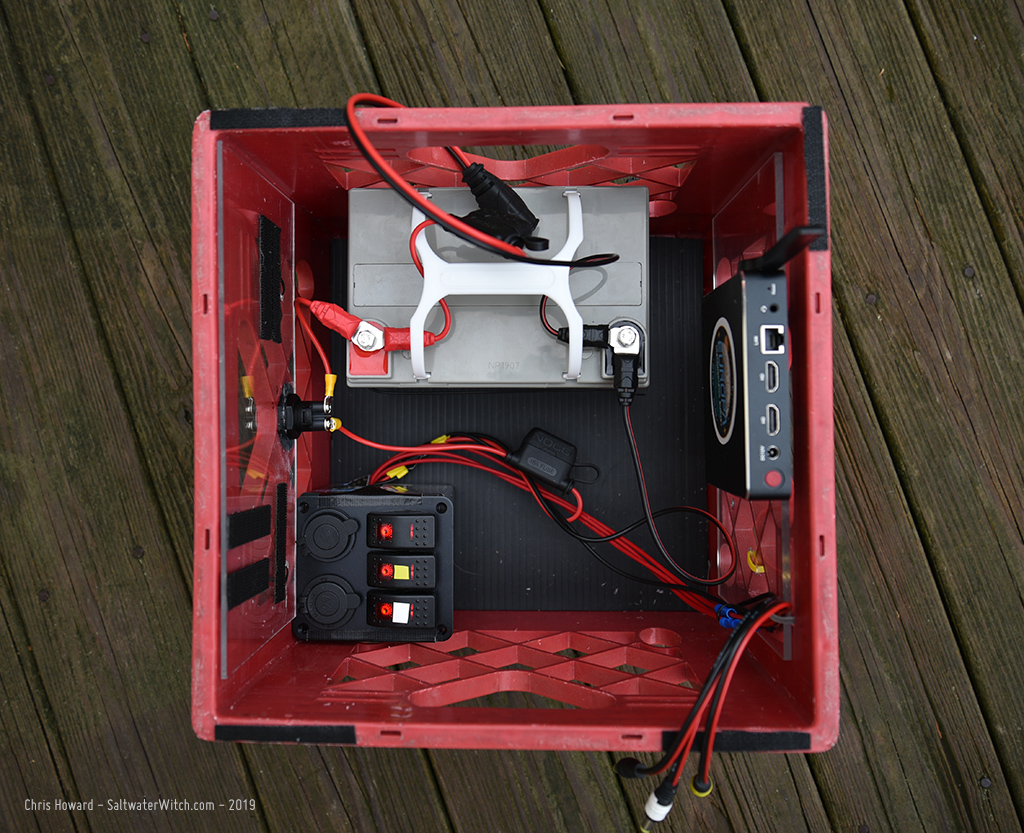
Here's what I've put together and successfully tested so far:
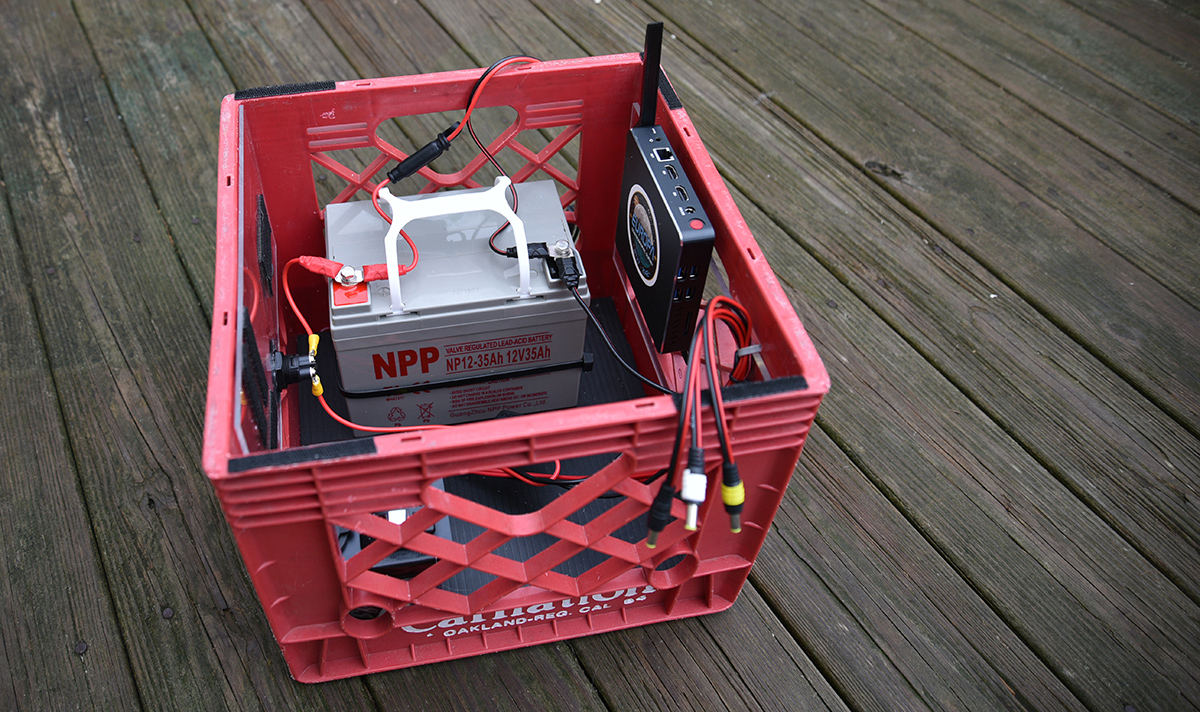
I bought a small deep-cycle 35 amp-hour lead-acid (AGM) battery, which will get me completely through a night of astro-imaging: through evening setup, an entire night's imaging run with a cooled camera (TEC set to -20C) and dew control running the whole time. In my first tests I discovered I would not go any smaller than the 35Ah @12v dc battery, because I ended the night with it pretty close to completely discharged. Keep in mind the charging cycle with AGMs is a gradual process that uses lower power. Absorbent Glass Mat batteries are safer to use, but require a slower, steadier charging cycle.
Everything I purchased for my power box was perfect except I went underpowered on the charger. The NOCO chargers are awesome (https://no.co). I bought the NOCO Genius G1100 (1.1 amp) and I should have gone with with the G3500 (3.5 amp)--for $20 USD more. The G1100 will charge my NPP NP12-35Ah AGM battery from dead to full in 18 hours. Yeah, see the problem? That's not going to work with more than one clear night in a row. The G3500 will charge the battery in less than 6 hours.
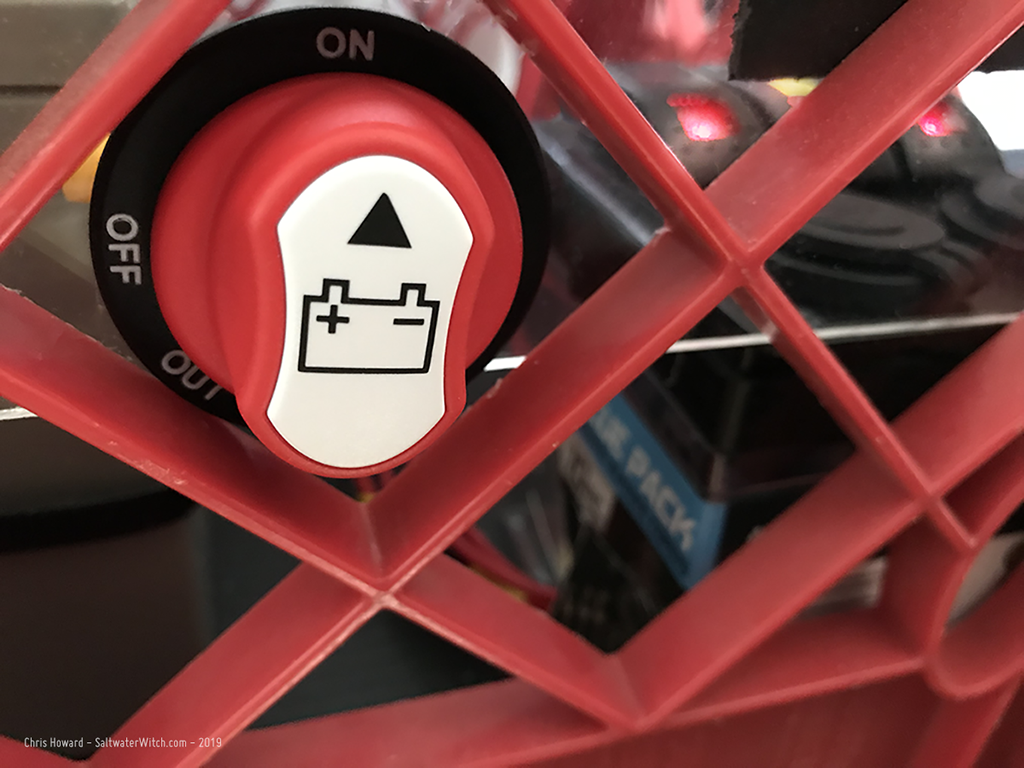 I have everything housed in an old milk crate--an original from the early '80s. But you can buy similar containers today--at Amazon, the Container Store. I attached two pieces of scrap acrylic to two sides. I have my Fanless Windows 10 box secured to one, and I drilled out the other side for my battery power cut-out. I added this so there was no draw on the battery--even minimal. The three switches on the rocker panel are lit when they have power, even when they're off. They have a small LED bar that shows that the switches are functioning, and a brighter red LED when they are powered on. The cut-out also allows me to completely separate the lines running to my gear from the NOCO charging line, if I want to.
Tools: wire cutters, wire stripper, soldering iron + solder, and the crimping tool for the connectors (link below)
NOCO chargers https://no.co
NPP NP12-35Ah Rechargeable AGM Deep Cycle 12V 35Ah Battery with Button Style Terminals
https://www.amazon.com/gp/product/B01LW19AOE
Rocker Switch Panel
https://www.amazon.com/gp/product/B075V4CZLF
NOCO GC018 12V Adapter Plug Socket with Eyelet Terminal
https://www.amazon.com/gp/product/B00G8WLW2Y
NOCO Genius G3500 6V/12V 3.5 Amp Battery Charger and Maintainer
https://www.amazon.com/gp/product/B004LWVEKS
Car Battery Switche MAX 50V DC 50A
https://www.amazon.com/gp/product/B01GDYGQJA
Insulated Wire Electrical Connectors Assortment
https://www.amazon.com/dp/B078PMWNJC
Ratcheting Crimper Tool - for the connectors above
https://www.amazon.com/dp/B01IQIALJC
Primary Wire, 14-Gauge Bulk Spool, 100-Feet, Red & Black
https://www.amazon.com/dp/B016TQKT9K
3 x 6ft 2.1mm x 5.5mm Extension Cable, 18AWG for 12V
https://www.amazon.com/dp/B079P842DK
Power Pigtail Cables, 12V 5A Male and Female Connectors
https://www.amazon.com/dp/B07QH8VNY7
Posted June 16, 2019
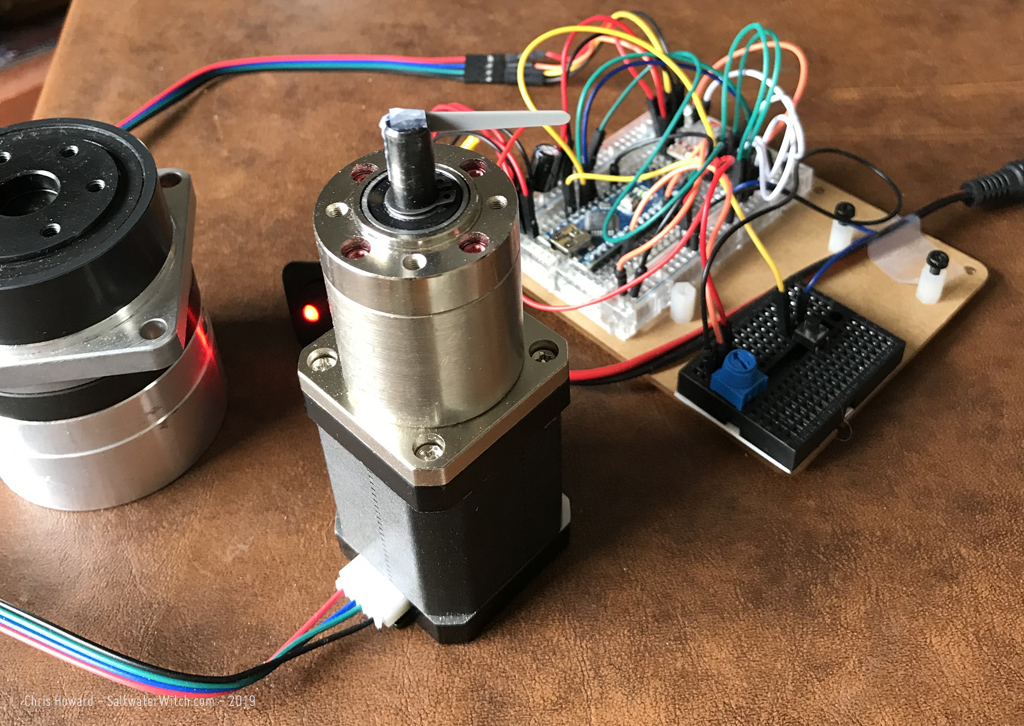
AstroTrackerHD Prototype 4
AstroTrackerHD Prototype 4 in testing, with pics. (HD = harmonic drive, which is a high-precision, high-torque, zero backlash gear set. See: https://youtu.be/3mWemlMEzFk). I did some code cleanup and refactoring for version 4.0.7, and added the ability to adjust the speed in small increments and save the speed values to eeprom. I have a couple posts on this earlier in the year, but if you haven't seen them: AstroTrackerHD is my project to build a very accurate star tracker using a NEMA 17 stepper, 139:1 ratio planetary gear feeding a 100:1 ratio harmonic drive. I'm running updated software in this one, and I'm in the process of 3D printing some brackets for the stepper.
![]()
![]()
![]()
