All Sky Cam with Solar Charging
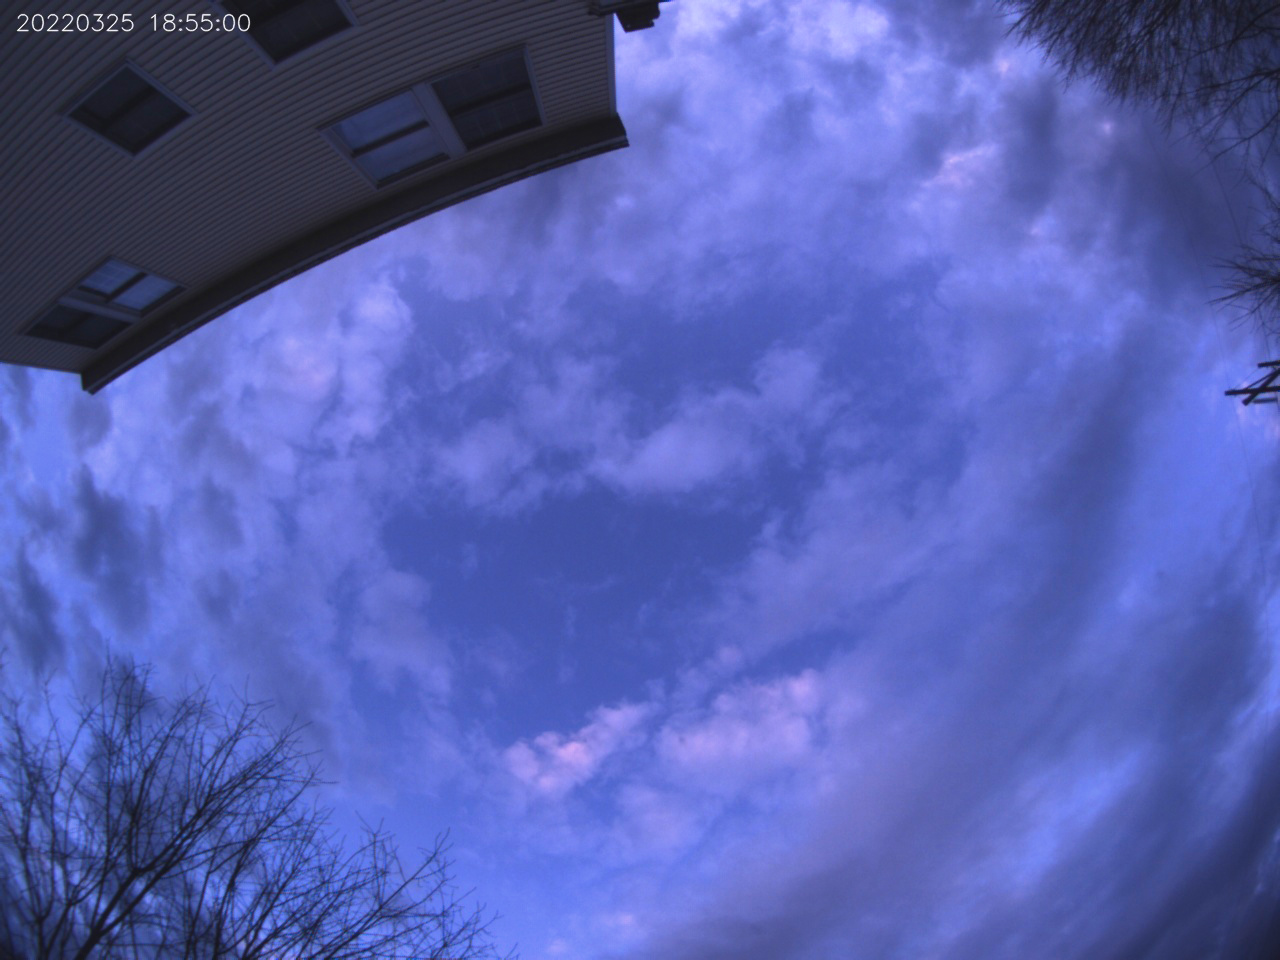
The evening weather hasn't been super clear lately, but it has given me a chance to test out the all-sky camera. This takes a pic every 20 seconds through the night and creates a time lapse video, a stacked star-trails image, and a keogram (a keogram is single image visualization that represents an entire night's atmospheric activity). And of course, there's a "Live View" so I can always check on the sky's current conditions.
I'm running Thomas Jacquin's awesome open-source AllSky software for Raspberry Pi:
https://github.com/thomasjacquin/allsky
Today starts my first full test of the setup, with daylight solar charging and continuous operation. Here's the current system, with the dome taped down for now, ZWO ASI120MC color astro camera, 6mm super wide-angle lens, Raspberry Pi 3b, lithium battery, and 10 amp PWM solar controller. I drilled two holes for ventilation, mainly to test the need for separate dew control. My hope is that there's enough heat rising from the Raspberry Pi CPU fans to get warm air circulating under the dome--with enough of a temp boost to prevent condensation from forming.

Examples of the camera's field of view from the back deck, close to the house. I have it in the middle of the backyard now, with a full view of the sky.

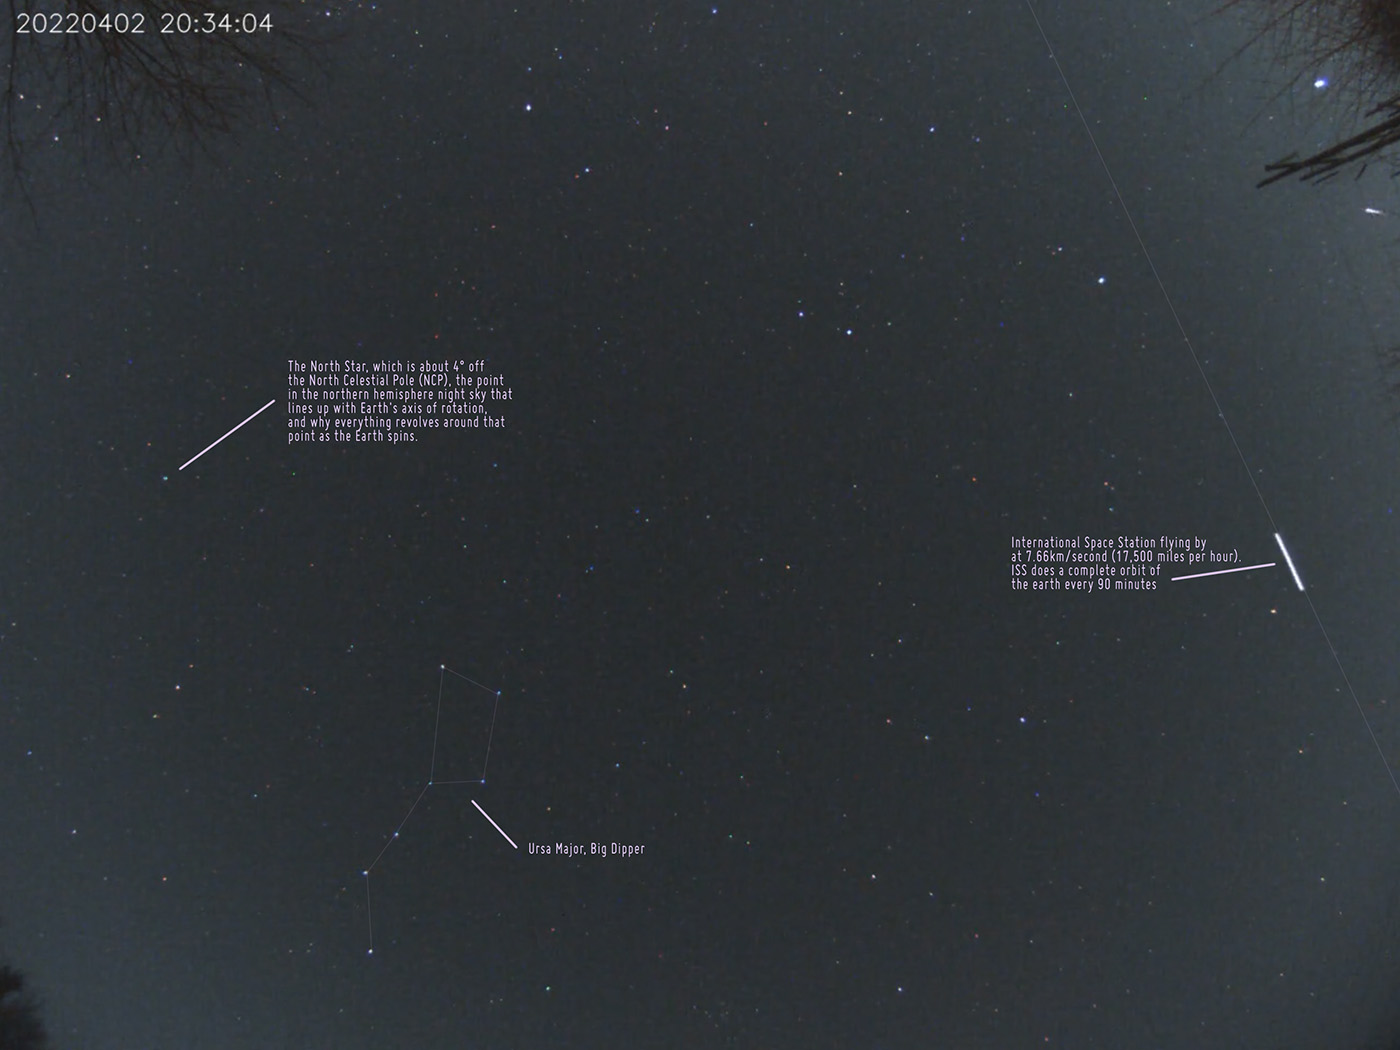
A snapshot from the April 3rd night sky:
Posted March 27, 2022
The Underutilized Ferromagnetism Advantage
When you see reviews of Newtonian astrographs, you sometimes hear—if the option is available—that you should get the carbon fiber version—for a variety of good reasons, including reduced weight, less susceptible to temperature fluctuations like steel tubes, and that cool carbon fiber look. Steel OTAs (Optical Tube Assemblies) are cheaper, but they also have an underutilized ferromagnetic advantage—meaning magnets love to stick to them. I bought a ZWO EAF (auto focuser) for my Apertura 8" (203mm) newtonian with an 800mm focal length at f/4, but I ended up removing it and using it with the William Optics SpaceCat 51. I have a couple Deep Sky Dad autofocusers, including a new-ish AF3 I had bought for a scope I sold.
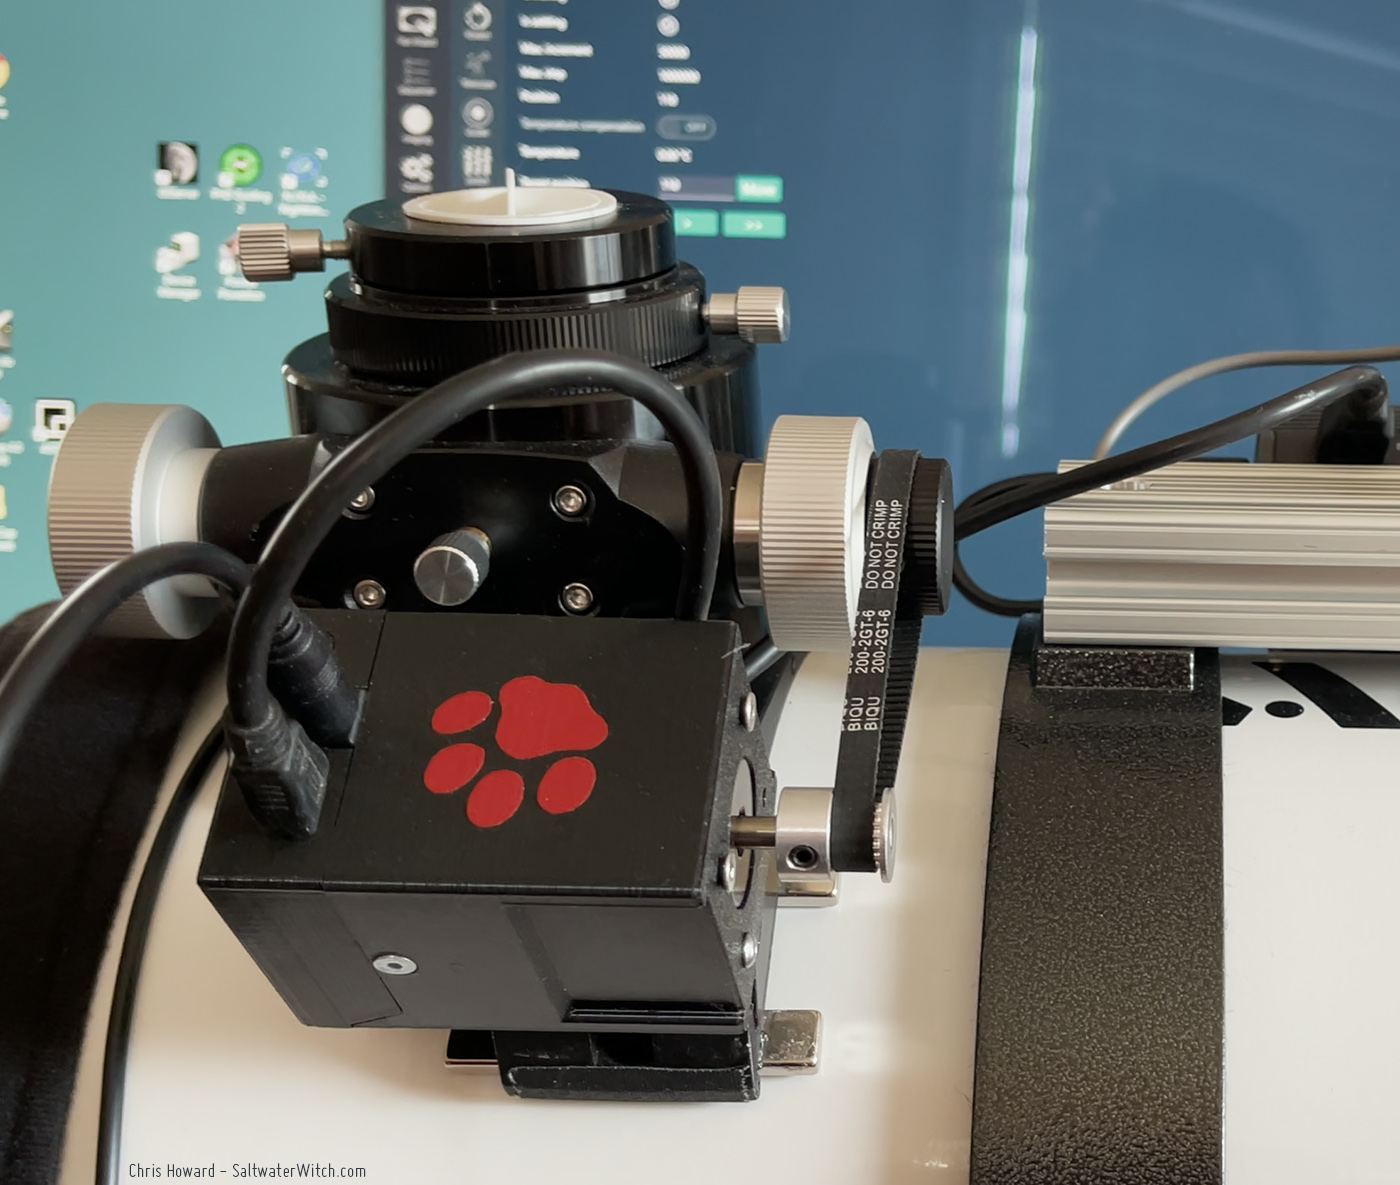
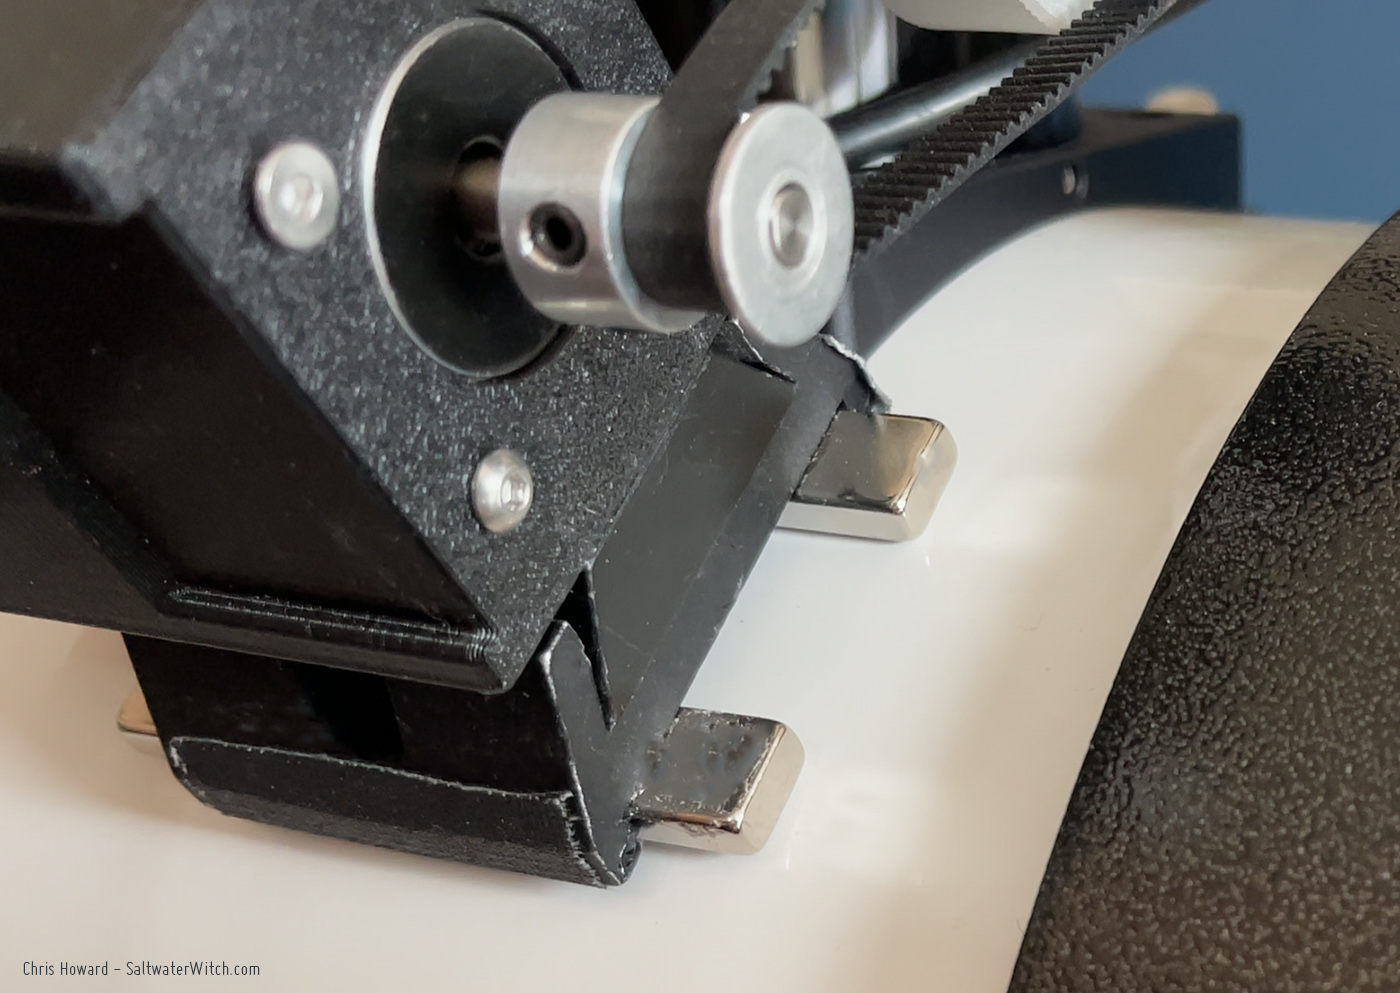
I was tinkering with options for using the AF3 for focusing the Newt. The obvious approach would be to use something like the ZWO EAF bracket and couplers. Or... I could take a completely different path, using strong magnets to hold down the focus motor, with a timing belt to turn the 10:1 reduction focus knob.
This idea wasn't completely out of the blue. I've been using these neodymium bar magnets for a while to hold down Raspberry Pi devices and my Pegasus Pocket Powerbox. I bought a pack of adhesive-backed metal plates (link below) to hold down these devices. But I don't need them for newtonian scope because the whole thing is steel.
First off, these magnets are crazy strong, and you have to be careful with them. Get them around your tools or a box of hex bolts and it's like angry Magneto tussling with the X-Men. But if you glue two of these to a spare guide cam dovetail bracket, you have the perfect base for your autofocus motor on a steel OTA. I always tape over the magnets with gaffers tape (cloth tape) so I don't scratch my scope. I then glued a small 32mm dovetail to the AF3 motor housing and that's it. I let the E6000 glue dry for 24 hours, and tested out the setup up in N.I.N.A. The belt tension was easy to dial in by carefully sliding the dovetail base and testing the belt. I'm happy to report that everything seems to work well. The motor isn't going to budge with two of these magnets holding it down.
E6000 industrial-strength glue
https://www.amazon.com/dp/product/B071DXL2MP
Neodymium Bar Magnets
https://www.amazon.com/dp/product/B07QWMHGHZ
Adhesive metal plates for magnets
https://www.amazon.com/dp/product/B08CHF846J
Posted December 1, 2021
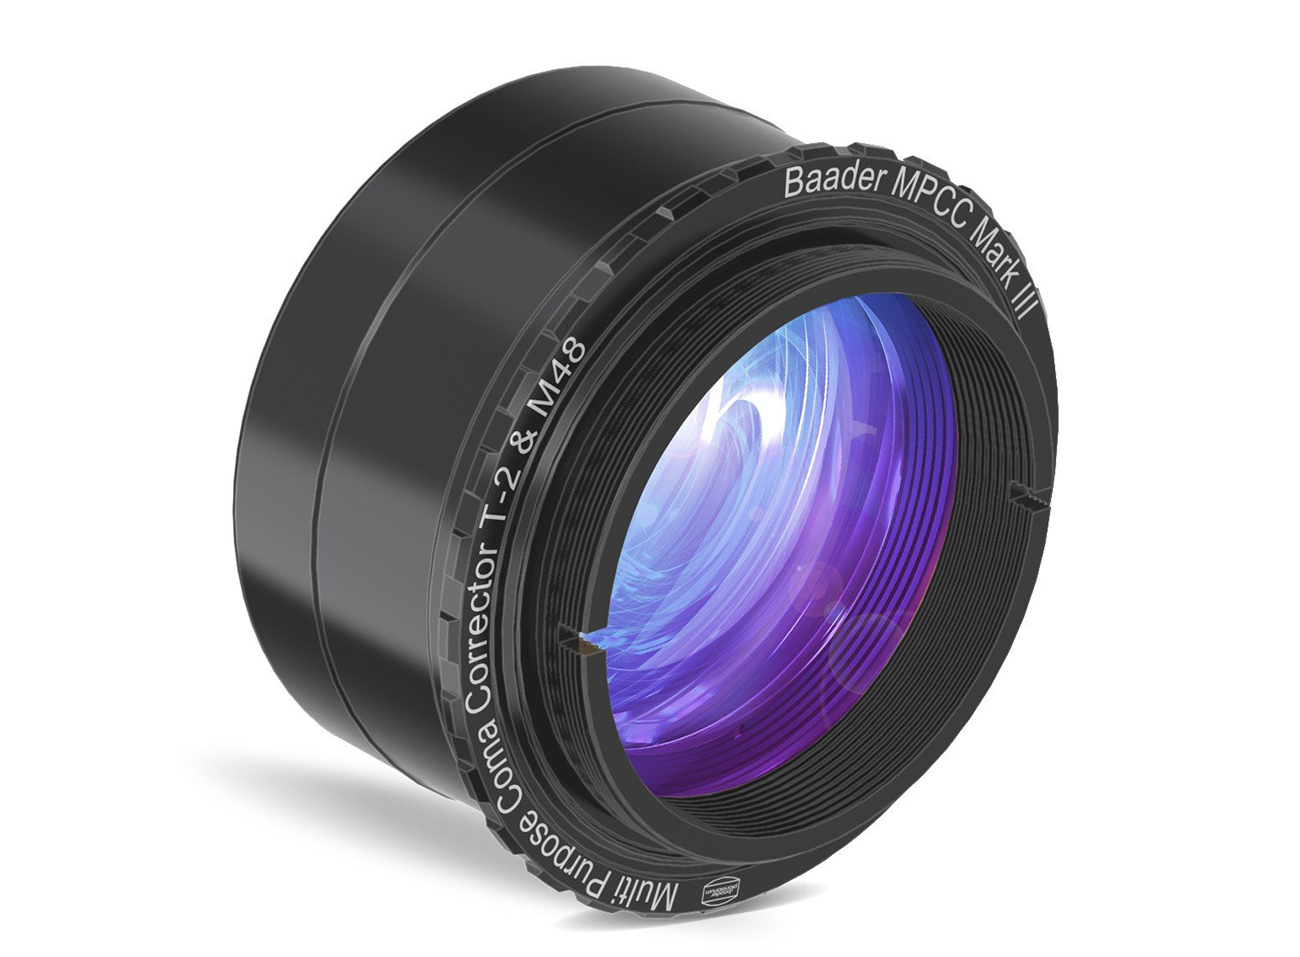
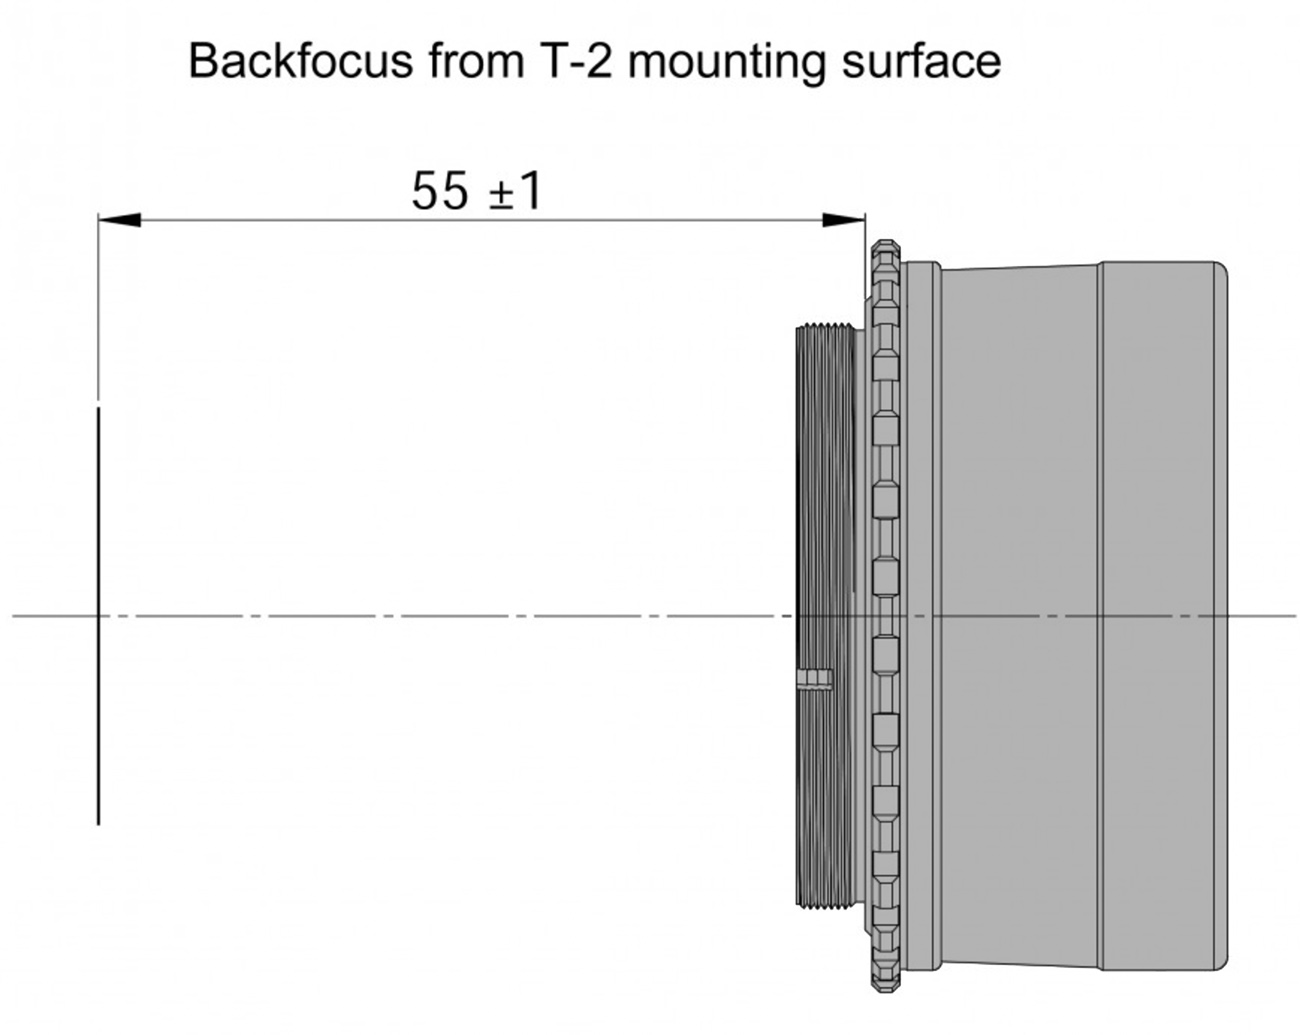
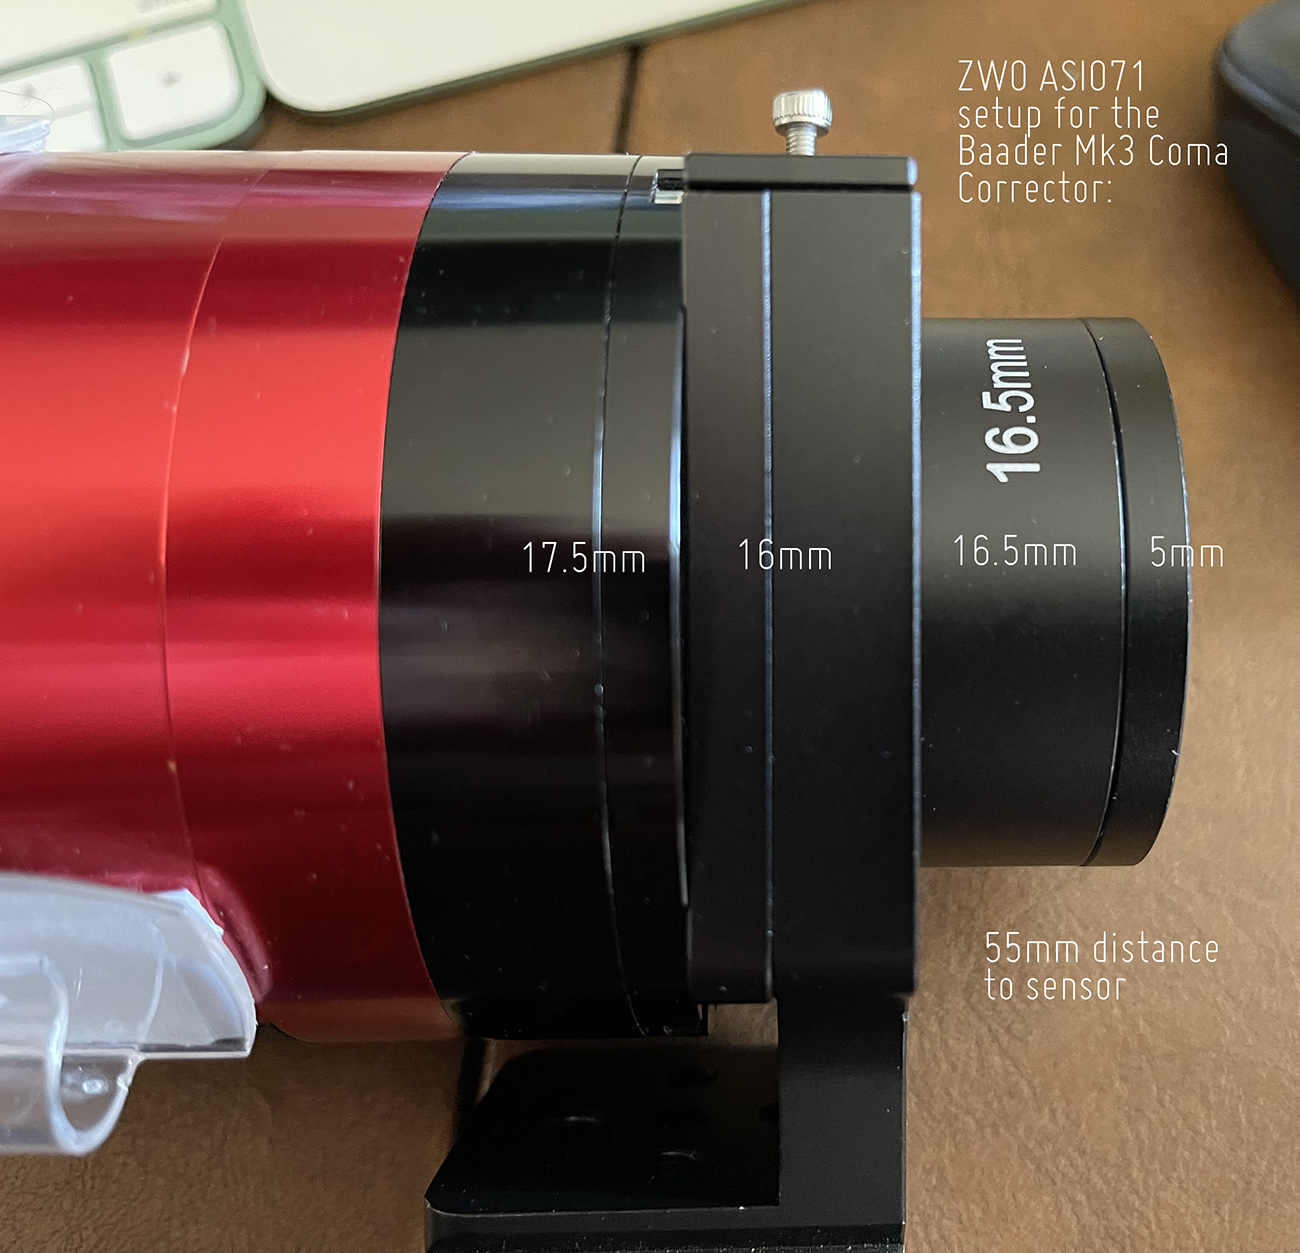
The Baader Mark III Coma Corrector
I just ordered the Baader coma corrector for my 800mm f/4 Newt, and spent a few minutes getting the 55mm distance to sensor spacing right for the ZWO ASI071 camera.
Posted November 30, 2021
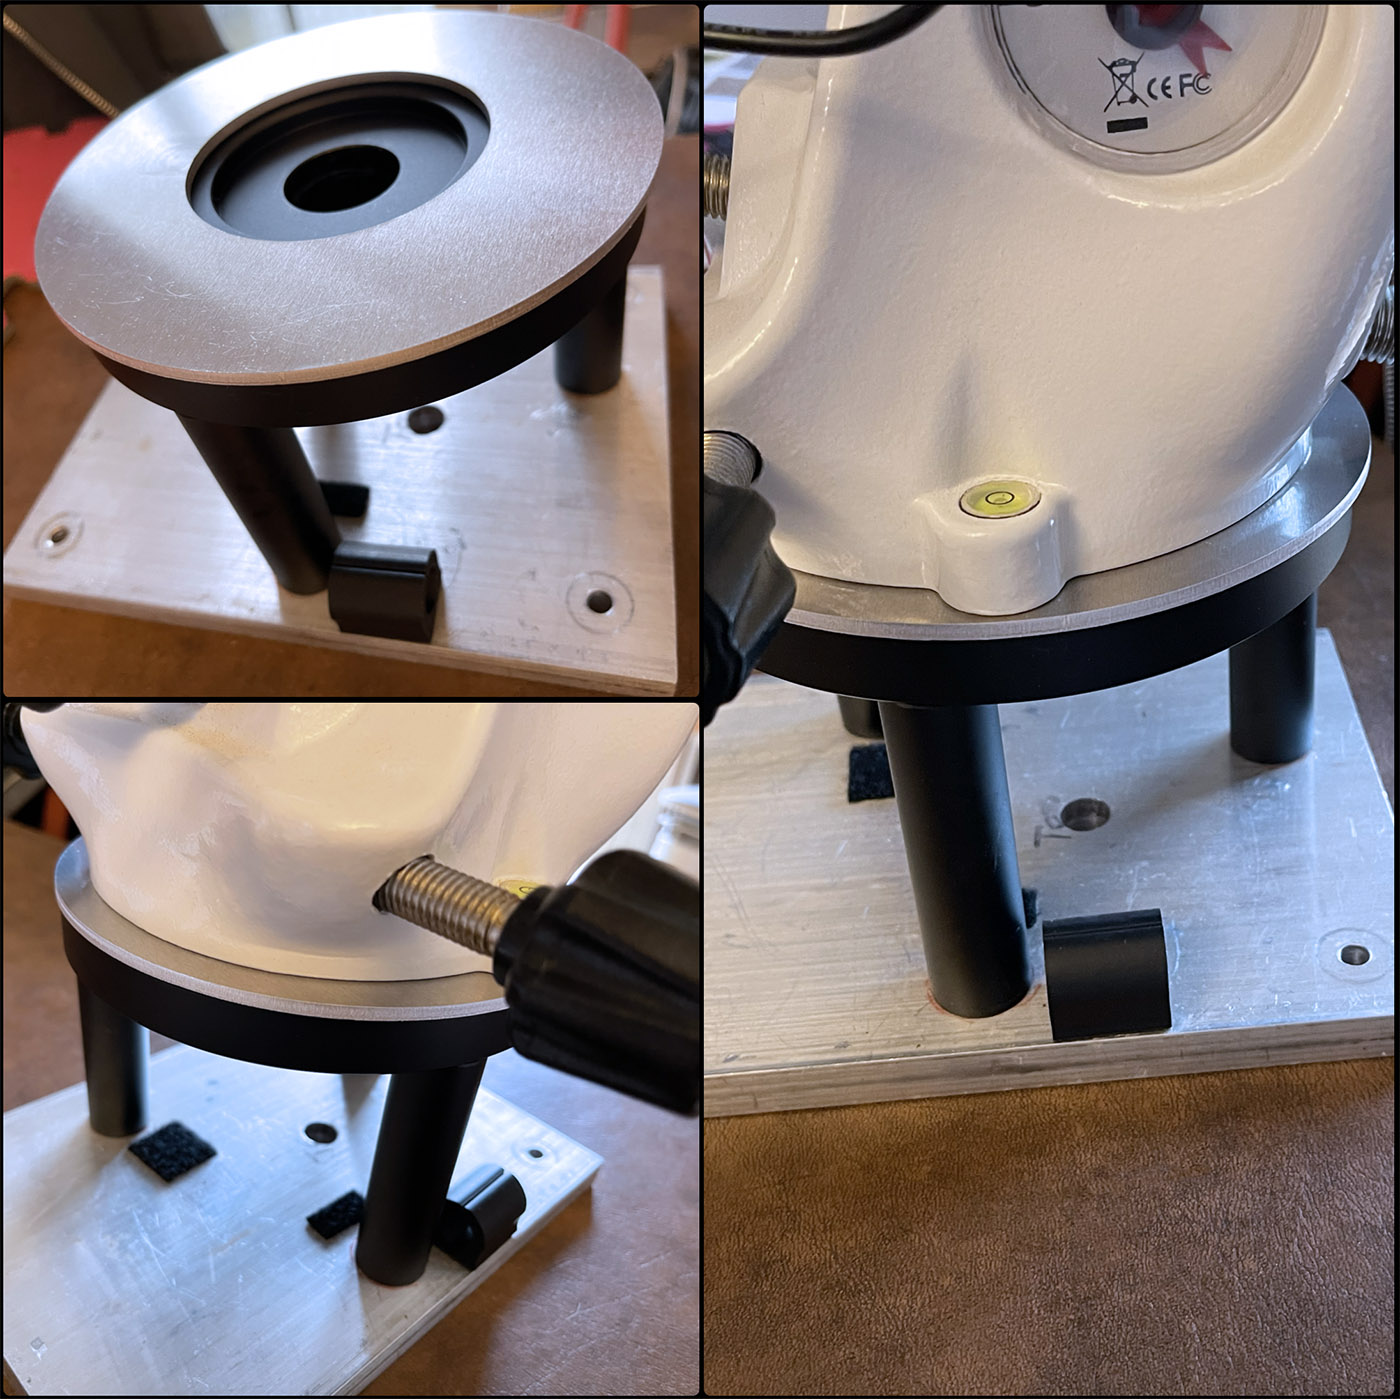
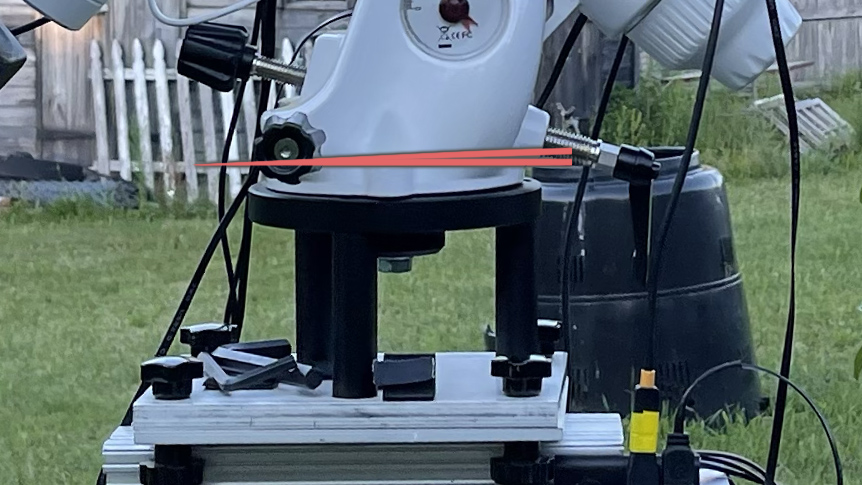
Something I've been meaning to correct for a while...
It's a gray rainy autumn day, so a good time to do a little upgrade. I ordered an ⅛" (3.2mm) thick aluminum spacer (6"/152mm OD x 3"/76mm ID) for the Orion Atlas pier adapter I use for both the Orion and the Sky-Watcher EQ6-R Pro. The Orion Atlas sits perfectly flat in the machined center and cut out ring, but the EQ6-R Pro sits slightly higher because the depth of the center is probably millimeter too shallow. Although the center bolt held it in place, the EQ6-R Pro always sat at a slight angle. I never liked that. Time to fix it with an aluminum spacer. I drilled a hole for the azimuth post, and we're back in business!
Posted October 30, 2021
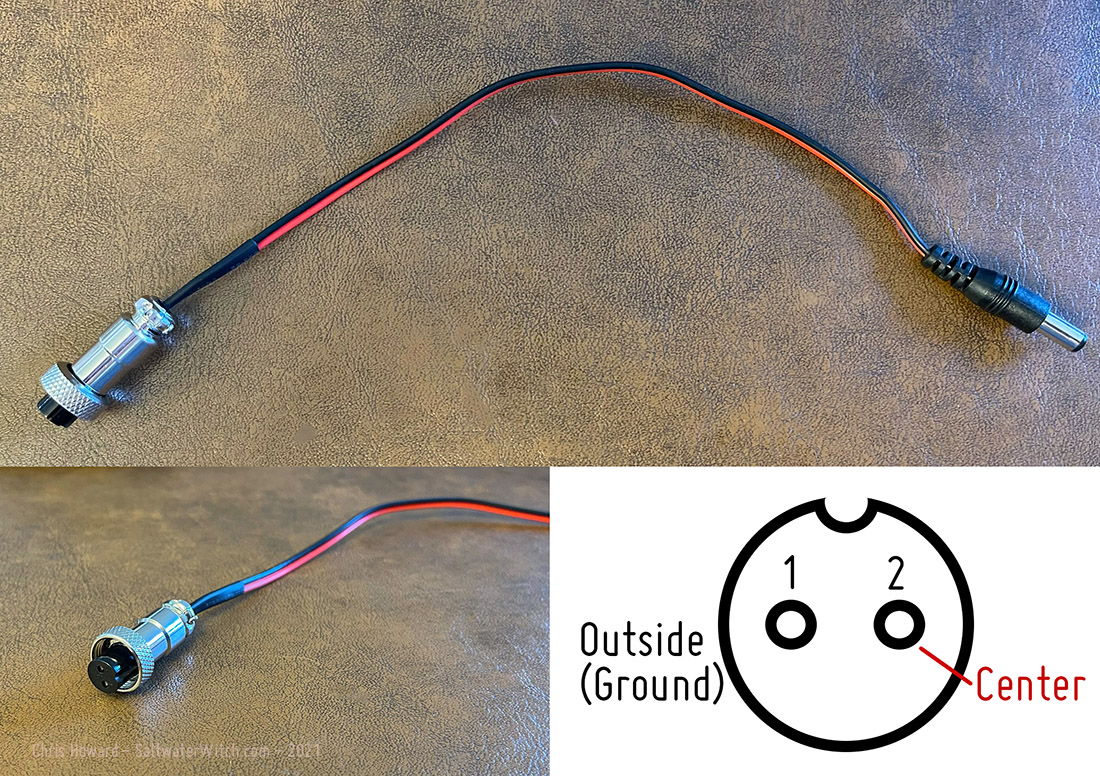
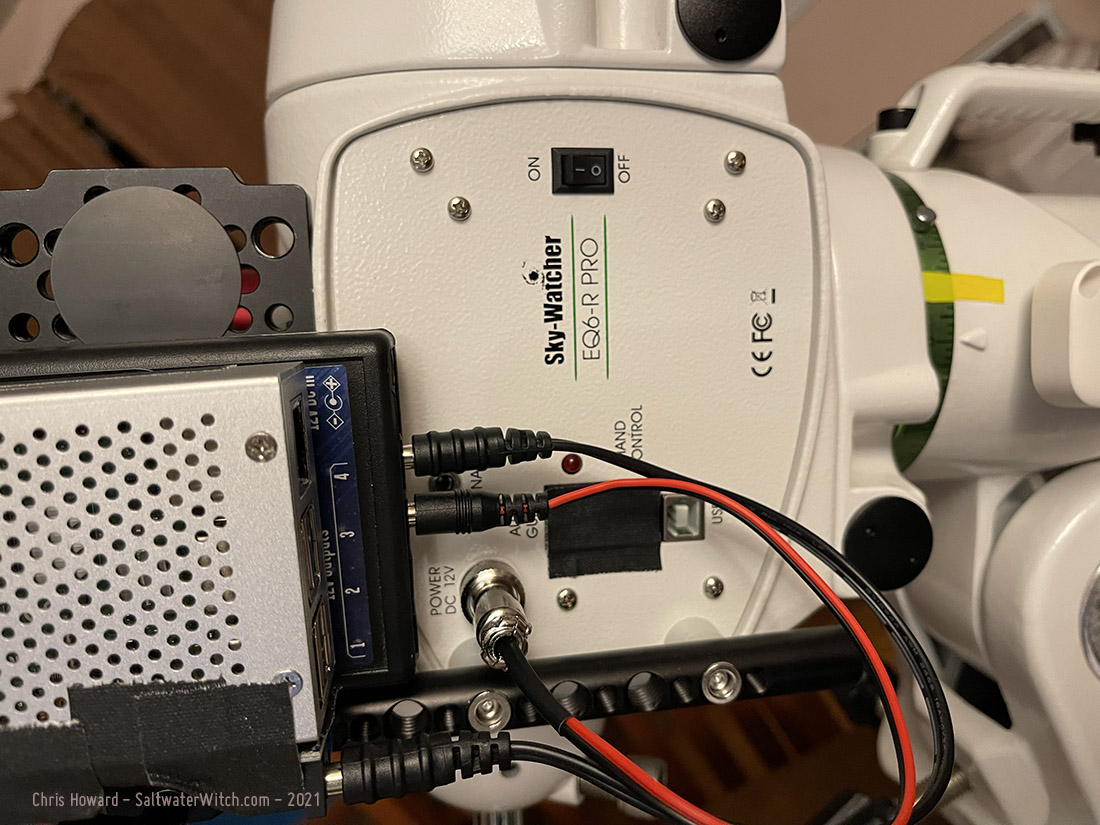
Custom power cable for the Sky-Watcher
Scrounged up a couple parts I bought a while back for this specific project, but just getting around to it now. The Sky-Watcher EQ6-R Pro telescope mount uses a 2 pin GX12-2 aviator plug for 12vdc power. I bought a couple off Amazon earlier this year, and today I soldered up the 5.5mm x 2.1mm power jack after testing which pin is ground and which has voltage. (https://www.amazon.com/dp/B07DC7KP8H).
I made this to supply power to the mount from my Pegasus Pocket Powerbox, which I have on a 15mm rail and SmallRig aluminum cheese plate (https://www.amazon.com/dp/B019C2ZM8Q).
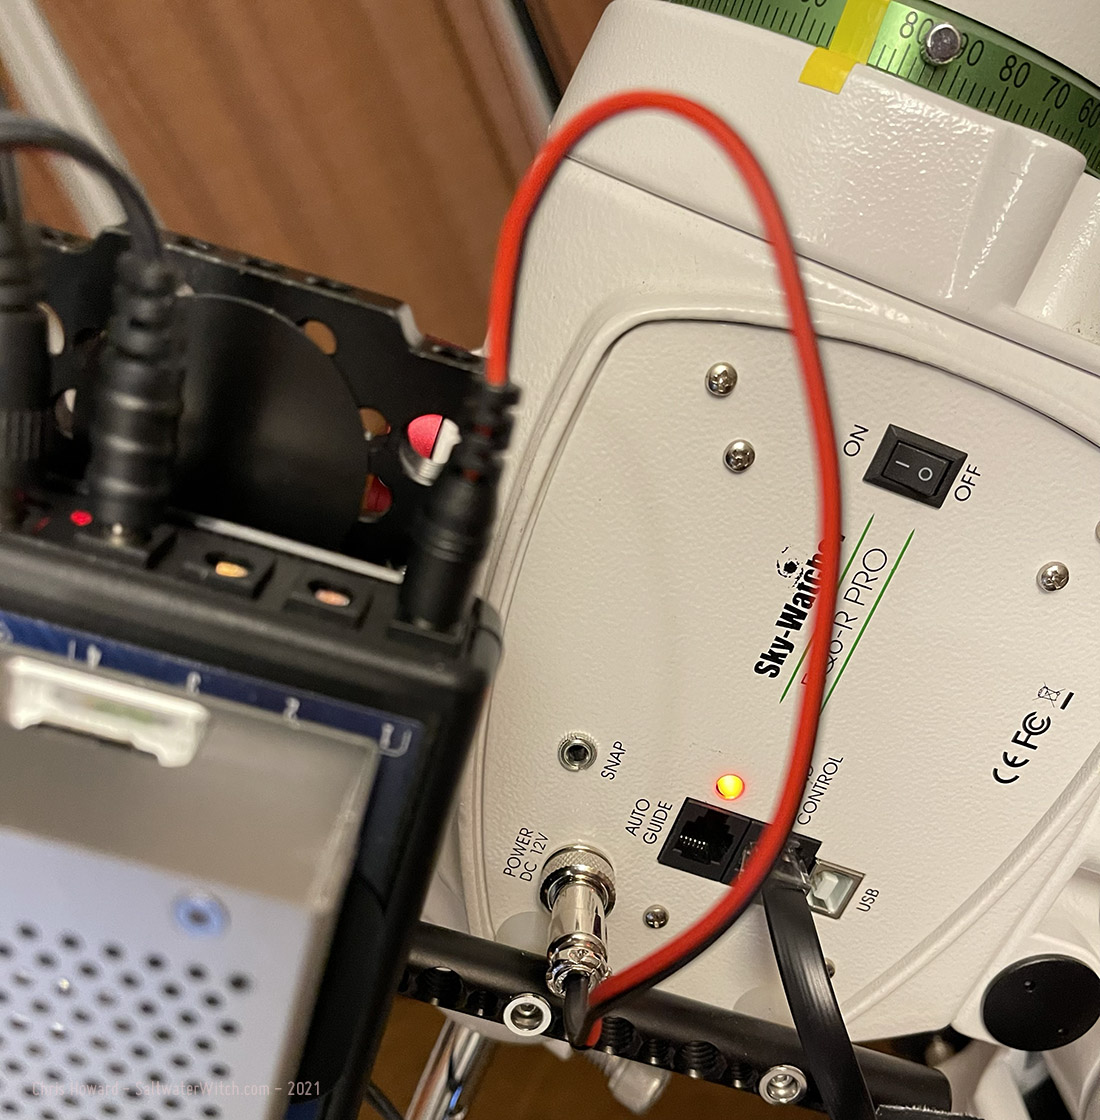
Here's the cable plugged into the Pegasus PPB, powering the Sky-Watcher mount. Tested and woks beautifully!
Posted September 13, 2021
Wide-field Narrowband Setup
Setting up and testing my wide-field astro gear: the William Optics SpaceCat 51 primary scope, 200mm guide scope, and everything else is ZWO--autofocuser (EAF), ASI120MM-S mono guide camera, ASI1600MM-Pro monochrome primary camera, and EFW with my Astronomik 6nm narrowband filters and the new Antlia 3 nanometer hydrogen-alpha filter. I switched to a guide scope from off-axis guiding with this setup because focusing with the different thicknesses of the filter material pushed my guide focus a bit too far. I was using this 50mm/200mm FL William Optics guide scope with the 800mm Newt because I had the same situation, narrowband filters mixed with near infrared filters with different brands and glass thickness.

Posted September 8, 2021
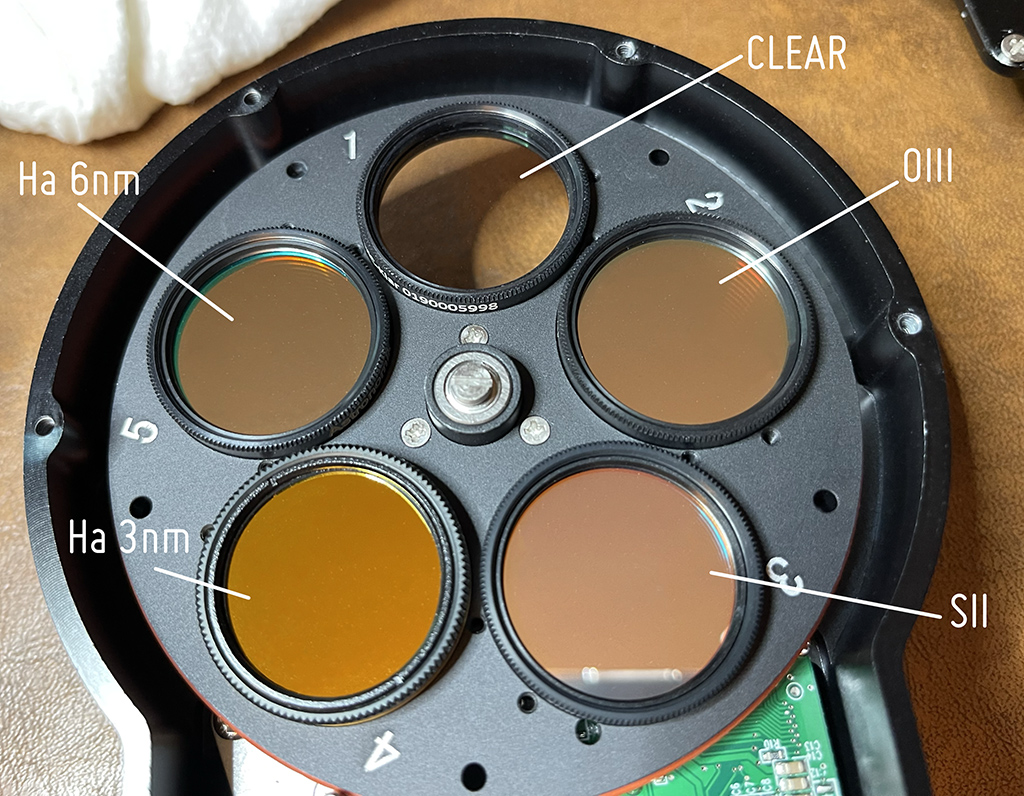
ZWO EFW Update
Added the Antlia 3nm Hydrogen-alpha filter in the ZWO filter wheel, and took a pic, added labels to make sure I remember where the filters are. Before this switch-up I had two near-infrared filters (a 680nm and 850nm) in slots 4 and 5, with my Astronomik 6 nanometer Ha filter in the first position. And just to make things as uncomplicated as possible I have the OIII (Oxygen 3) filter in position 2, and SII (Sulfur 2) in 3.
Posted September 4, 2021
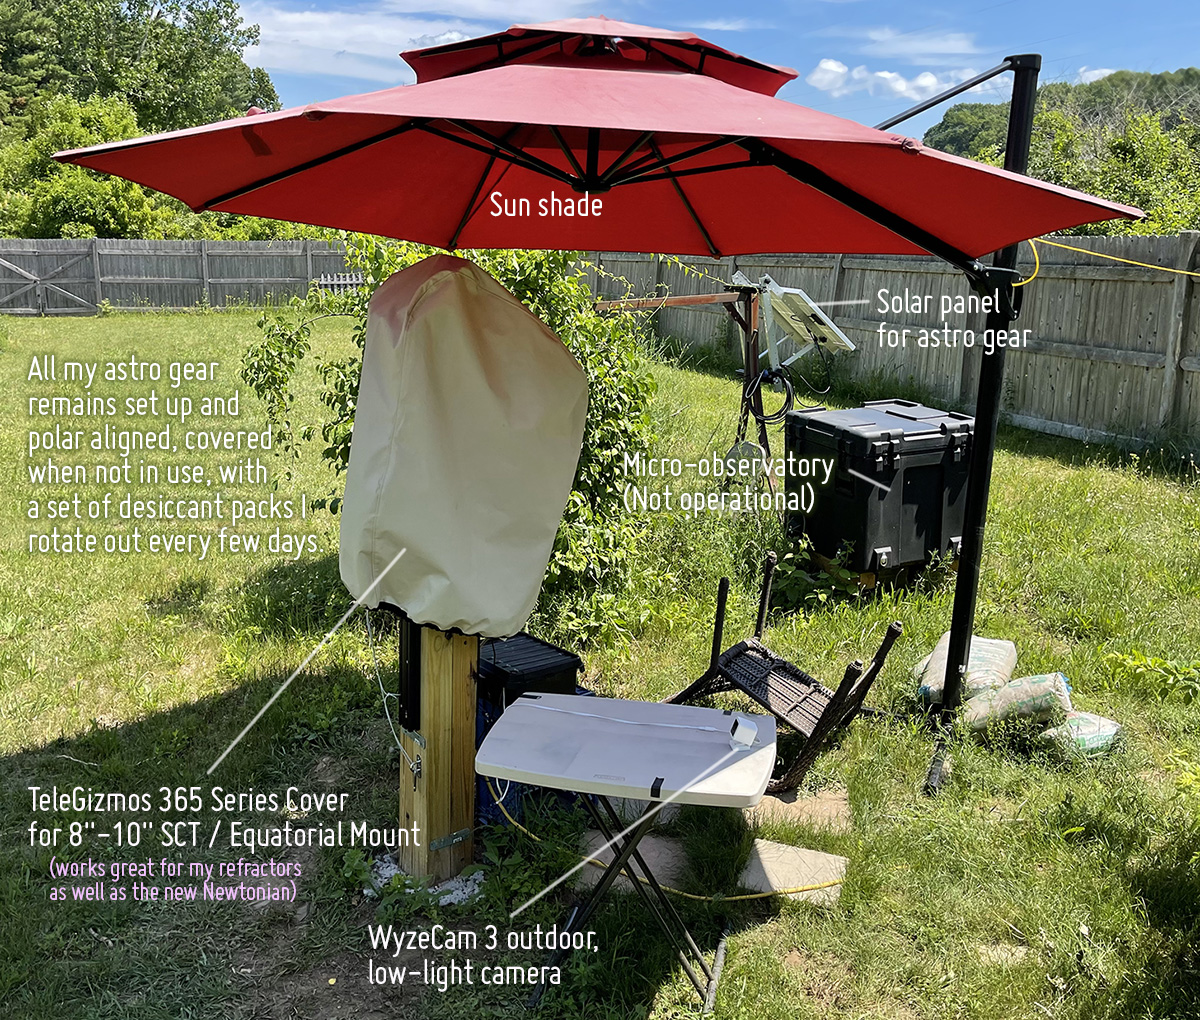
My Backyard Astro Setup - Summer 2021
This is the gear I currently have on the pier. I'm currently running with the color imaging train, and I will continue to until I get the coma correction dialed in. I'll try other cameras after that, including monochrome/narrowband.
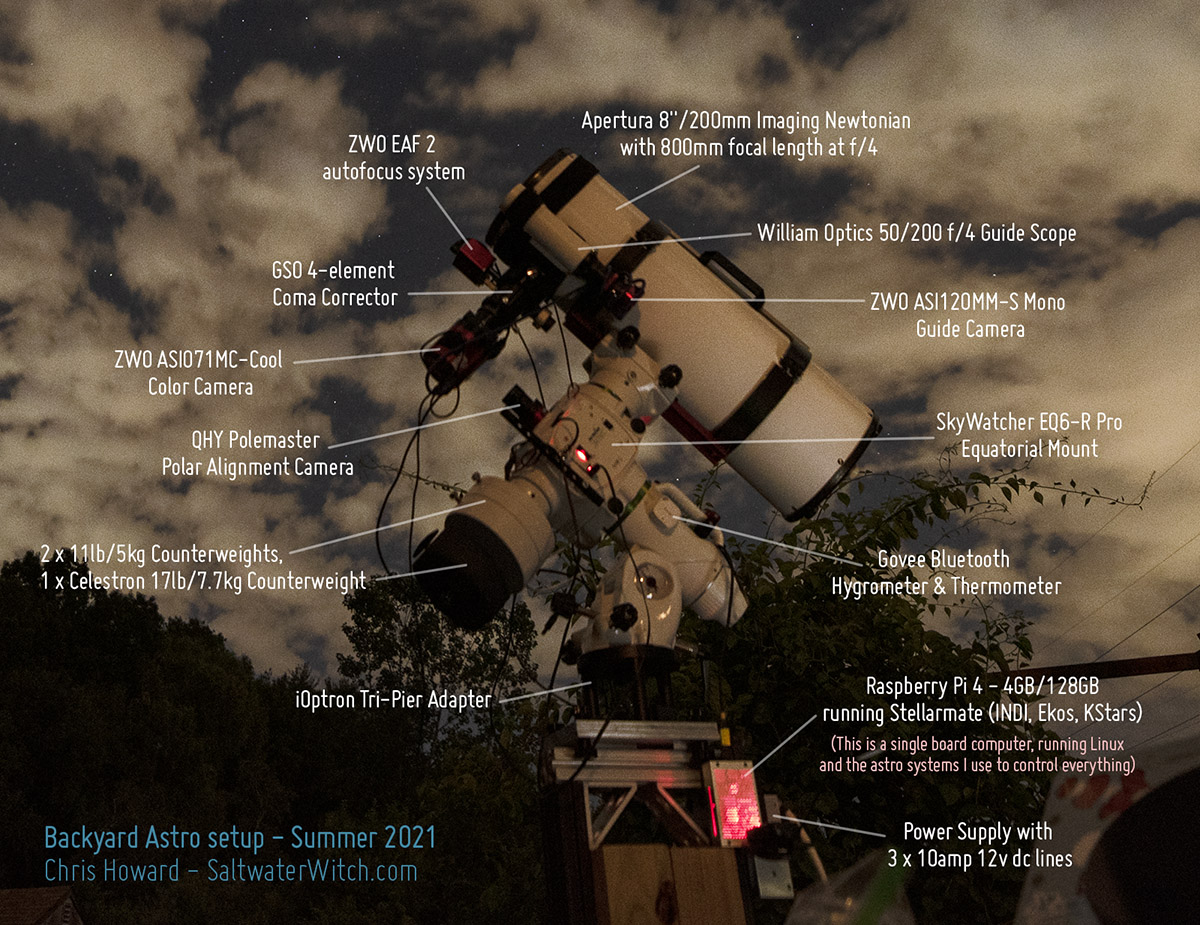
Here's what things look like during the day. The micro-observatory project is on hold until I can buy a replacement for the CEM25P mount.